Page Editor Overview
In the Page Editor, you will be able to add photos, text, shapes, decorations, and backgrounds to your cover and interior pages.
Opening a Page
To open a page in the editor:
- Click Edit Book to open the book ladder
- Hover over the page you want to open
- If the page is editable, the blue Edit button will appear
- Click the Edit button to launch the page editor
Note: Staffers may only open pages assigned to them, and by default will see their assigned pages highlighted. Editors-in-Chief and Editors may open any page in the book, but may use the Assigned to Me Highlight to focus only on their assigned pages.
Tip: To learn more about assigning pages to team members, check out the Team Management article.
Navigating the Page Editor
Left-Side Menu Editor Functions
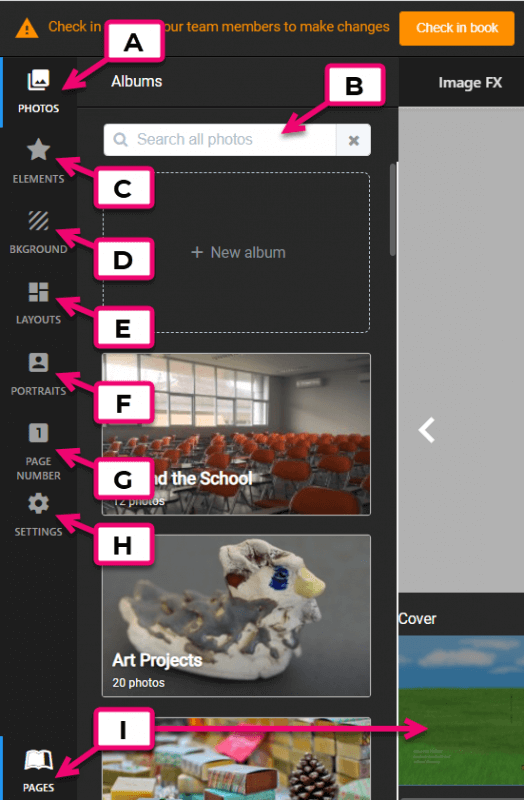
- A. Photos Tab – Provides access to the Yearbook Photo Albums
- B. Search Bar – Allows you to search within each tab
- C. Elements Tab – Provides access to decorative embellishments
- D. Backgrounds Tab – Provides access to Memento’s background collection
- E. Layouts Tab – Provides access to pre-made templates for your pages
- F. Portraits Tab – Provides settings to cutomize your portrait page grids
- Note: You must flow your portraits in the book manager before using this option
- G. Page Number Tab – Allows you to customize printed page numbers
- H. Settings Tab – Allows you to customize the keyboard’s “nudge” arrow distance
- I. Pages Toggle Button – Displays a scrollable view of all pages in the book and allows you to click on any page for editing
Tip: Turn off the Pages Toggle Button to make your editing area larger.
Editor Canvas Functions
In the editor, your actively editable page on the canvas is highlighted and the adjacent page is greyed out. Click on the blue Edit button to make edits on the inactive page.
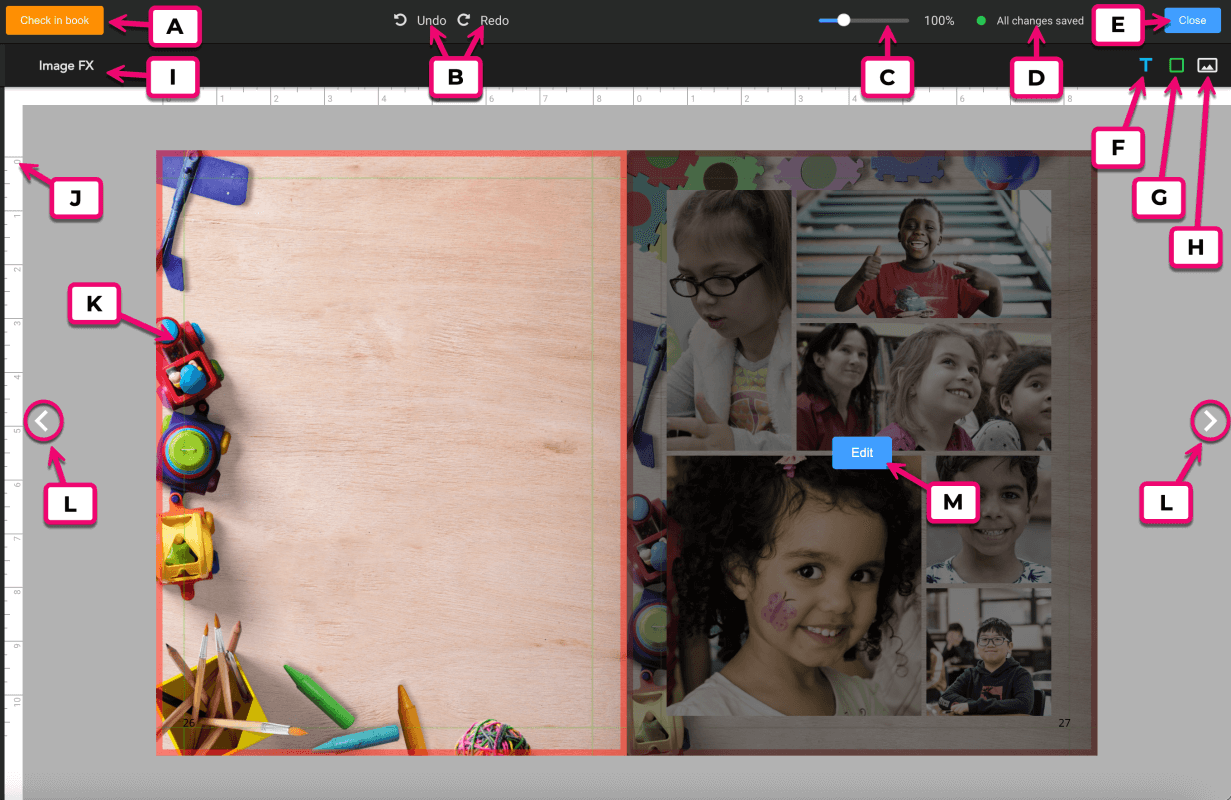
- A. Check In/Out Button – Allows you to Check Out the book for editing or Check In the book when editing is completed
- B. Undo/Redo Buttons – Allows you to undo or Redo edits within a single editing session
- C. Zoom Slider – Drag to zoom in/out. (Hold the space bar to pan the canvas.)
- D. Save Status – Notifies you when changes are auto-saved
- E. Close Button – Ends your editing session and returns you to the Book Ladder
- F. Text Frame Button – Allows you to add an empty text frame
- G. Shape Button – Allows you to add a shape with default attributes
- H. Image Frame Button – Allows you to add an empty image frame
- I. Editor Options – Provides options for editing your selected item
- J. Ruler – Helps you align elements on the canvas
- K. Active Page – Page on canvas that can be edited
- L. Edit Button – Click to make the page the active editable page
- M. Page Arrows – Allows you to move to the previous/next page
Editing Pages
The Cover page is the first page of the book, displayed as a single sheet with guidelines showing where the spine will fall. Check out the Cover Design article to learn more.
The interior pages are displayed as double-page spreads, editable as a single page (right or left side). Check out the Book Management article to learn more about your Book Structure and Page Management.
Interior Page Dimensions & Margins
Your interior page dimensions (length, width) are automatically preset based on the book type – usually trimmed to an 8.5″×11″ finished size.
The page editor displays pages surrounded by guidelines. These lines are used to assist you in placing your images, shapes, and text.
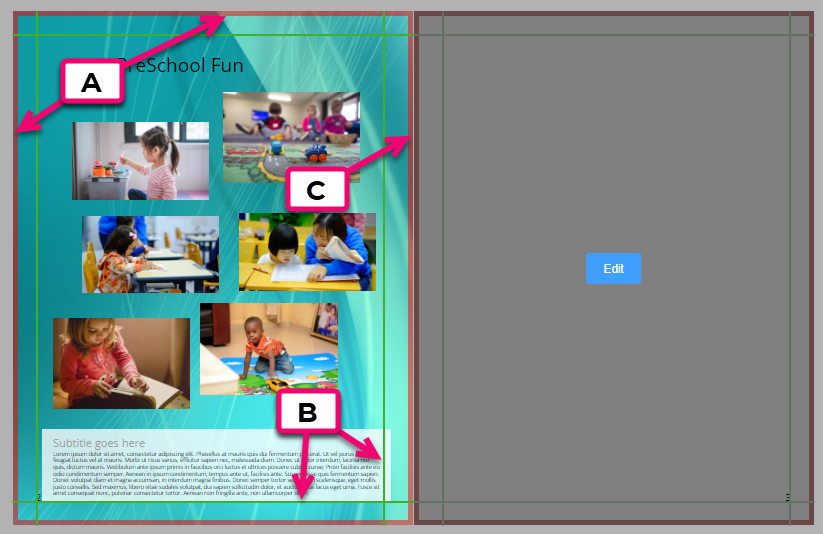
- A. Bleed Area – The red border around the outside of the pages; this will be trimmed off the final printed page to ensure edge-to-edge printing
- Note: All background images or content purposely spilling off the page edges (eg. shapes, banners) must extend through the red bleed area to the edge of the page so that no white unprinted border appears on the final printed page.
- B. Safe Margins – The green lines on the inside of the page edge; all featured images and text should be within these safe margins to ensure they are not trimmed off of your final printed page
- C. Gutter – The area between the pages; images and text cannot be placed across the gutter to appear on both sides of the double-page spread.
Tip: Learn about Cover Guidelines & Margins and how they vary depending on book type in the Cover Design article.