Cover Design
The cover is the first section of your book. The cover appears as single blank page at the top of your book ladder. Covers are designed across a single large page, as if the book was opened flat on a table.
Cover Terms & Specifications
Your cover dimensions are automatically preset based on the book type and size assigned to your account as specified by your studio.
Hard Cover Binding – A method of binding that has rigid covers and pages. Also referred to as hardbound or hardback binding.
Perfect Bound Soft Cover Books – A method that is commonly used for paperback books that have a higher page count. The cover is wrapped around the glued pages, then the book is trimmed to its finished size.
Saddle Stitched Books – A method in which folded sheets are gathered together, one inside the other, then stapled through the fold line with wire staples.
- Creep – When the inner pages extend further out than the outer pages as a result of folding then bundling pages into a booklet. The edges of the booklet are then trimmed flush.

Split Binding – The practice of offering identical yearbooks with the same design for two types of covers.
Tip: Check out our Design Specifications Guide for all details about designing your cover even if you aren’t using Memento.
Anatomy of a Cover
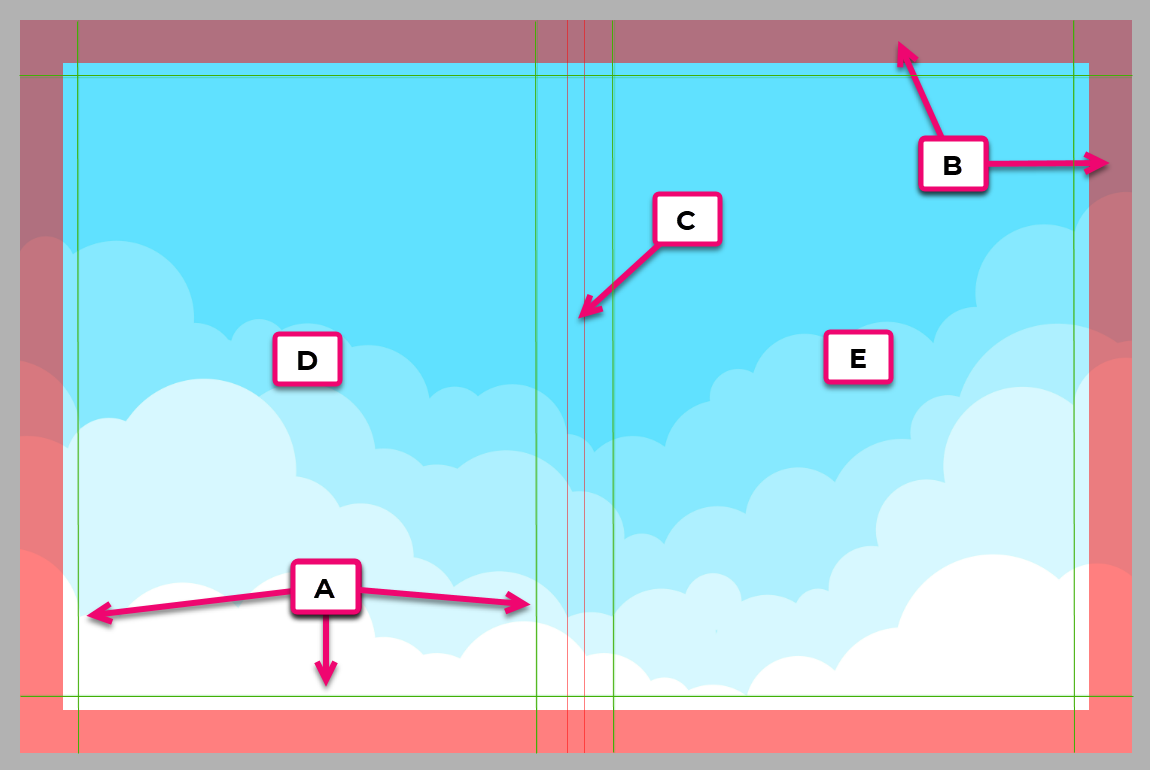
- A. Safe Margins – Indicated by green lines
- B. Trim/Wrap Area – Indicated by the solid red area
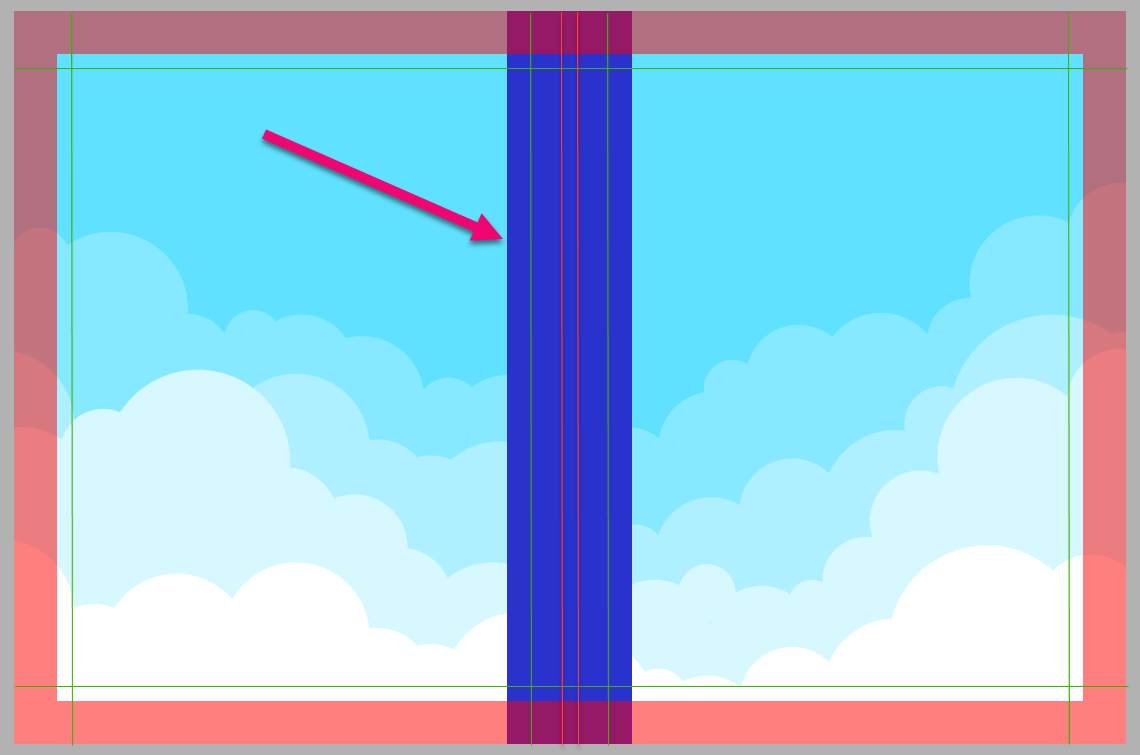
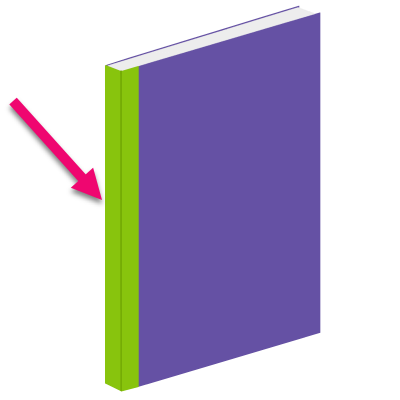
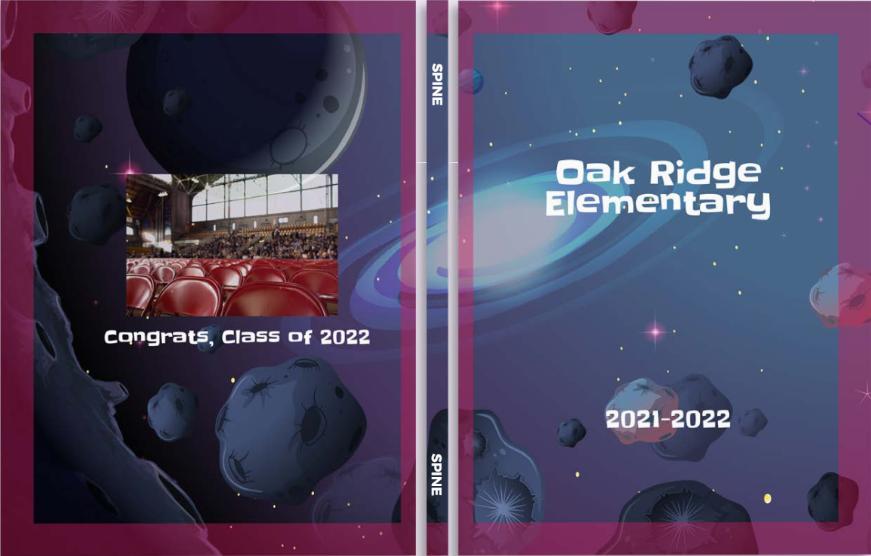
- C. Spine – Displayed as one or two mid-page lines
- D. Back Cover – Designed on the left side
- E. Front Cover – Designed on the right side
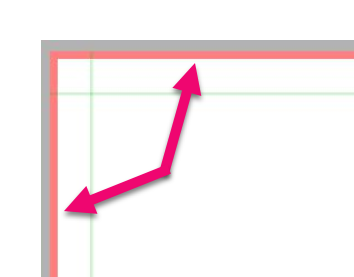
Bleed/Wrap Area
Covers are printed on paper larger than the finished book. After the cover is printed, it is trimmed to fit your book, or in the case of a hard cover book, wrapped over the back edge of the cover. Your background (and any full width banner elements) must extend to the outer edges of the cover canvas into this area to ensure clean edge-to-edge coverage on your printed, trimmed page.
Hard cover books display a large red Trim/Wrap Area around the entire page as shown in the image above. This area wraps over the edge of the cover.
Soft cover books (Perfect bound, Saddle-stitch) display a thin Trim Area around the entire page as shown in the example to the right.
Tip: Extend background colors/textures over entire Trim/Wrap Area to the outer edges of the page to ensure there are no white unprinted edges around your cover.
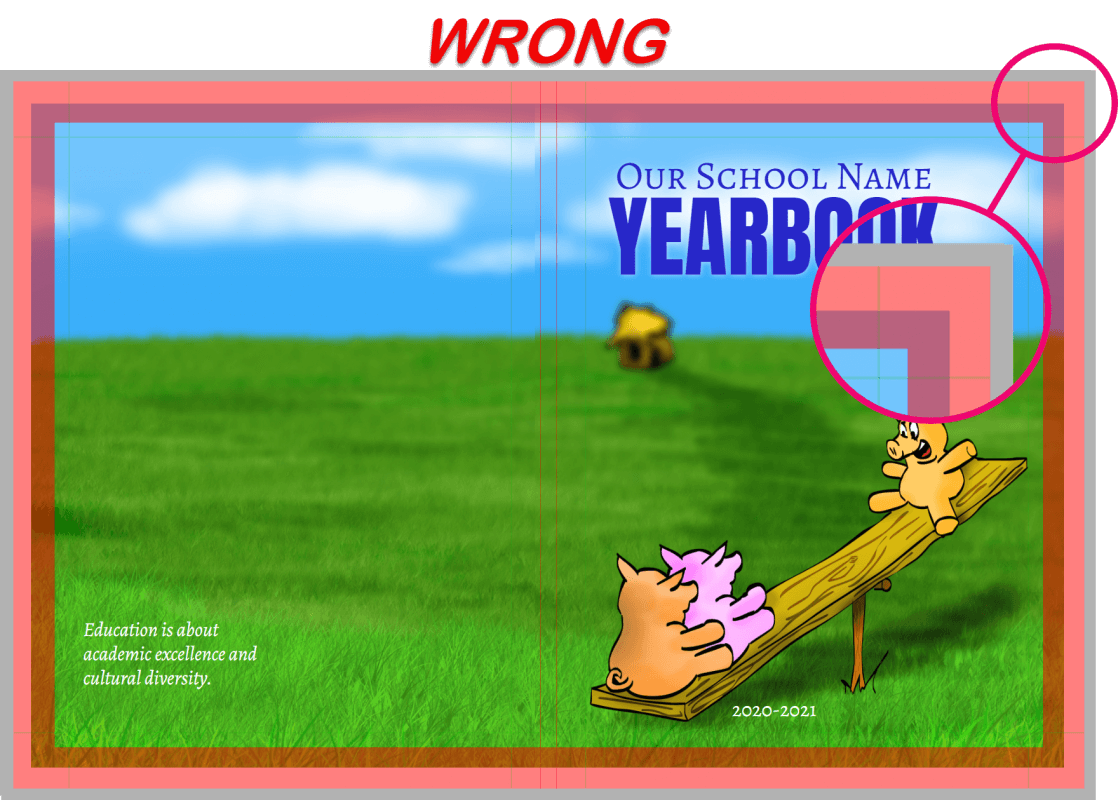
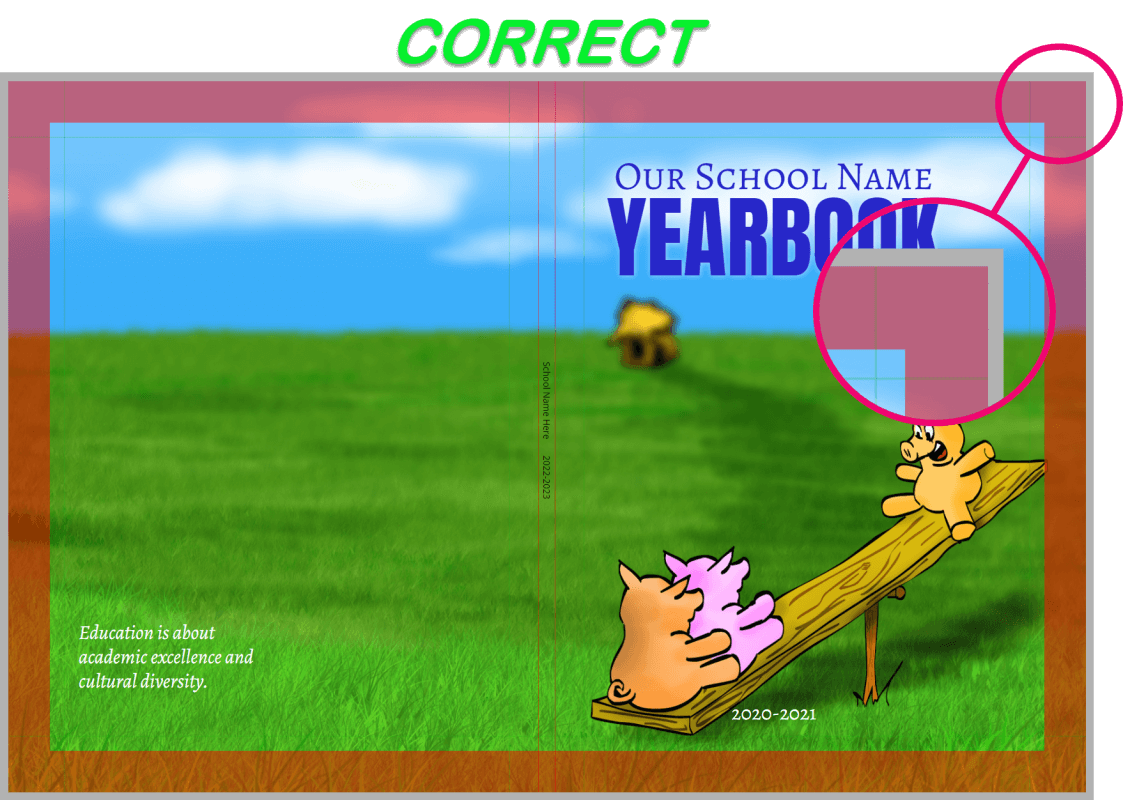
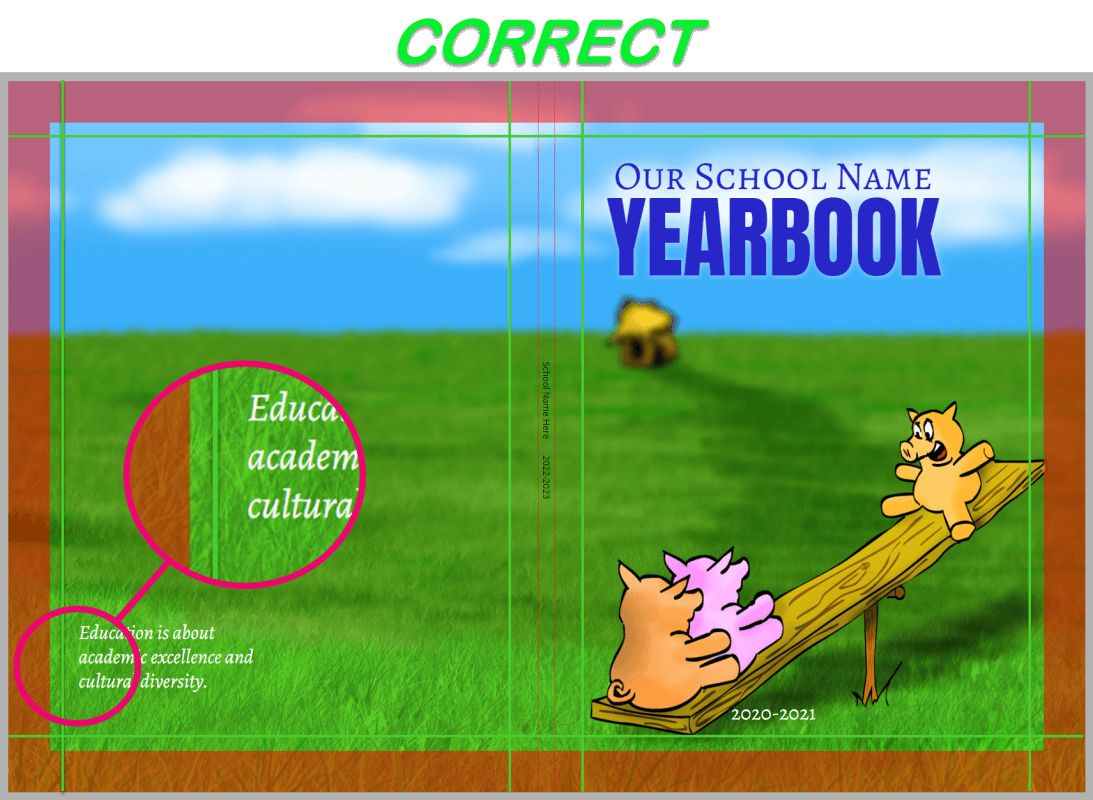
Safe Margins
The safe margins keep content from getting too close to the edge of the page. Only your background or banners/graphics that are deliberately spilling over the edge of the page should fall outside of the safe margin line.
Tip: Keep all featured images and text well within the safe margins. Paper can shift during printing by up to 1/8 inch, so text and images too close to the green safe margins may be trimmed off or appear awkwardly after printing.

Designing Your Cover
The Basics
Most cover designs prominently feature:
- The School Name
- The School Year
- Any Desired Artwork
Background Design Options
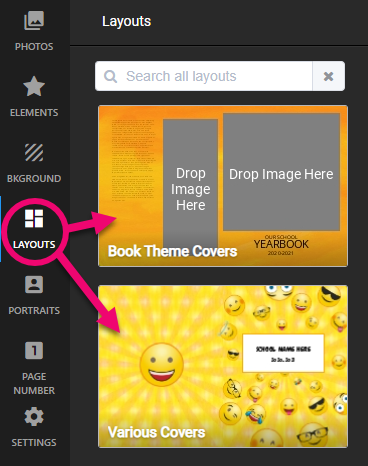
Memento Yearbook includes a collection of single page backgrounds under the Layouts tab in the book editor.
For additional cover background options, browse the extensive collection of images in the Studio Source Catalog. All cover backgrounds in the Catalog are copyright-cleared and appropriately formatted (6000 x 3900 pixel jpg files) to fill the entire cover background.
Tip: Learn how to use the Catalog in the Additional Resources & Tools article.
Custom Cover Contest
If you want to use original hand-drawn student art on the cover, be sure to download the Custom Cover Contest Guidelines to obtain detailed guidelines for using student art. Be mindful of the cover design guidelines and the following details:
- Important design elements such as titles, text, and feature images should be inset 3/4″ from the page edges
- Watch out for spelling mistakes, especially your school’s name!
- Scan the completed designs at a minimum of 300 dpi jpg files, ensuring the paper is as flat and wrinkle-free as possible
- Try to remove any eraser marks or smudges before scanning the artwork
Spine Design
Spine text can only be added on hard cover and perfect bound books with a minimum of 62 pages.
For the best design, follow these guidelines:
- Only add text in the spine area
- Text must be centered within the spine guidelines
- Do not exceed 70% of the spine width
- The spine area should be kept clear of feature images and text
Note: The amount of the background image being taken up by the spine may affect the placement of design elements on your front and back covers. Be sure that the images “land” correctly, with no critical content lost on the bleed/wrap or across the spine.
Do’s & Don’ts
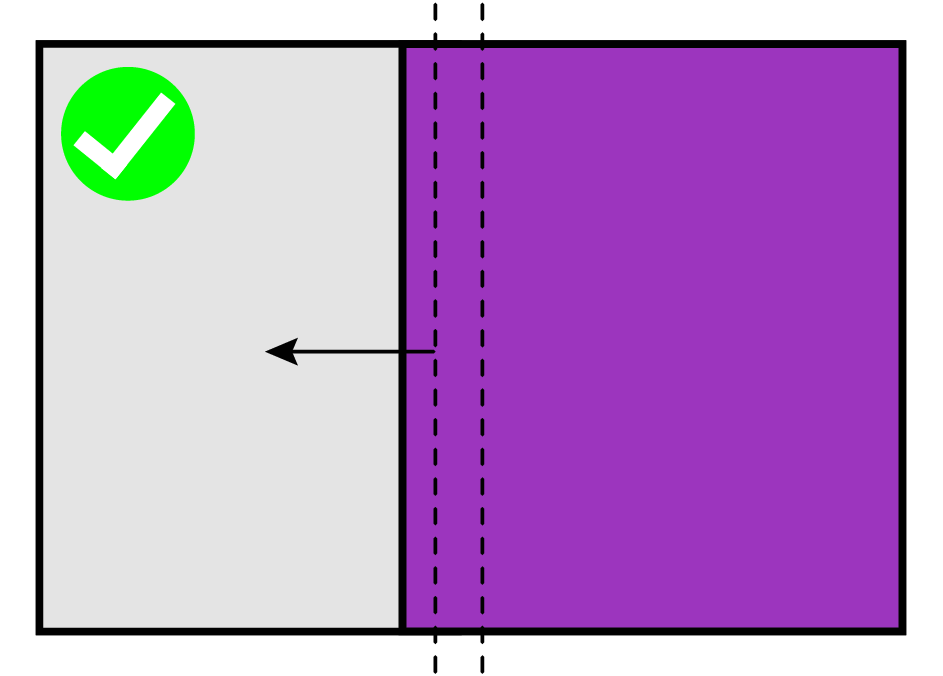
Since paper can shift during the printing process by up to 1/8 inch, you MUST pay attention to how your cover background falls across the spine area.
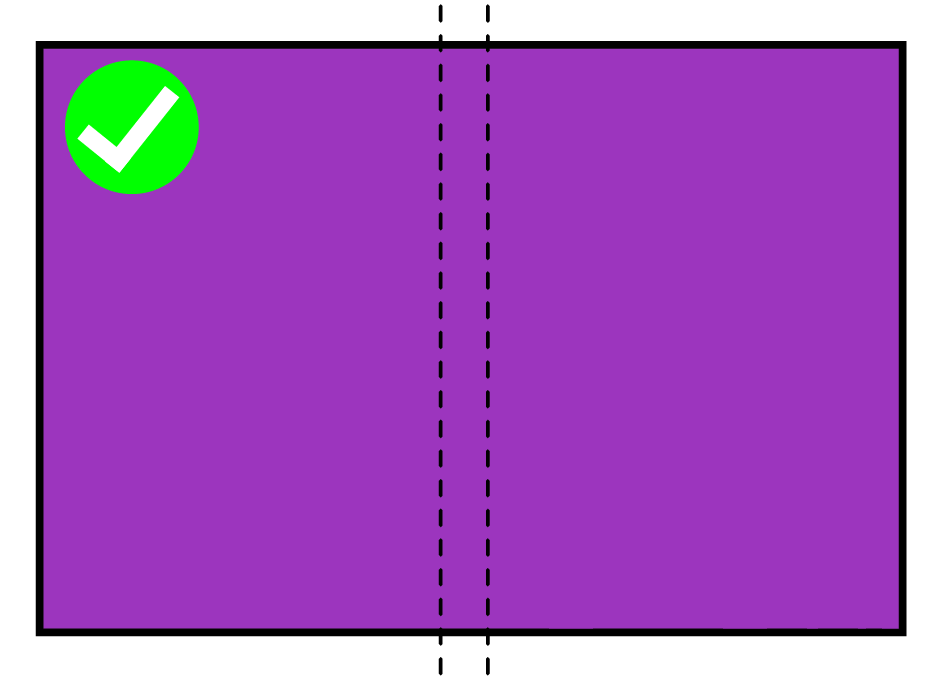
DO use a continuous background across the spine.
DO extend a front cover wrap past the spine guides to the back cover. The same can be done when wrapping a back cover to the front.
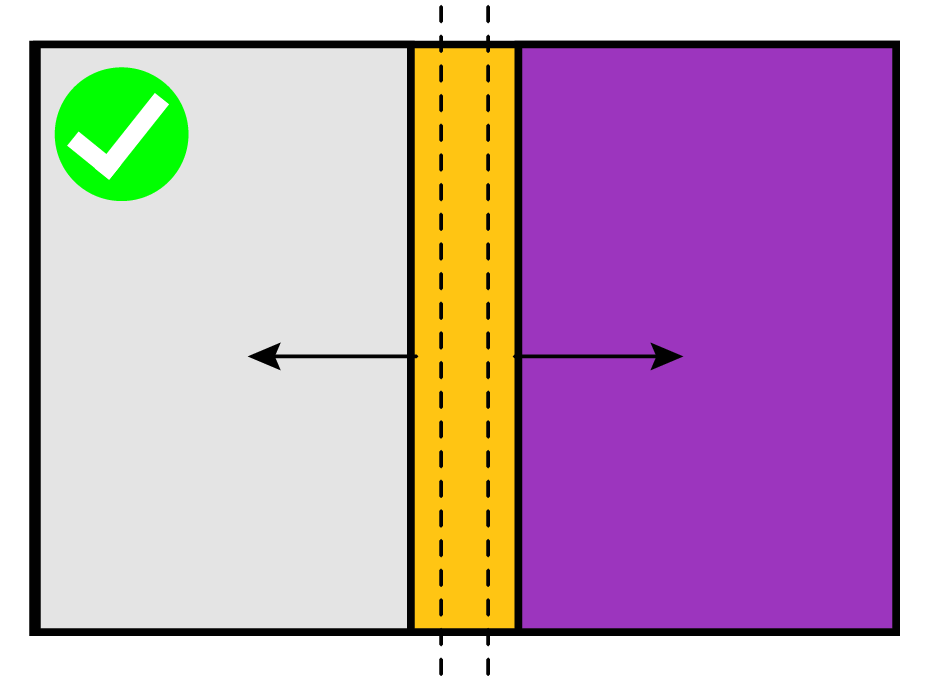
DO use a color band that extends past the spine guides to replicate the look of book binding tape. See the Tip below.
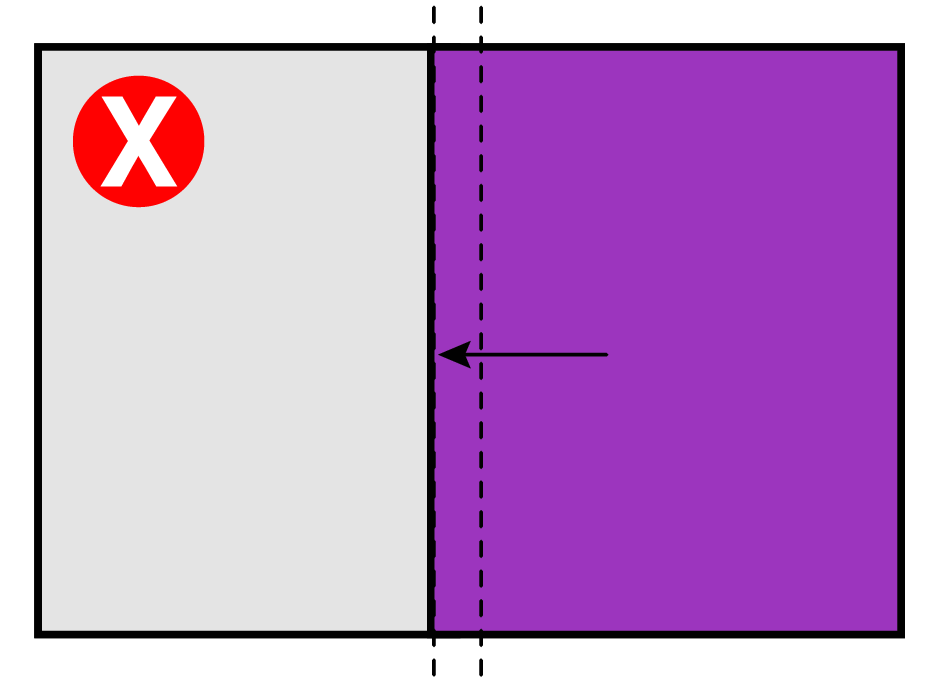
DON’T wrap a front cover around to the back and end it at the spine guides.
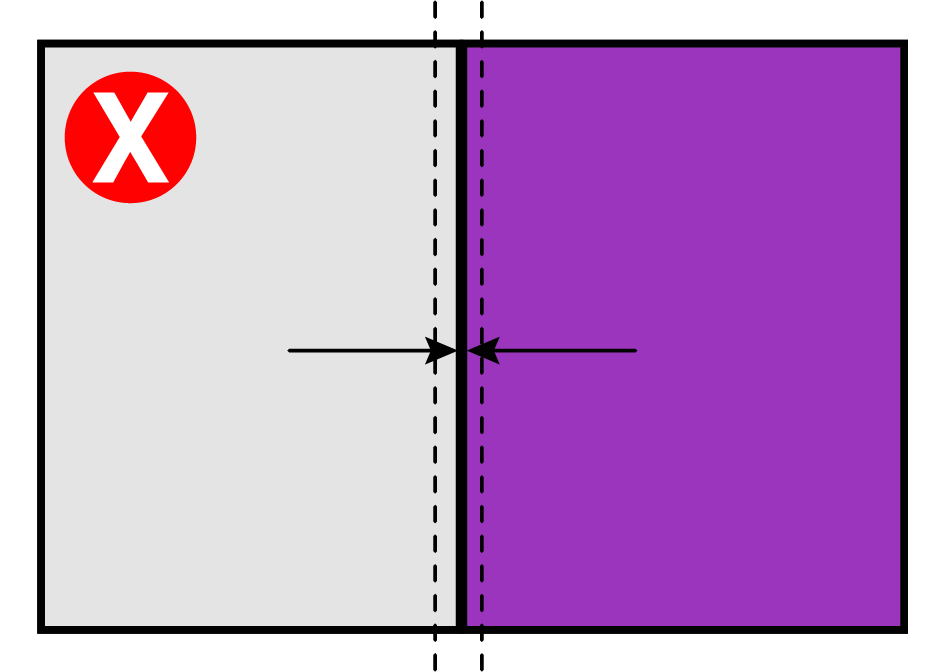
DON’T layout a different front and back cover that meet in the center.
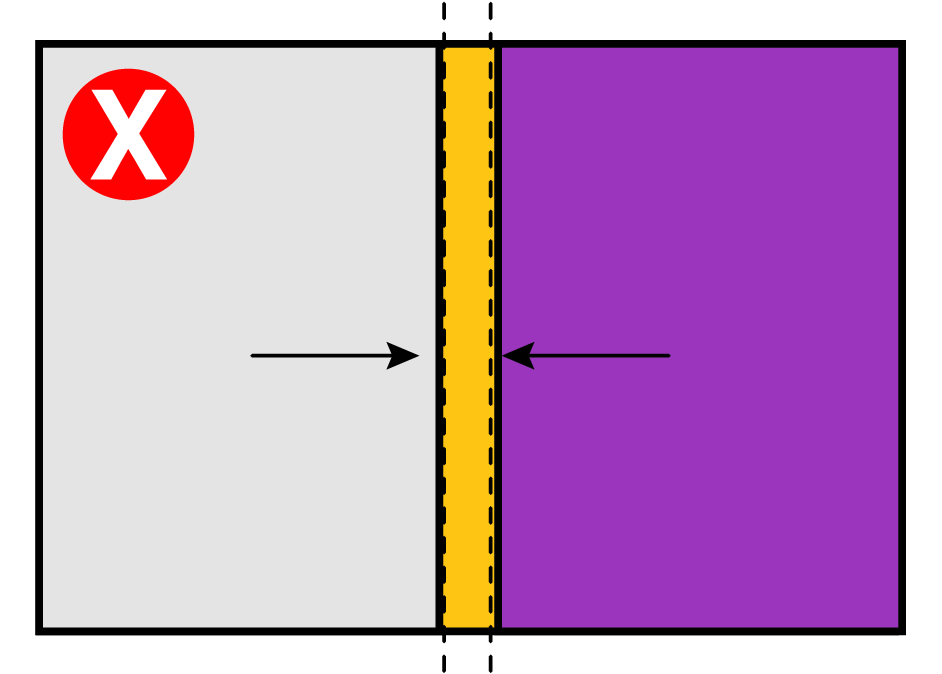
DON’T use a color band on the spine area and end it at the spine guides.
Tip: Replicate the look of book binding tape by adding a shape or a background texture. Extend a frame to the top & bottom edges of the page, and onto the front & back covers to pad out the spine area.