Frame Basics
In the Page Editor, frames can be added to your canvas to design your yearbook. Below you will learn what frames are and the basics on how to use them. For more uses of frames, check out the Shapes, Text & Image Frames article.
What is a Frame?
All objects on your canvas exist inside a frames. There are three types of frames: Image, text and shape frames.
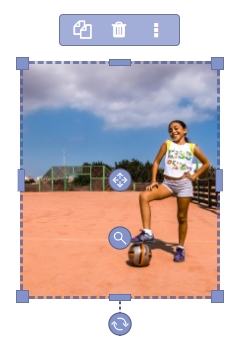
Image Frame
Text Frame

Shape Frame
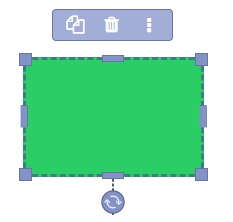
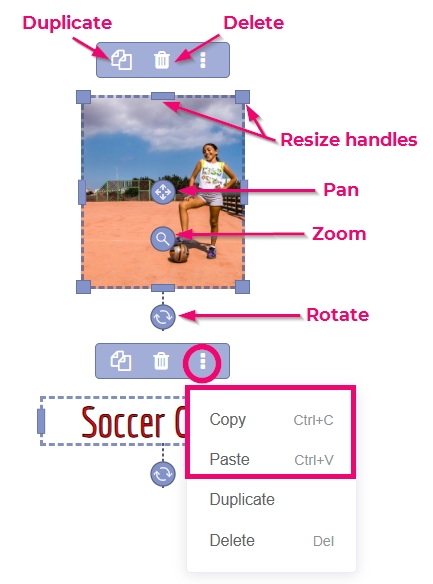
Frames display a small toolbar with options to duplicate and delete the selected frame. The toolbar includes an extended menu that includes copy and pasteFrames show resize handles at their edges, allowing you dynamically change the size and shape of the frame, and a rotate handle under the frame.
Image frames also include a pan handle to move the photo within the frame and a zoom slider too.
Adding a Frame to a Page
Add an image frame to a page in one of three different ways:
- Add image directly to page: Choose an image from the left-side menu in Photos, Elements, or Backgrounds, then drag and drop it onto your page.
Note: Learn more about sorting, searching and managing images in the Candid Photo Management article
- Add an empty image frame: Click the image frame icon on the top right canvas menu to add an empty frame to the canvas. When an image, background or element is dragged on top of an empty frame, it will glow red. Drop the image into the empty frame.
![]()
Add image to the canvas background Simply click down on any image or background on the left-side pane to apply it to the entire canvas. Double-click on the canvas to reveal a zoom and reposition handle. 
Note: Learn more about background options in the Additional Design Elements article
To add an empty shape or text frame to a page: Click the text or shape icon on the top right canvas menu.
Tip: Rather than adding images directly to the page, create your own template by adding empty frames first.
Selecting Frames
To select a single frame: Click on the image, shape, or text you want to select. The frame will highlight, and handles will appear around its edges.
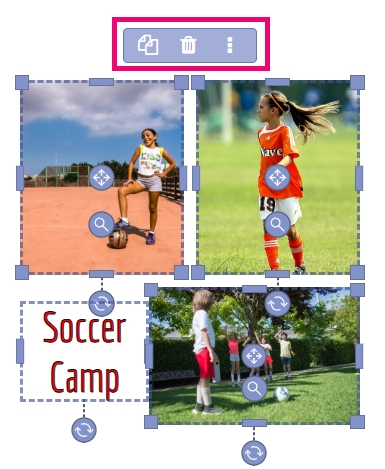
To select a multiple frames individually, hold the Control Key (Windows) or Command Key (Mac) then click each frame with your mouse.
To select all frames in an area of your canvas, click and hold the left mouse button, the drag down across the area with the frames
A multi-selection may be moved as a group and displays a single toolbar over the selected area. Dragging on a resize handle will resize all elements individually but proportionality. To resize the entire selection as a fixed unit, use the Grouping tool – see below for details.
Grouping Frames
Grouping enables multiple frames to be resized proportionately and rotated as a group.
To group a selection of frames, first select multiple frames (as described above. Click Group frames on the top menu. The grouped frames will now display a single set of handles to resize and rotate.
To ungroup a selection of frames, select the group, click Group on the top menu, then click Ungroup Frames.
Repositioning Frames
After selecting one or more frames, they may be moved by dragging them to a new position simply by dragging them around the page.
Magnetic Snap Guidelines
When moving an object on your page, Purple Guidelines will appear to help you align frames relative to other objects on your page.
These guidelines are magnetic, snapping frames together along their edges, to the safe margins, and to the page edge.

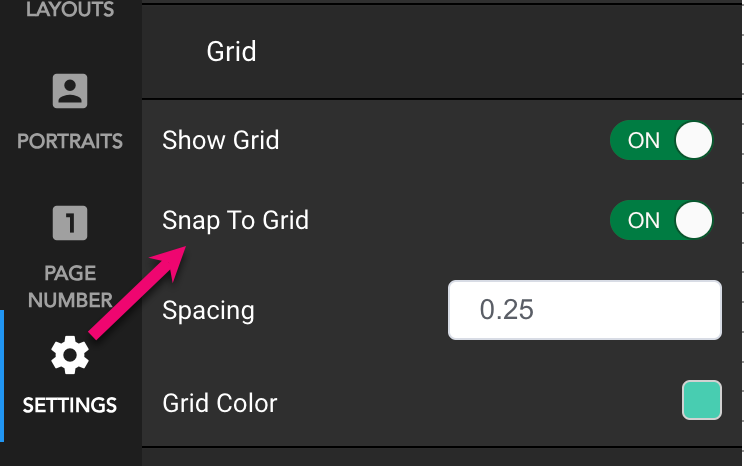
To adjust the snap guidelines:
- Click Settings on the left-side menu
- Click the Show Grid Toggle to turn on the grid (optional)
- Click the Snap to Grid Toggle to turn on the snap guidelines
- Click Spacing to fine tune the amount an item moves to snap to the grid
- Click the Color Chip to change the color of grid if you choose to have it visible
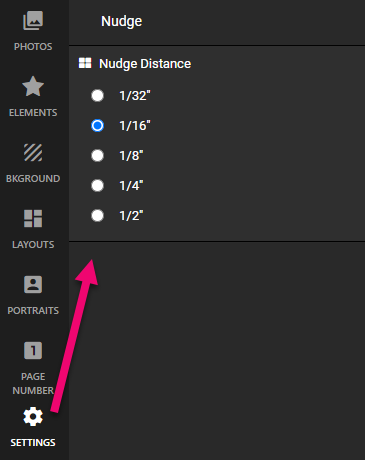
Nudging with Arrow Keys
To move a selection in small increments: Tap the keyboard arrow keys in the direction you want to move the frame.
To adjust the nudge distance: Select Settings on the left-side menu. Choose the preferred Measurement
Note: A larger distance increases the amount the selected frame moves when the arrow key is tapped.
Resizing Frames
Handles on the frames are used for resizing. Image and shape frames display eight handles (four corner, four midpoint). Text frames display only two handles.
Resize frames in the following ways:
- Click and drag a Text Frame Handle to resize the width; the height will adjust to accommodate the text within the frame
- Click and drag a Corner Handle of an image or shape frame to adjust the length and width simulataneously
- Click and drag a Midpoint Handle of an image or shape frame to adjust the width or height independently
Note: The image is not being cropped itself during resizing, the frame is only changing its shape around the image.
Tip: Hold the Shift Key on the keyboard while resizing to lock the image’s proportions. This technique is ideal for clipart to avoid clipped edges.
Rotating Frames
To rotate a frame: Select the frame then drag the Rotation Handle to pivot the frame
To rotate a frame in 15 degree increments: Select the frame. Hold the Alt Key (Windows) or Option Key (Mac) , then drag the Rotation Handle to pivot the frame
Tip: Double-click the Rotation Handle to reset the frame to the original position.
Aligning Frames
To align frames relative to each other and the canvas: Select the frames to be aligned then click Alignment in the top canvas menu. Select the desired alignment.
- Alignment from Page: to position on the middle or center of the page.
- Horizontal Alignment to reposition frames relative to the canvas edge
- Vertical Alignment to reposition frames relative to each other
- Distribute to reposition frames equal distance from each other across the canvas
Changing Frame Order
Every frame on your page is placed in a layered order as it is added to the canvas. The last added frame will be in the front.
Note: Smaller frames can become hidden as larger frames are moved in front of them.
To move a frame forward or backward in the layered order: Select the frame, then click Order on the top canvas menu. Choose a desired order.
- Bring Forward to move the frame one layer at a time closer to the front
- Bring To Front to move the frame all the way to the front
- Send Backward to move the frame one layer at a time further to the back
- Send To Back to move the frame all the way to the back
The Color Picker
The color picker is used by many different design elements – borders, shadows, shape fill, and text fill.
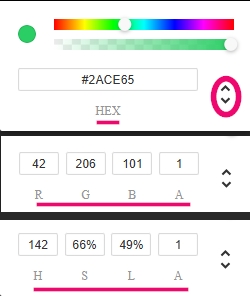
To use the color picker: Select Fill then click the Color Chip. Slide the Rainbow Slider to choose a color, and click the Gradient above the rainbow slider to choose a shade. Use the Opacity Slider to change the selected item from 100% opaque to 100% translucent
Beneath the sliders is a precise color code for your current selection. Use the arrows next to the code to move between HEX, RGB, and HSL color codes. RGB & HSL include an alpha channel value for the level of transparency. To match an exact color use the HEX/RGB/HSLA code to copy/paste an exact color match between items.
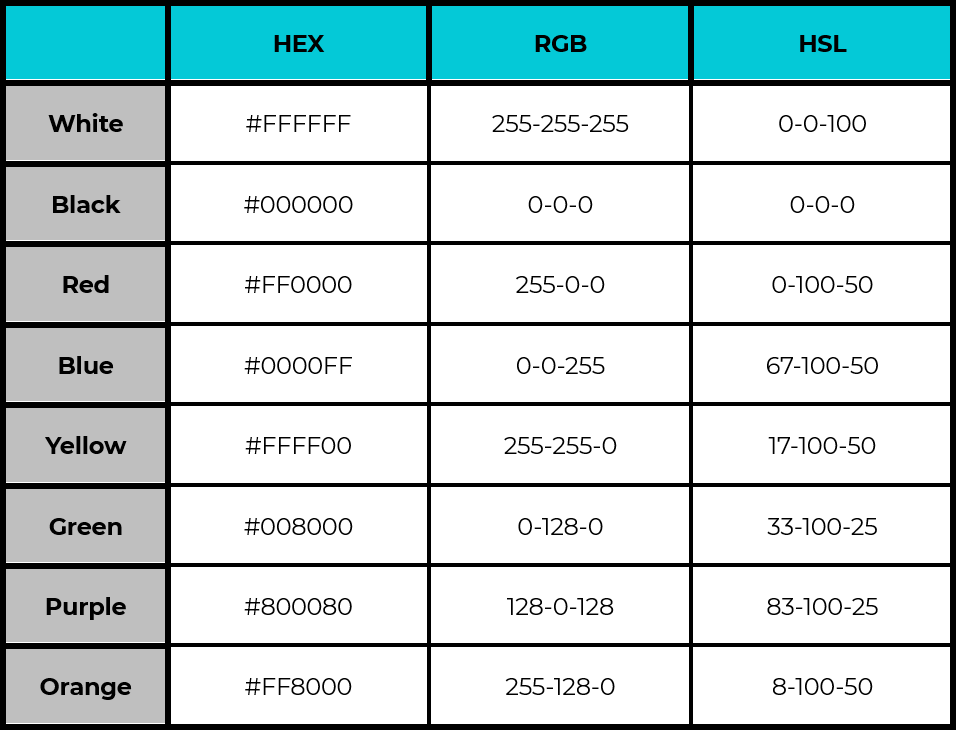
Tip: Want to get pure values without using the shade gradient? Use any one of these values in the appropriate color code box for these basic shades:
Studio Source Yearbooks unofficially recommends the following non-affiliated website to help you with exact color matches, useful for matching your school colors, as well as palette inspirations: Color-Hex.com