Importing & Managing Portraits
The portrait manager associates information about the people in your school to their portraits – their names, the groups they belong to, and their priority ranking. This information is used to create customizable portrait grids across multiple pages of your yearbook in a few easy clicks.
Importing Portraits
The first step to creating portrait pages is to import your PSPA-format portrait package. The package consists of one or more folders containing portrait images and a data file saved as Index.txt. The Index.txt file describes who are in the portrait images – names, grades, classrooms, etc. When imported, it creates a portrait database that allows you to flow portraits onto a page by groups (grade, classroom) and add name labels.
Note: Only Editors/Editor-in-Chief can import and manage portraits as the book must be checked out during this process.
The PSPA (Professional School Photographers Association) format is the industry standard for providing portraits to schools. This file may be opened in a notepad or spreadsheet application, such as Excel to review the data before importing it.
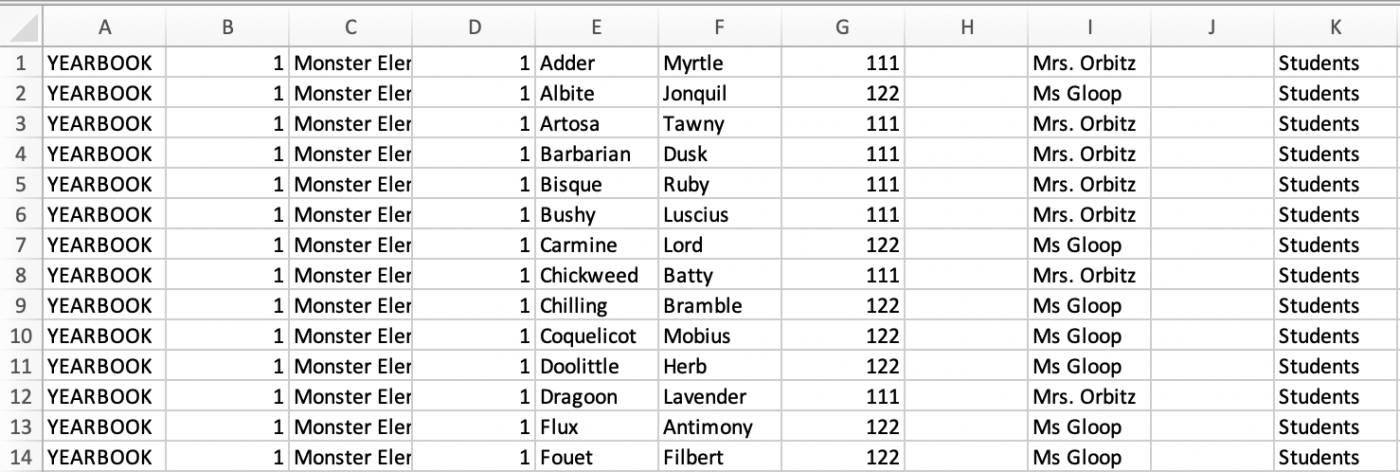
The PSPA format assigns one row per person/photo. The columns contain data in a particular order, as listed below. The following categories are required to import and build pages in your yearbook. Additional categories may be included.
- A. Volume Name: School name or a default field, like “Yearbook”
- B. Image Folder: The name(s) of the folder(s) containing your images
- C. Image File Name (including file extension): File names given to the portrait photos, usually a .jpg
- D. Grade: Assigned to students and possibly teachers
- E. Last Name: Family name of the person in the portrait
- F. First Name: Given name of the person in the portrait
- G. Teacher Name: Can be first and last or last name only
Importing a PSPA Package
The following video will walk you through how to import a PSPA package to upload portraits into your yearbook and how to manage this data.
Step by Step
- Click Manage Portraits on the left-side menu, then Check Out the book
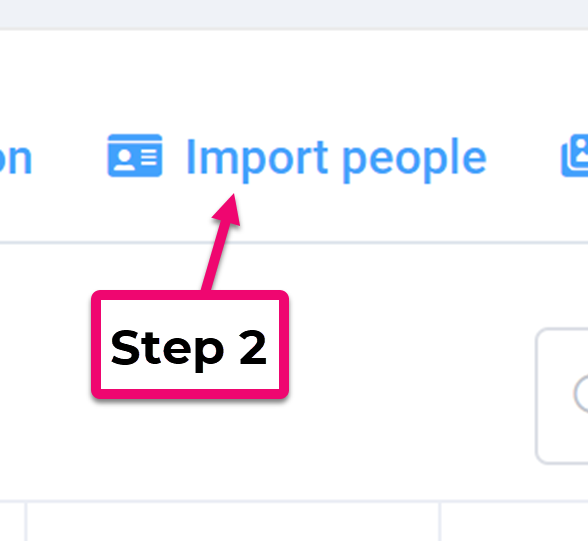
- Click Import People
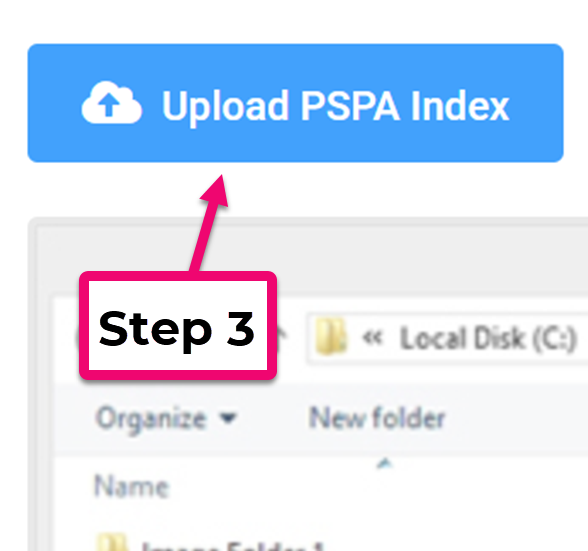
- Click Upload PSPA Index
- Locate the index.txt file on your computer (usually located next to the folders holding the portrait images). Select the file, and click Open
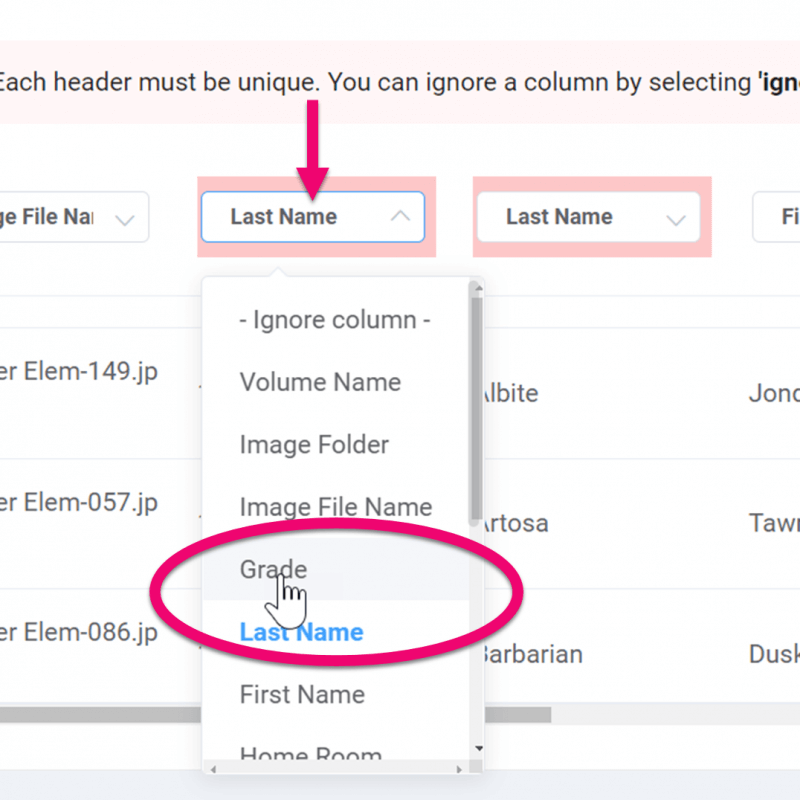
- Verify that column headers match the data underneath (See the example shown to the left – Grade information is not incorrectly assigned to the Last Name column)
- Click on a column header to reassign the category, if needed
- Each category may only be used once
- If a column contains unnecessary information (eg. random codes), set the column to be ignored
- Click Import People in the top menu
- Click on Import Photos
- Click on the Upload icon
- Drag the photos to the Upload icon
- Portrait photos will upload, attaching themselves to the people listed in the database
Once the import is complete, see the section below on Managing Portraits for information on how to make corrections in the database (eg. fix typos, reassign people to different groups), import another index (eg. retakes, senior photos), assign roles to staff, or create portrait pages in your yearbook.
Portrait Upload FAQs
If your portrait photographer has only provided portrait photos without a database, or you wish to include photos for people who missed photo day (homemade portraits or placeholder images), you can import these into your portrait manager.
Note: If you are adding retake or extra photos to an existing import, be sure to match the formatting of the portraits already in the database.
After the upload has completed, the portrait manager will display a warning about portraits that are missing critical information. Complete the information describing the portraits in the data table (eg. names, grades, teacher/homeroom, etc).
Tip: More information on editing portrait data is available in the section below on Managing Portraits.
Memento Yearbook will only import a .txt file. If you’ve received a .csv file format, simply rename it to a .txt and it will import without issue. Other formats may require you to import them into Excel or another spreadsheet application, then resave them to a .txt format.
If your database simply looks wrong when you import it into Memento – full of random alphanumeric codes, missing file names, etc. – your photographer may have given you the wrong portrait package format.
To verify the format:
- Open the index file in a spreadsheet software, like Excel, or a notepad application
- Look for extra columns, data that appears as random alphanumeric codes, or missing critical information such as filenames, grades or names
- Contact your photo studio to ask for a PSPA-format database should these problems be discovered
Some portrait databases may have been formatted in all-cap characters (eg. CAREY STJOHN). Unfortunately, the portrait manager is not able to auto-convert names in all-caps to mixed case.
Upper and lower case versions of the same name are seen as unique records. Students with the same last name may fall out of alphabetical order on their pages if different capitalization rules are used (eg. Peter MacIntyre would appear before Anna Macintyre, when the opposite may be expected.)
This is particularly important when using the Teacher column (eg. The database will treat a teacher group named McKay as separate from a group named Mckay, making it impossible to create a single portrait page mixing the students in both groups.)
Tip: When re-assigning a person to a new group, be careful to select pre-existing groups rather than to retype the entire group name.
If most of the data appears correct at import, but there is one or more columns of extra data, set these column headers to “Ignore column.” This will exclude this information from importing into your database. For example, some index files will include student ids or photo size info. Don’t import this info into Memento – just ignore the column at import.
If your database contains more that 100 characters in any column, the import will fail. This excludes any field under the Notes column, which may contain 255 characters. (Notes may not be used in labels, so usually this information is not particularly useful.)
Occasionally a photographer will provide a portrait database package that is not PSPA format, but it will contain all the information needed to create portrait pages. The other information is simply not required.
Note: If the data table contains more than thirteen columns, an error will occur at import.
To fix this issue:
- Open the data file in a spreadsheet software
- Delete the extra columns, keeping only the essential info (file name, first & last name, grade, homeroom, teacher, salutation, job title)
- Resave the datafile as a TXT format, using Save As… under a new file name to avoid overwriting the original file (eg. INDEXrevised.txt)
- Import this new index file into Memento.
If you import the index.txt file and discover that some of the people do not have matching images to attach to their record, check the Index.txt file in a spreadsheet software or notepad application.
- Compare the actual file names of the portraits listed in the index file versus the actual portrait names. There may be a typo. The file names in the data table must exactly match the actual names of the portrait files.
- Check the index file for missing zeros starting the file name, typos or extra spaces, and ensure that the file name includes the JPG extension.
- Check to make sure that the photos were included in the package. There may be a file name in the index, but if the file was not included in the package, then you’ll need to talk to your school photography company to get the image.
You may be able to manually correct the file names, but if you are not able to, ask your photographer for a new PSPA format table, explaining in detail what is wrong with the package you received.
Tip: If you feel that you still need help with these issues, please reach out to Studio Source Yearbooks Support for further assistance.
Managing Portraits After Import
After importing the portrait package, Editors/Editors-in-Chief may make corrections and additions to the portrait data using the Portrait Manager at any time during the yearbook building process. Existing portrait pages will be automatically updated whenever corrections and additions are made.
The portrait manager features tools to search, sort and filter your portrait database, as well as to alert you to potential problems. To make changes to the portrait database, click on Manage Portraits on the left-side menu of the book manager, then Check Out the book.
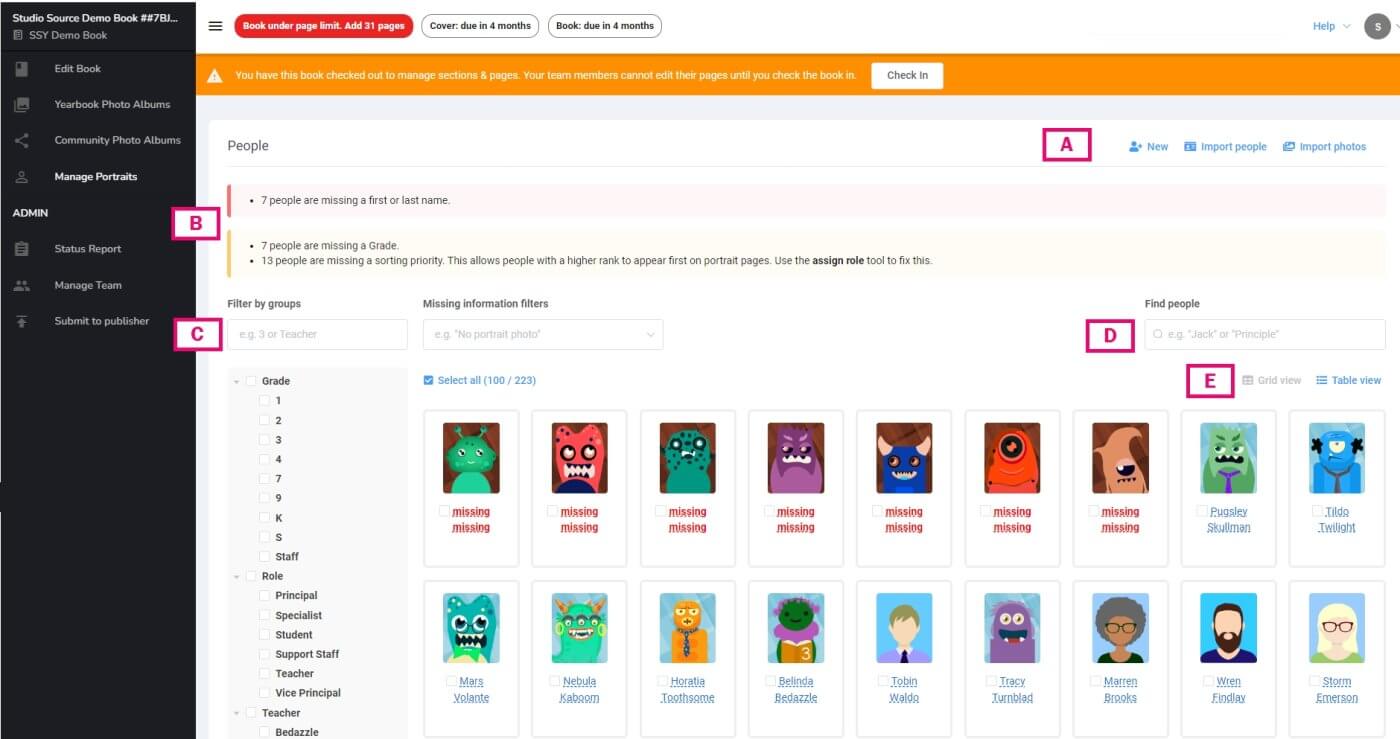
- A. Portrait Manager Menu – Used to import, add new people or edit existing people
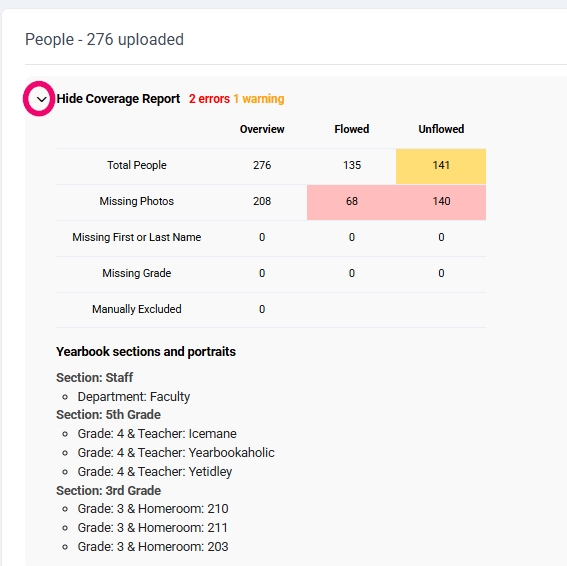
- B. Coverage Report – Open this area to review potential problems with portrait, unflowed or missing critical info.
- C. Smart Filters – Filter for members of a particular groups (eg. show only Grade=8, show people missing a portrait photo.)
- D. Keyword Search – Search for an individual person by name or by group
- E. View modes – Switch between grid view and table view. Table view will display 1 person per row, with a small photo and their data in a table.
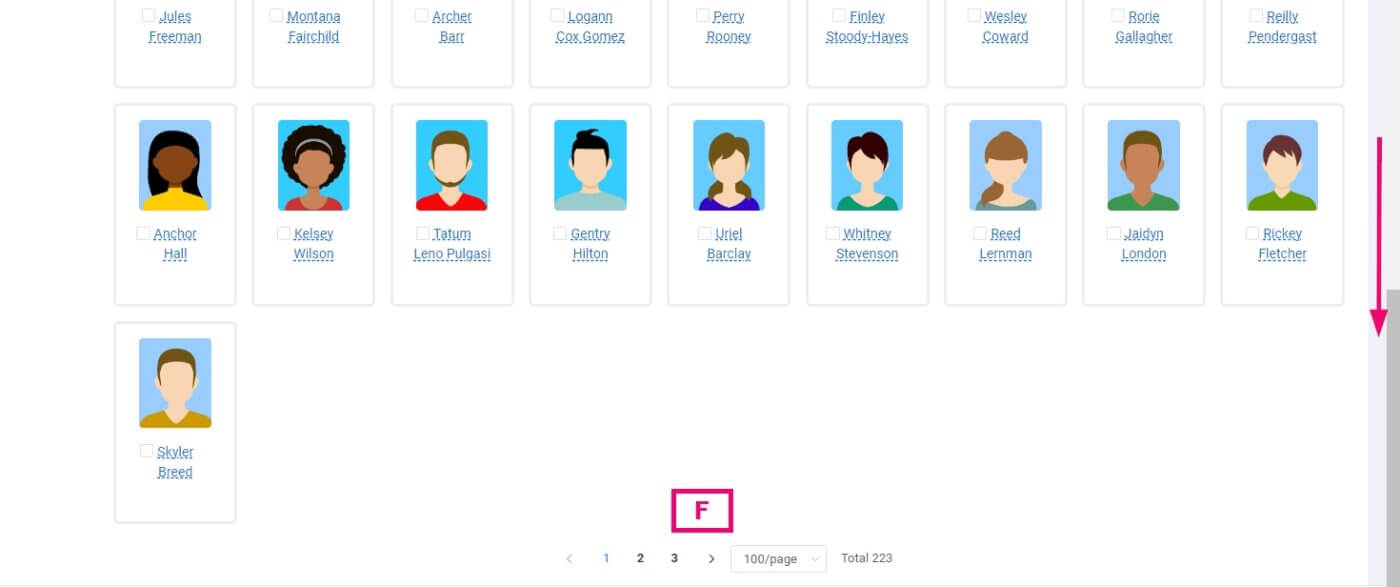
- F. Page Navigation – Scroll to the bottom of the page to move change pages and the maximum number of portraits to display per page
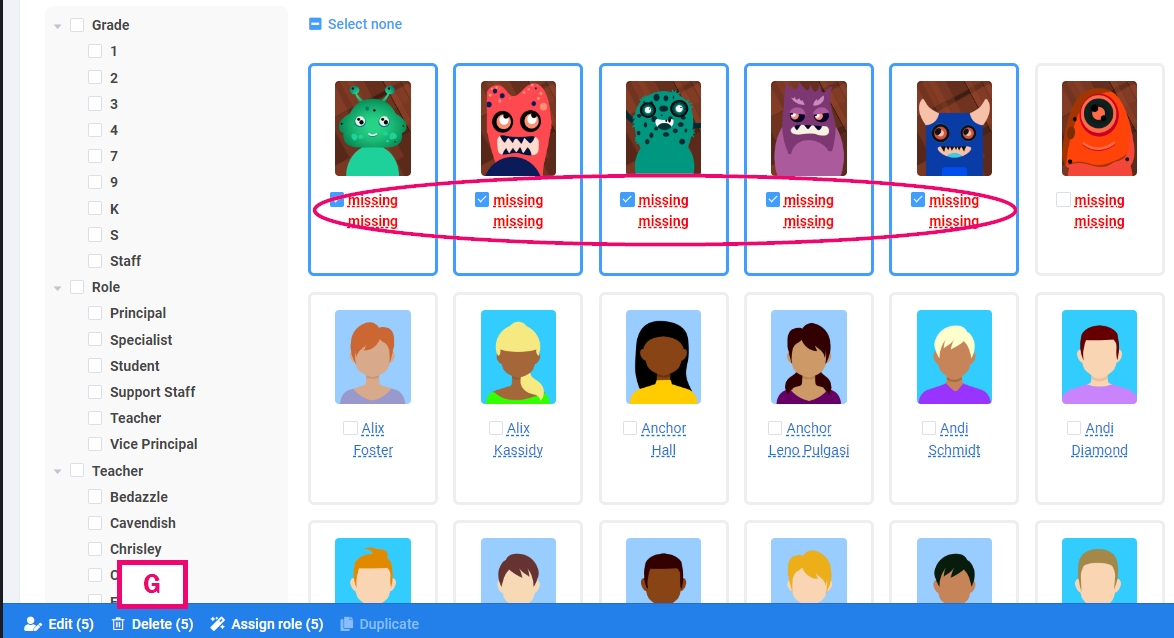
- G. Selected Portrait Options – When one or more portraits is selected, option to edit, delete, assign role and duplicate are available.
Selecting, Searching, & Sorting
Coverage Report
Click on the Coverage Report drawer to see important info about your portraits. Learn which groups have not yet been flown onto pages, see if any portraits are missing their name, photo or other important data.
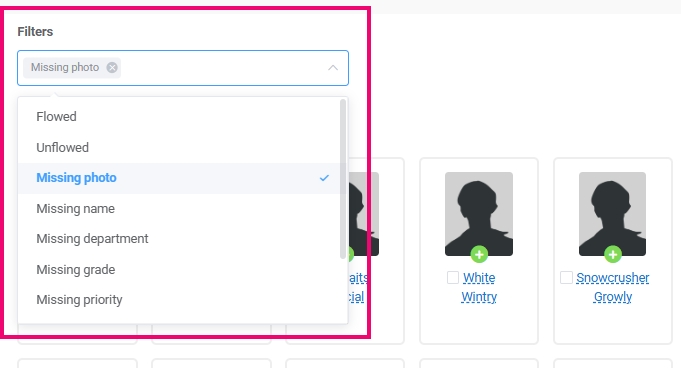
Missing Information filters
Use this filter to quickly review potential problems as displayed in the coverage report. Show all portraits missing name info, photos, grades, etc. so you can edit these records easily.
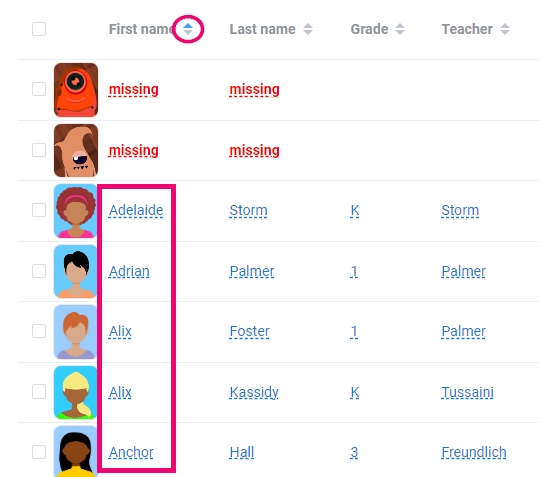
Sorting by Columns
To reorder the portraits in any particular order within a column, click on the up or down arrows on the column header. Missing names will always appear at the top of the list.
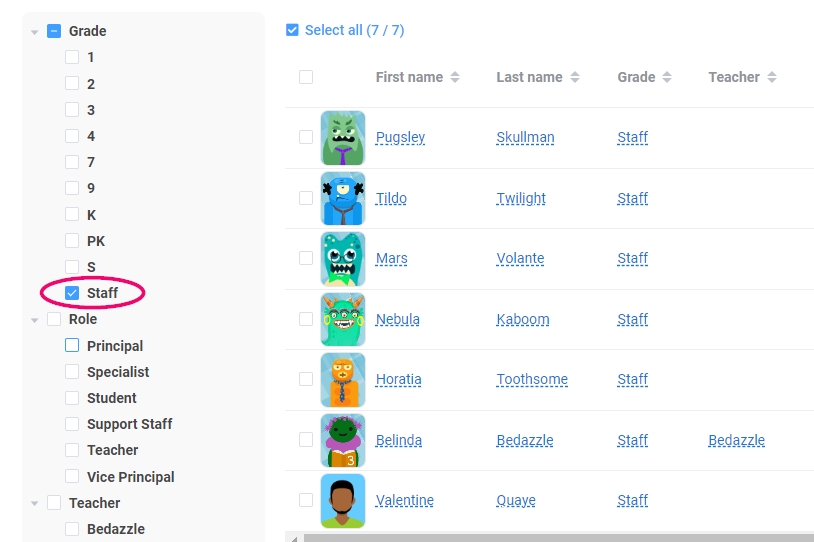
Filtering by groups
To view a selection of portraits tagged with common information, checkmark a group from the list of options on the left side of the page. Only the portraits that are members of the selected group will be displayed.
Searching by Keyword
Type into the Keyword Search Field an individual’s name, grade, homeroom number, or a teacher’s last name to see all portraits assigned to people with that information. To clear the filtered search, simply delete the information in the search field.
Adding / Editing Portrait Information
To add or edit information unique to a single person:
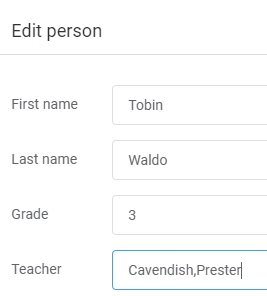
Grid view: Hover over the individual, then click Edit under their name. Make any changes required to one or more fields, then save the changes.
Table view: On the person’s row, click onto the information that needs to be added or edited, then update the field. Save the change.
Note that only shared info (grade, teacher, homeroom, priority, etc.) is editable. First and Last Name info is excluded from a multi-selection edit.
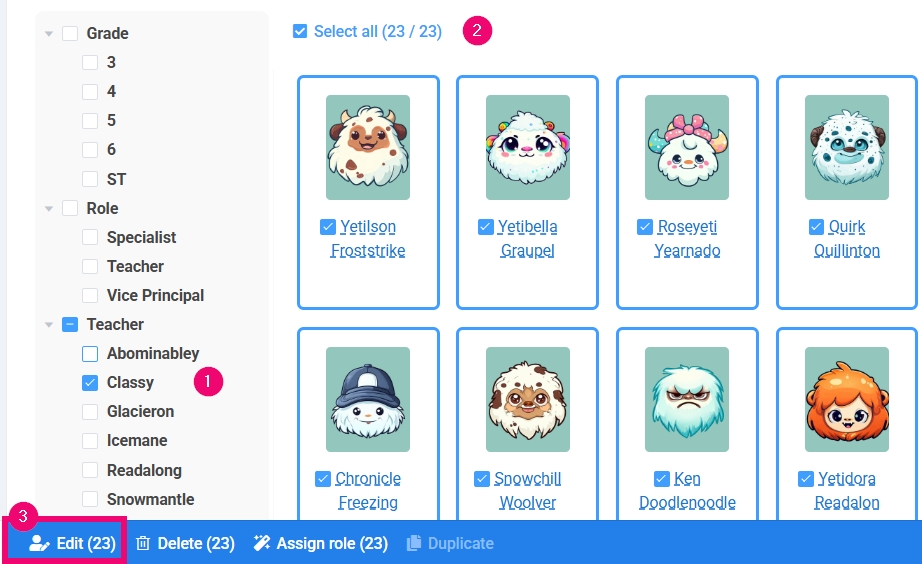
To add or edit information for multiple portraits:
- Checkmark the individual portraits
OR
Use a filter to choose a group (eg. Teacher: Smith) then click SELECT ALL over the portraits. - Click Edit People on the portrait manager menu (bottom of screen)
- Type the new or corrected information into the respective field in the form
- Click Update to apply the change
Adding a Missing or Retake Image
To add / replace a portrait:
- Click the Portrait Preview.
- Click Upload Photo under the existing portrait or portrait placeholder image.
- Select the new photo on your computer and upload it.
- Click Save New Photo to complete this change.
Note: If the person already appears on a portrait page, their image will be updated.
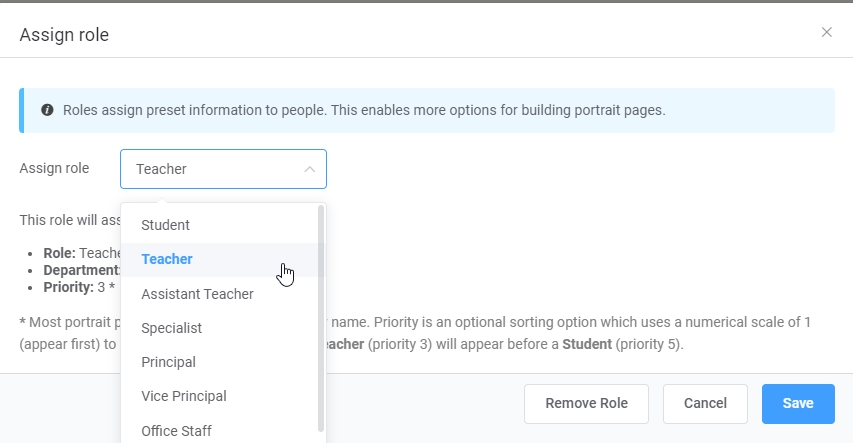
Assigning Roles to People
Roles auto-assign several attributes to a selected portrait: their position in the school (eg. Principal, Teacher, Support Staff), a department (eg. Admin, Support, Faculty) and a priority (to break alphabetical order by last name). Memento will preview the information that is auto-updated when a role is selected.
Assigning a Role to a Single Person:
Grid view: Same as assigning a row to multiple people – see below.
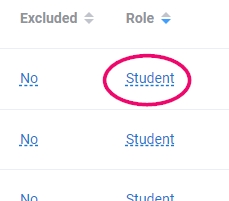
Table view: On the person’s row, click into the Role column for the selected person. Choose a role, then save.
Assigning a Role to Multiple People:
- Checkmark all the portraits that will receive the role
- Click on Assign Role button at the bottom of the page.

- Choose the role common to all selected portraits
- Click Save
The selected portraits will be assigned a role, a department and a priority.
After assigning roles to your staff members, you may wish to add job titles and salutations (Mr., Ms, Dr.) – this information can be displayed on the portrait labels.
To ensure that Homeroom Teachers and Assistant Teachers appear on their own classroom pages, make sure that their Grade, Teacher Name and/or Homeroom information matches the information associated to their students.
Tip: The teachers may also appear on the staff page – use Assign Role to place them into a Department, which can be used to build a staff page.
Assigning a Portrait to Multiple Groups
If a person needs to appear in more than one portrait page (eg. an assistant teacher assigned to two classrooms in the same grade), theirportrait may be assigned to more than one group.
Note: If a portrait needs to be on multiple pages, assigned to multiple grades and teacher/homerooms, or needs to appear in a different position on each of the pages (eg. top of the homeroom page, middle of the staff page), we suggest duplicating the portrait instead and then assign one set of attributes per copy.
To assign a portrait to multiple groups:
- In the Portrait Manager, click into the column where the person needs to be double-assigned
- Type in both group names separated by a comma (Do not include any spaces between the group names and the comma)
- Click Update
For example, if an assistant teacher is assigned to two teacher’s classrooms in the same grade, enter in both teachers’ names with a comma (no space) between them. Be sure to match the exact spelling and case of the existing groups.
Duplicating a portrait
A single selected portrait may be duplicated to assign each copy separately to different grades, teacher/homerooms and/or roles/priorities.
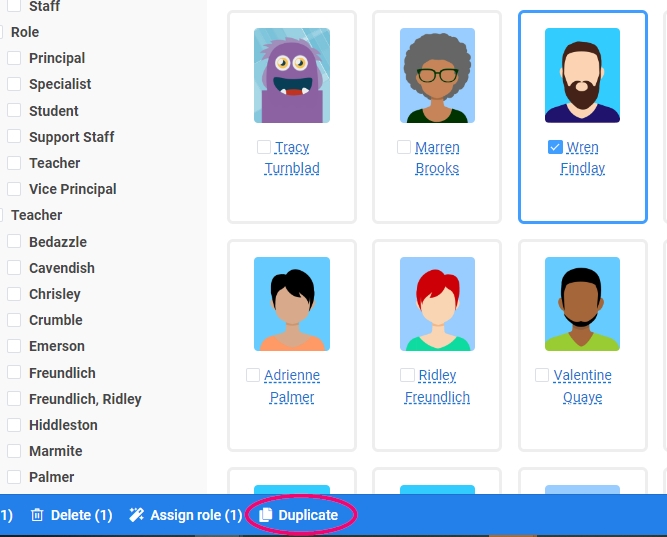
To duplicate a portrait
- Place a checkmark next to the portrait.
- Click duplicate on the top menu.
- Edit the copied portrait’s details to add the new group information (grade, teacher/homeroom, role/priority, etc.).
- Save the changes.
Adding People Without Portraits
People who do not have a portrait image may still be added to your portrait pages as a placeholder image with a label.
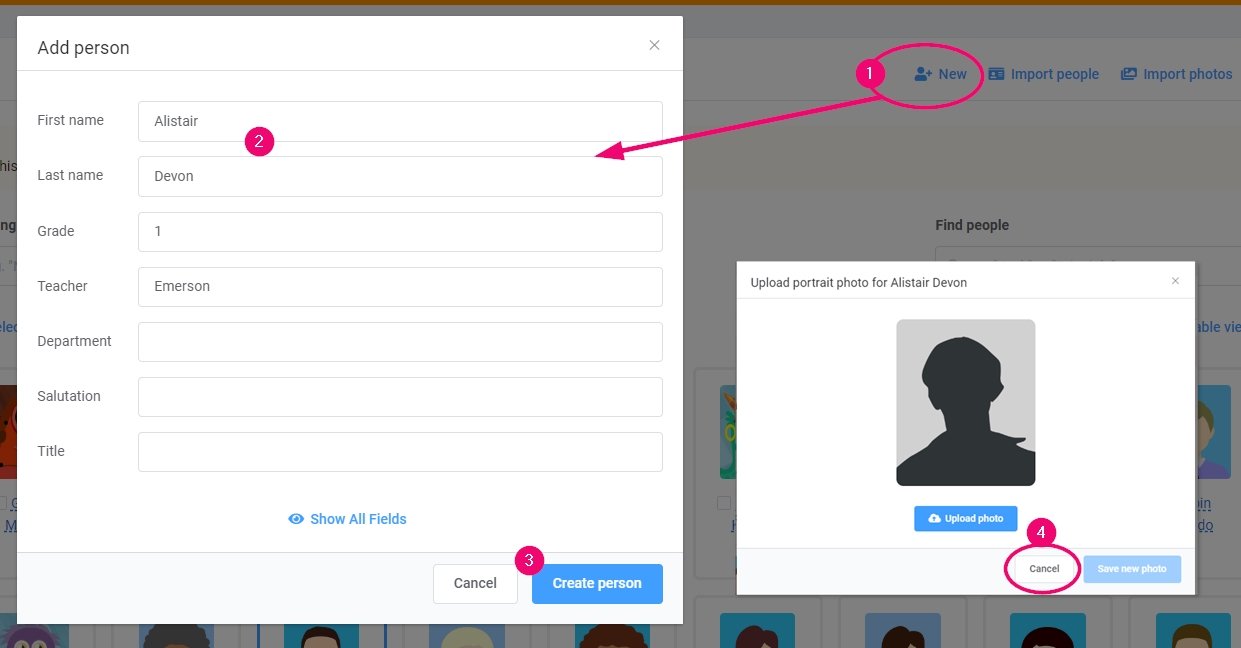
To add people without a portrait:
- Click the New Person button
- Complete the form to add information about the person
- Note: Be sure to add the same group assignments as the person’s classmates, so they will appear on their group’s page.
- Click Create Person to complete the record
- Click Cancel when prompted to upload their portrait
Tip: The placeholder image can be replaced with another image that is 640 x 800 pixels. Use a school logo, mascot or other clipart.
Excluding and Deleting People
Exclude a portrait from appearing in a grid, as an alternative to deleting the image from your database. (Eg. turn off the Principal from appearing in the staff grid as their image will appear elsewhere in the book, or hide one portrait for a person who has two uploaded).
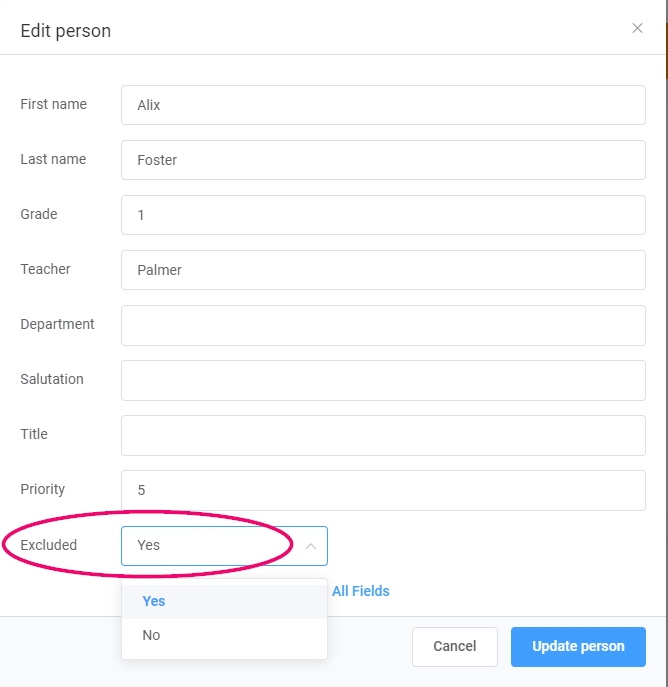
To Exclude one or more people on your portrait pages:
Grid view: Hover over the individual, then click Edit under their name. Turn the Excluded field to “Yes” then save the changes.
Table view: On the person’s row, click into the Excluded column for the selected person. Checkmark the Excluded box.
Note: The portrait will not disappear from the portrait manager, but will no longer appear on any portrait pages.

To Delete one or more people permanently:
- Checkmark the people you want to delete.
- Click Delete People on the portrait manager options at the bottom of the screen.
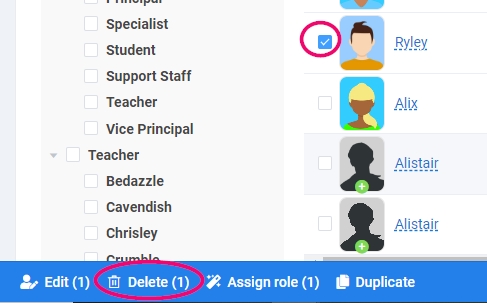
- Confirm your choice.
Note: This process cannot be undone. The record will no longer exist in the portrait manager nor the portrait pages.
Tip: If you need to add a portrait to a candid page, click on the Photos tab in the page editor, then look for the Portraits album among your candid albums. Drag and drop any portrait from this area to your page as you would any other image. Note this is not the way to build portrait grids, but to add a portrait image to a candid page (eg. A Message from the Principal with a feature image).