Collecting Photos from the School Community
Community Photo Albums provide a way to receive photos safely from members of your school community who are not working directly on the yearbook. Photo contributors can upload photos securely on any internet connected device, to be reviewed by Editors & Editors-in-Chief then transferred to a Yearbook Photo Album for use in the book.
Community Album Setup
Due to the child online safety rules, community photo albums are password protected. Only Editors and Editors-in-Chief may set up community albums.
To begin creating a Community Photo Album:
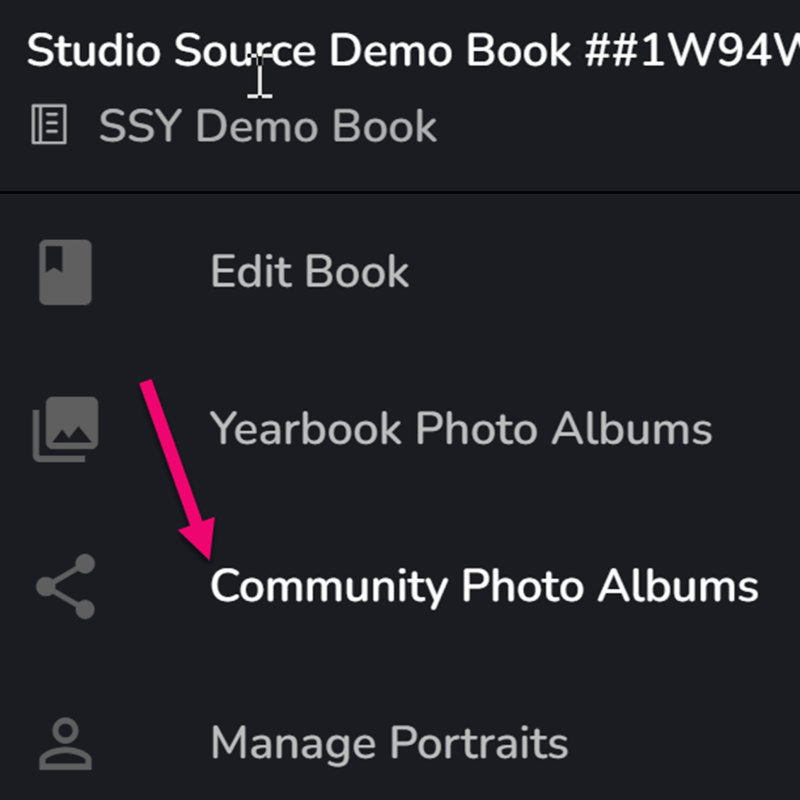
- Click on Community Photo Albums on the left side of the book manager
- Click on Setup Community Photo Albums to set the password
- Create a Password for guests to access community photo albums
- The password should include a mix of upper and lower case letters, at least one number, and one non-alphanumeric character
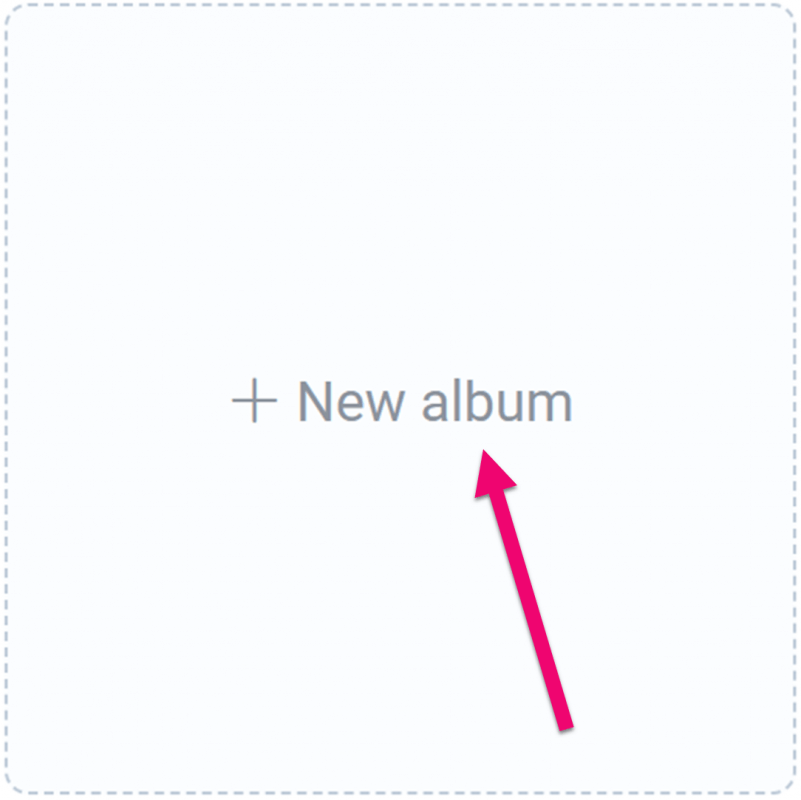
- Click on the +New Album button to create an album
- Give the album a name specific to events or yearbook sections to help keep photos organized
- Click Add Album
The newly created album will appear in alphabetical order. Each album will display it’s active link status and the number of images in each folder.
Tip: Be sure to write down your password in a safe place – you’ll need to provide this password to anyone uploading photos to the community albums.
Sharing Community Album Links
Each community album has its own website link that can be copied individually or all at once, to be sent by email or text message to invite staff, parents and students to upload photos for use in the yearbook.
To share a single album link:
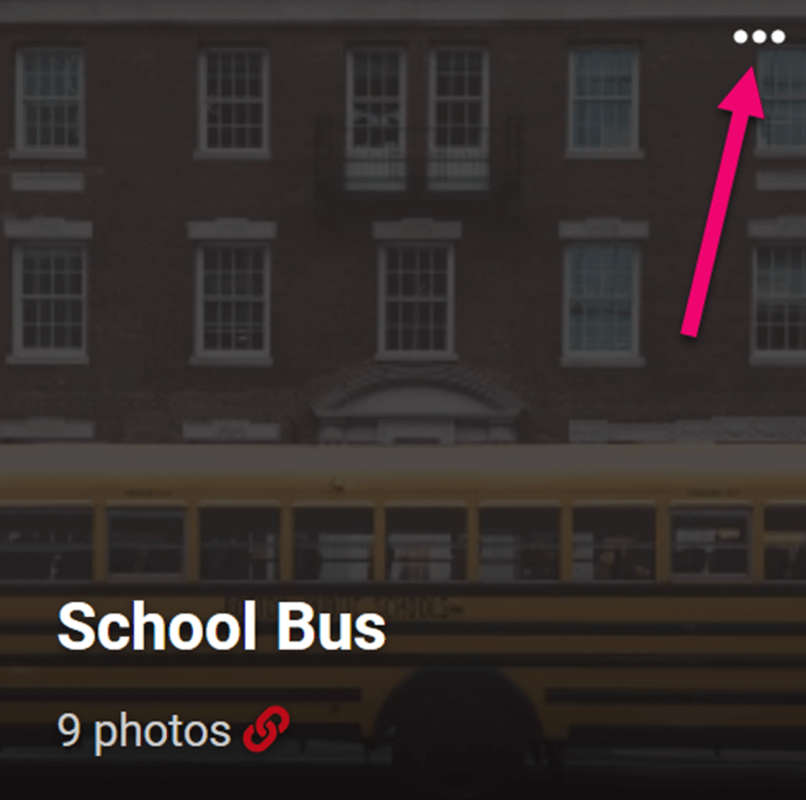
- Hover over an album and Click the Meatballs Menu
- Choose Get Shareable Link
- Click Copy Link
- Paste the Copied Link into an email or other message
To share multiple album links:
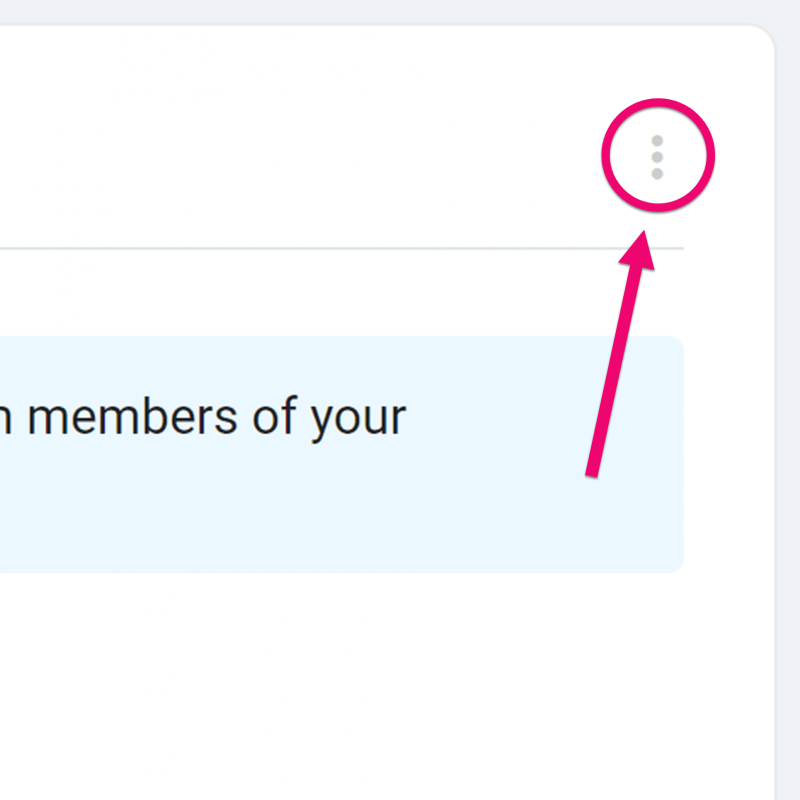
- Click on the Kebab Menu of the Community Photo Album page
- Click on Copy Sharing Links
- Click the first Copy Link button to copy all album links
- Paste the copied text in an email or a message (Be sure to send the community album password in your message)
When the recipient of your message clicks on the link, they will be prompted to enter the password in order to upload photos to the albums you sent them.
To ensure Print Quality, request photos to be:
- High-resolution JPG files (300 dpi) taken directly on your camera. HEIC and PNG files will also be accepted
- Do not submit low-resolution screenshots of photos from your phone
- Do not submit images downloaded from websites
- Avoid using online collage-makers, as these usually output low-resolution content
Community albums only display photo thumbnails. The folders do not show other photos uploaded in previous sessions for reasons of child online privacy.
IMPORTANT: Ask your photo contributors to only send their best selection of photos. Don’t “camera dump” all images from an event and avoid series of photos taken on burst mode. Weed out badly cropped, out-of-focus or redundant images to make page building a breeze.
Tip: Ask your photo contributors to rename their image files with helpful info to help identify the event or the people in the photos. For example, BakeSale May2.jpg or JenniferK AllieN Gr2.jpg.
Disabling Uploads
Album links are on by default. However, the links can be turned off if there is a submission deadline or too many images have been received.
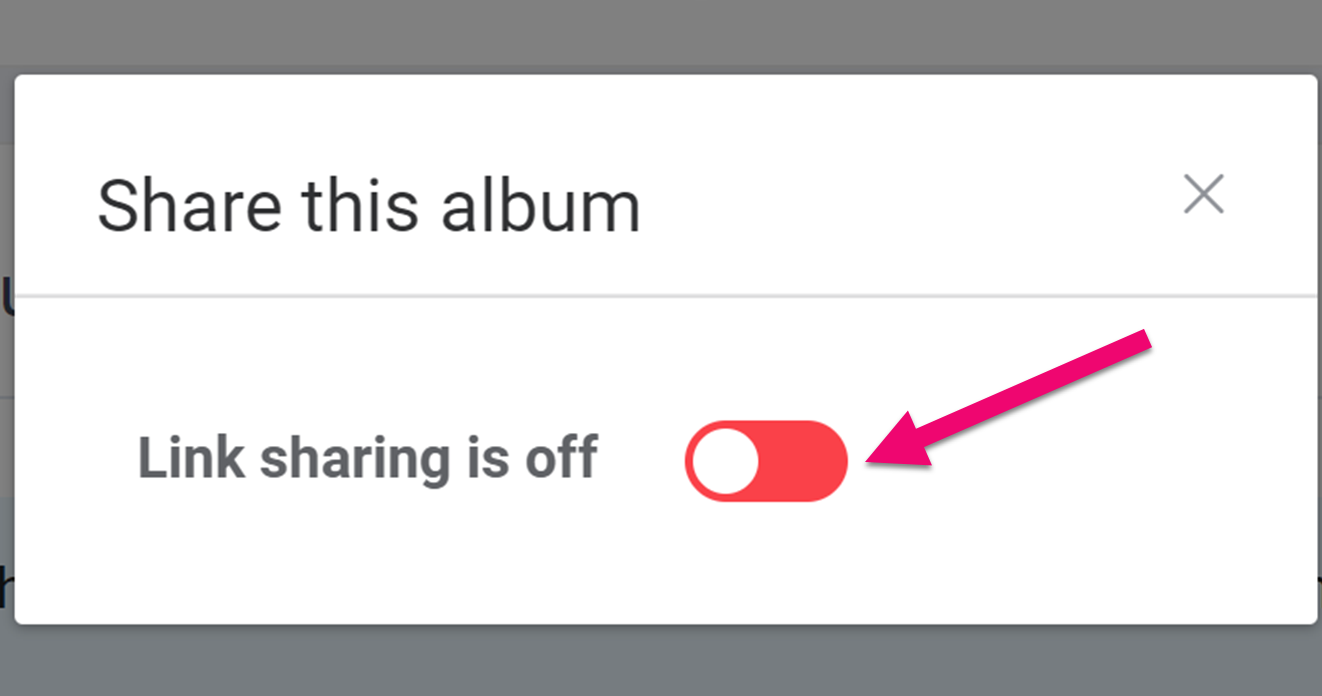
To turn off an individual community album:
- Click the album’s Meatballs Menu
- Click Get Shareable Link
- Turn off the Link Sharing toggle
No further uploads may be made to this album.
To turn off all uploads for all albums, click on the Kebab Menu on the community albums page, then select Disable Guest Uploading.
Moving Images to a Yearbook Album
Community Photo Album images must be transferred to a Yearbook Photo Album to make them accessible in the page editor. Images cannot be moved between different Community Photo Albums.
Tip: Be selective about which photos make it over to your design team. Only transfer the best images to speed up your page design – weed out near duplicate, badly framed or out-of-focus images.
To transfer photos to a Yearbook Album:
- Click into the Community Photo Album containing the photos that need to be moved
- Choose to Select All the images in the album or Select Individual Images by checkmarking them
- Click Move Photos
- Use the Dropdown List to select the Yearbook Album folder you are moving the photos to
- Click on Move Photos to complete the transfer
FAQs
If the password is forgotten or needs to be changed to block access to the albums, it can be reset by an Editor or an Editor-in-Chief. Click on the Kebab Menu to choose Reset Password. Type in a new password, then be sure to send an update message to anyone who needs access to the community albums.
To rename a Community or Yearbook Album, hover over the album and Click the Meatballs Menu. Choose Rename, type in the new album name, then click the Rename Album button to finalize the change.
Hover over the Community or Yearbook Album you want to delete, click on the Meatballs Menu, then choose Delete. The album and its contents will immediately vanish.
Note: Once deleted, there are no means to restore the album nor the images – technical support services cannot restore lost images. (Images already added to your yearbook pages will not disappear from those pages, but cannot be redropped or downloaded.)
Tip: Before deleting a Community Album, transfer all photos you want to keep into a Yearbook Photo Album.
Editors-in-Chief may download photos from the Community and Yearbook Albums by:
- Click on the album containing the photos to be downloaded
- Select the photos individually or choose Select All
- Click Download Photos
If an image fails to upload to a Yearbook or Community Album, it may be due to the file size, file type, or the image is not saved with an sRGB color profile.
If you wish to upload a non-supported image file type and do not have access to an image editing software (such as Photoshop), look for a free online image converter. The SSY support team recommends CloudConvert.com as a useful tool.
Note: Studio Source Yearbooks is not connected to this tool and does not provide support services for its use. Also note that if you convert a PNG with a transparency around into a JPG, you will lose the transparency, but converting a JPG to a PNG will not create transparency around the image.