 129023449
  100227567
  100216313
  305586251_001
  169428956
  266451736
 Candid Photo Management
Candid photos can enhance your yearbook design and bring it to life. Easily organize all of your candid photos with Memento’s built in management system. You can upload photos using the Yearbook Photo Albums or the Community Photo Albums.
Image Formats
Memento Yearbook supports jpg, heic and png file types. Generally, jpg and heic should be used for photos and backgrounds. Since png files support transparency, they are used primarily for clipart embellishments. The maximum image file size is 20 megabytes.
Note: You cannot change the file name extension to convert an image file from one format to another (eg. do not rename a file from Filename.pdf to Filename.jpg). You’ll need to convert the image by resaving it in an image editing software.
Tip: Information on converting file types can be found in FAQs at the bottom of this page.
The Dos and Don’ts of Photo Management
Before you begin uploading just any photo to the Community and Yearbook Photo Albums, review our Do’s and Don’ts of Photo Management to be sure you choose the best photos and you make the most of your time designing your yearbook.
| PHOTO MANAGEMENT DO’s | PHOTO MANAGEMENT DON’Ts |
| Create several albums based on your sections or page themes. Less photos per album are easier to sort and select. | Don’t create albums for specific people or by date, or use only one album for all photos. Sorting and selection will be very difficult. |
| Upload or transfer only the best photos – ones that are good candidates for use in the book. | Don’t “camera dump” all images from an event. Weed out badly cropped, out-of-focus or redundant images to make page building a breeze. |
| Be selective when adding images to a page: fewer, better quality images tell a story. | Don’t overcrowd your page with dozens of photos – unless you include a free magnifying glass with your yearbook! |
| Assign photographers to cover events early in the season or recruit event organizers to provide images. Plan ahead to get the book done efficiently. | Avoid downloading photos from your school website, as these are often downsized to make web page loading faster. Get your photos from their photographer for best resolution. |
| Use original high quality photos take on phones an cameras. Photos should be transferred directly from the camera roll to the yearbook. | If a photo appears banded by large black areas, the image is a low quality screenshot. Get the original image to ensure good quality. |
| Include general photos taken around your school to decorate your book – the classrooms, the tech, the facilities, the grounds. Schools change over time, so document it today. | Only use images from your school community, your studio, or the Studio Source content catalogue. Do not download images found in a general web search – avoid copyright and resolution issues. |
Yearbook Photo Albums
Photos in the Yearbook Photo Albums will be used in the Page Editor to build your pages. Photos can be uploaded to yearbook photo albums in the Book Manager or in the Page Editor.
Creating Albums
Albums can be created on the Yearbook Photo Album page or in the Page Editor from the Photos tab.
To create an album:
- Click on the +New Album button
- Name the Album
- Click Add Album
The new album will appear in alphabetical order.
Adding Photos to Albums
Photos can be added to an album on the Yearbook Photo Album page or in the Page Editor from the Photos tab.
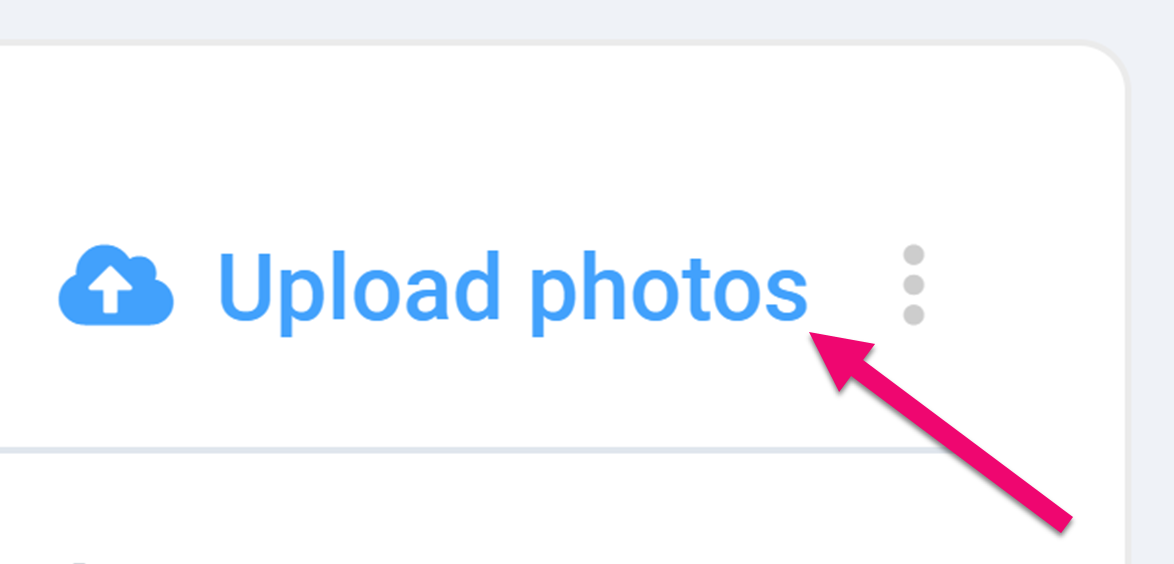
To add photos to an album:
- Click on the Album you want to add photos to
- Click Upload Photos
- Select the Photos you want to upload from your computer
- Click Open to start the upload
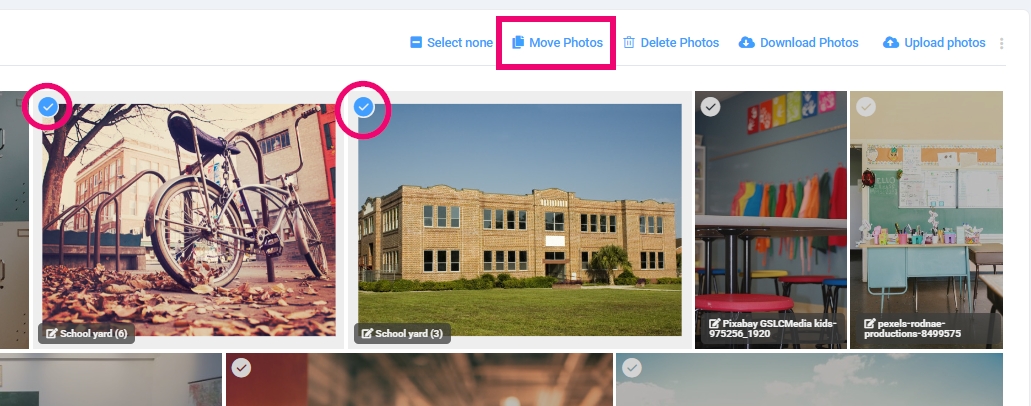
Moving Images Between Albums
- Click into the Photo Album containing the photos that need to be moved
- Choose to Select All the images in the album or Select Individual Images by checkmarking them
- Click Move Photos
- Use the Dropdown List to select the new album folder you are moving the photos to
- Click on Move Photos to complete the transfer
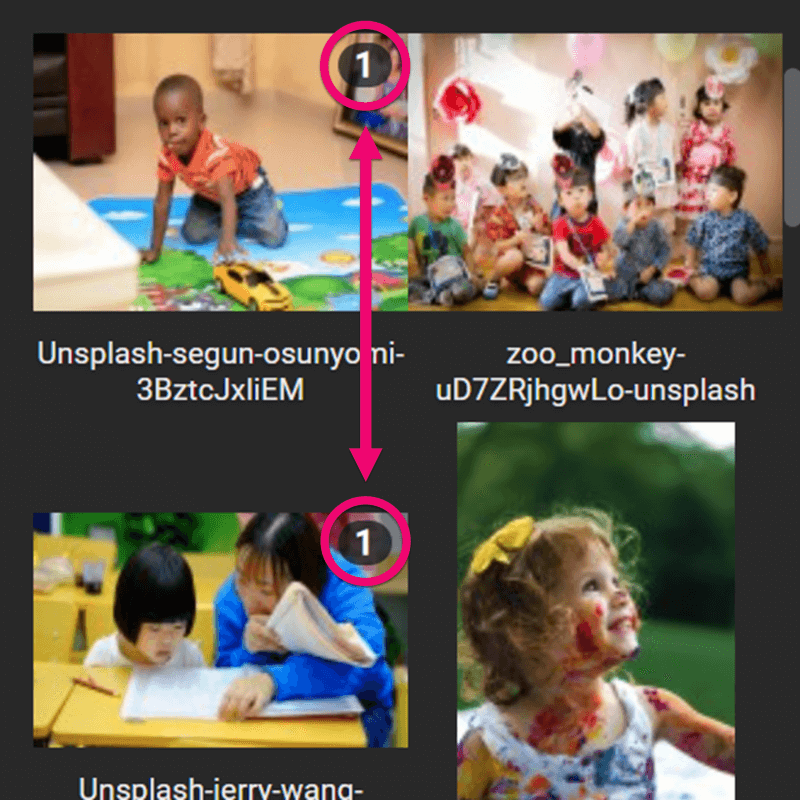
Used Image Indicator
Once a photo has been used on a page, it will display a Used Image Indicator in it’s album within the Page Editor. The indicator will show the number of times the photo has been used in the entire book.
Note: The Used Image Indicator will appear or add another image count when you move to another page.
Sorting & Searching Photos
Sorting
Use the album’s Kebab Menu in the Book Manager or Page Editor to:
- Show or hide file names
- In the Book Manager, file names appear at the bottom left corner of the photo previews
- In the Page Editor, file names appear under each photo within their album
- Sort images by file name or upload date
- Change the order in which they are displayed
Searching
In the Page Editor, search for a photo’s file name within all albums by typing into the search field on the Photos Tab or the search field within each individual album.