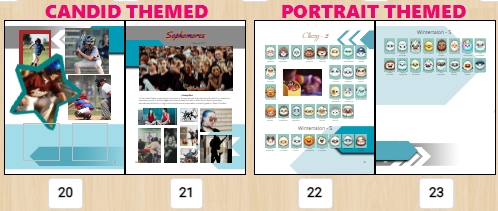
Themes, Layouts, Backgrounds & Clip Art
Plic offers predesigned arrangement of frames, backgrounds, clip art and overall book them theming to create a memorable and attractive yearbook. Studio Source Yearbooks also offers advisers the opportunity to use other sources for decorations and full-page layouts.
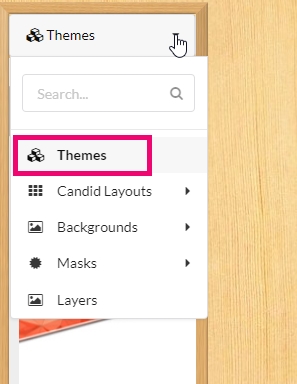
Themes
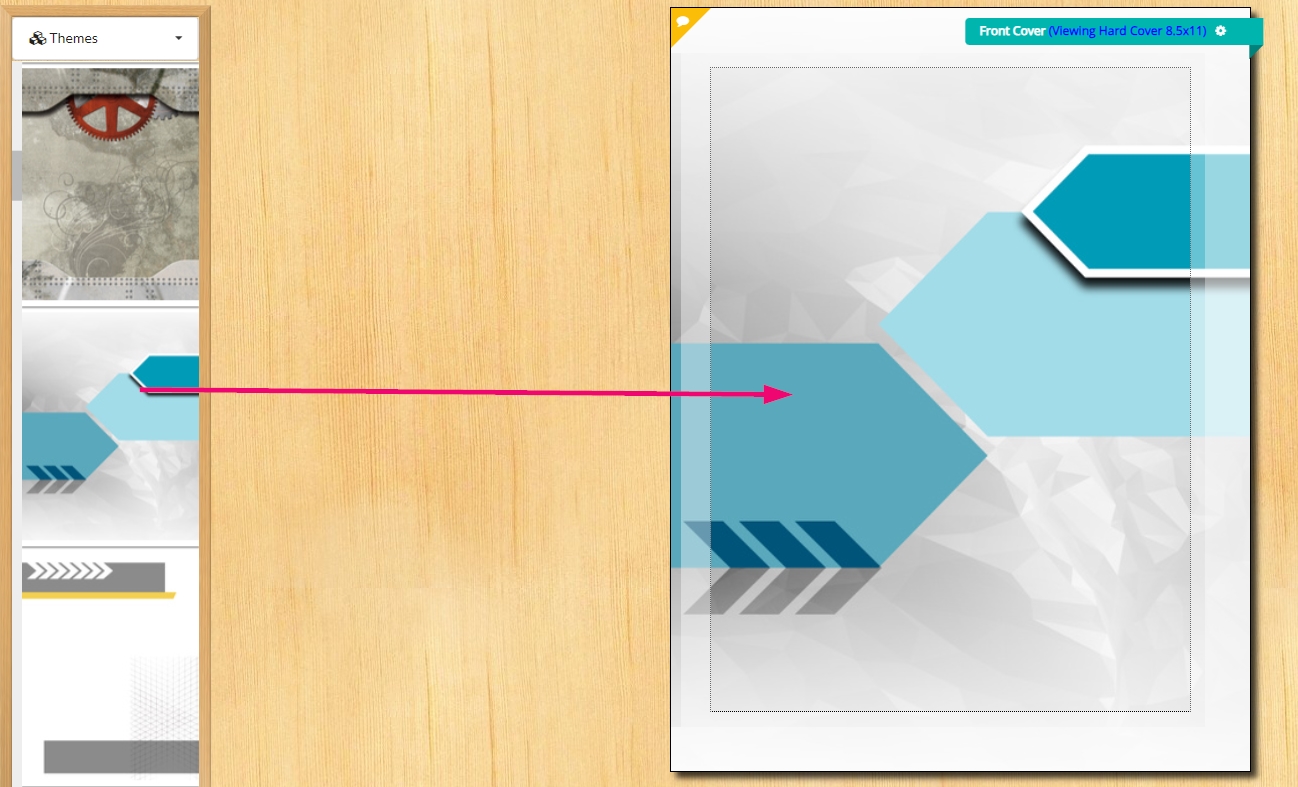
Themes are offered on the left-side preview pane in the editor. Themes apply backgrounds to your cover and all interior pages. Candid pages and portrait pages have different themed backgrounds.
To add a theme, navigate to your cover page, then drag one of the designs to your cover.
Theme backgrounds always apply to the bottom layer of your canvas. Custom backgrounds may be added on top of a theme background and removed via the page menu’s Revert Background option.
To remove a theme from your book, access the cover page. Click on the page menu gear in the top outside corner. Choose Clear Theme. All theme backgrounds will revert to a blank white page.
Layouts
Layouts add arrangements of empty image and text frames to candid pages. Layouts may be completely customized – add images and text, and tweak the size and arrangement of frames on your page You can try out new layouts on the same page, even after adding photos & text to the page.
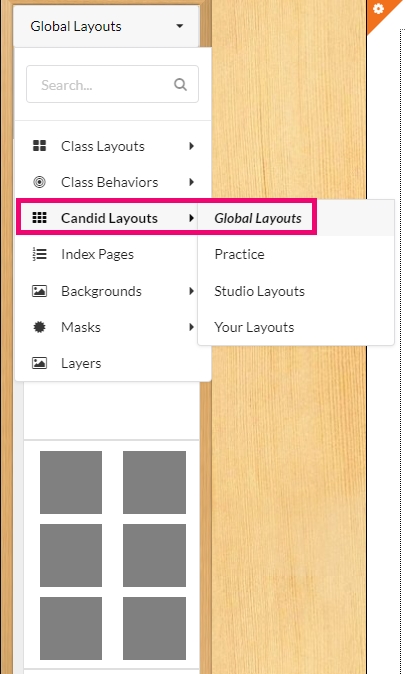
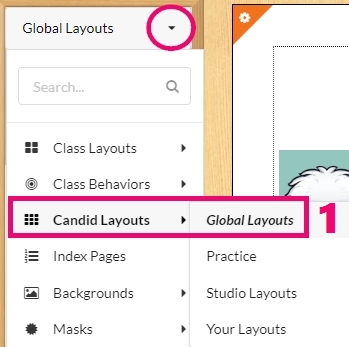
Access the Candid Layouts section on the right side pane. The Global Layouts area will offer some general designs to add to your page – simply drag and drop to apply them.
Auto-collage layouts
Quickly add a full-page collage to your page in the following manner:
- Access the Candid Layouts > Global Layouts folder on the right-side pane.
- Drag the collage layout to your page (1st layout from the top).
- Confirm that you would like to replace the current candid page.


4. Select the images to use and the collage settings to apply to the page:
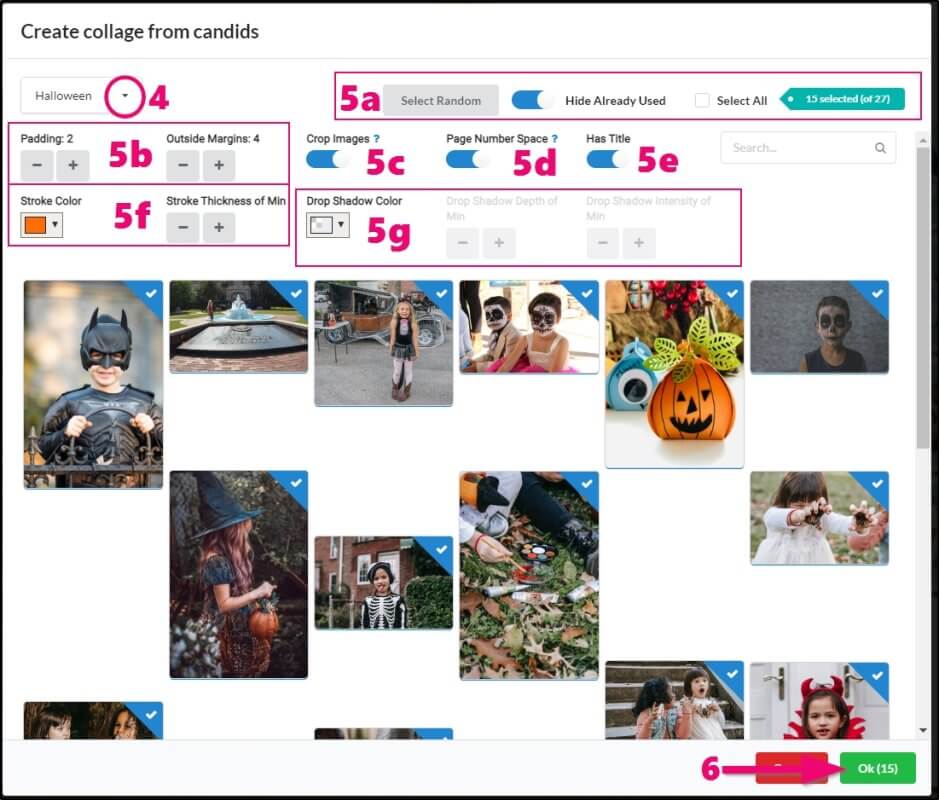
- a) Choose which images to include in the collage individually, or select a random number of images. Turn on the Hide already used toggle to avoid adding an image twice to your book.
b) Configure the spacing between images (padding) and the page outside margins.
c) Enable the images to be cropped (recommended)
d) Optionally turn on page number space to avoid overlapping the page number.
e) Leave a space for a page title using the Has Title toggle.
f) Apply a stroke (border) color around your images, and set the stroke thickness.
g) Apply a drop shadow color your images, and adjust the shadow depth and intensity. - Click OK to generate the collage.
Collages may be adjusted after their creation. Drag on the edge of any image frame to resize the width or height of all images aligned to the selected image or select an individual image to access its cropping tool, to reposition an image within its frames.
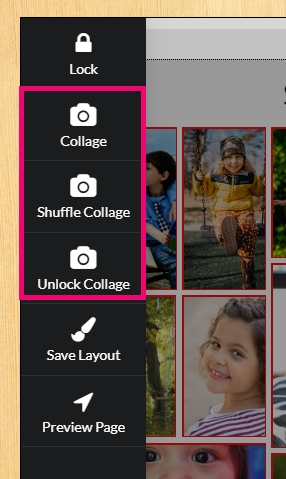
Other tools are available in the page corner menu:
- Click Collage to redo the current collage arrangement with new images and/or settings.
- Click Shuffle Collage to reconfigure the arrangement.
- Click Unlock Collage to select individual images reposition images within the grid.
Deleting a layout from a page
To remove all images, text and shape frames from a candid page (added manually of via a candid layout), follow these steps:
- Access the Candid Layouts > Global Layouts folder on the right-side pane
- Drag the empty page layout (2nd layout from the top).
- Confirm that you would like to replace the current candid page.

Saving a custom layout
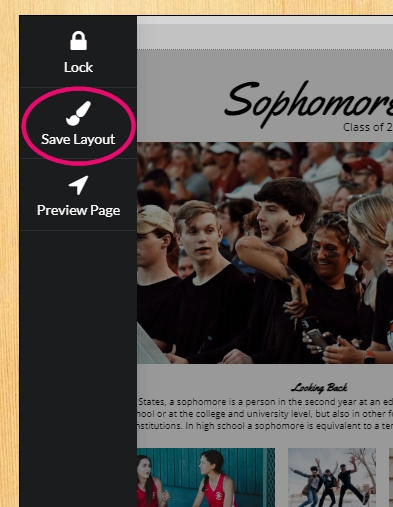
If you have created a custom page design that you would like to reuse on other pages of your book, you may save the layout.
- Click on the page settings gear in the top outside of the page.
- Choose Save Layout.
- Give a name to your new layout.
- Choose to save the layout with or without candid images retained.
- Click Ok.
Your layout will now appear under the Your Layouts option of the left-side Layouts menu.
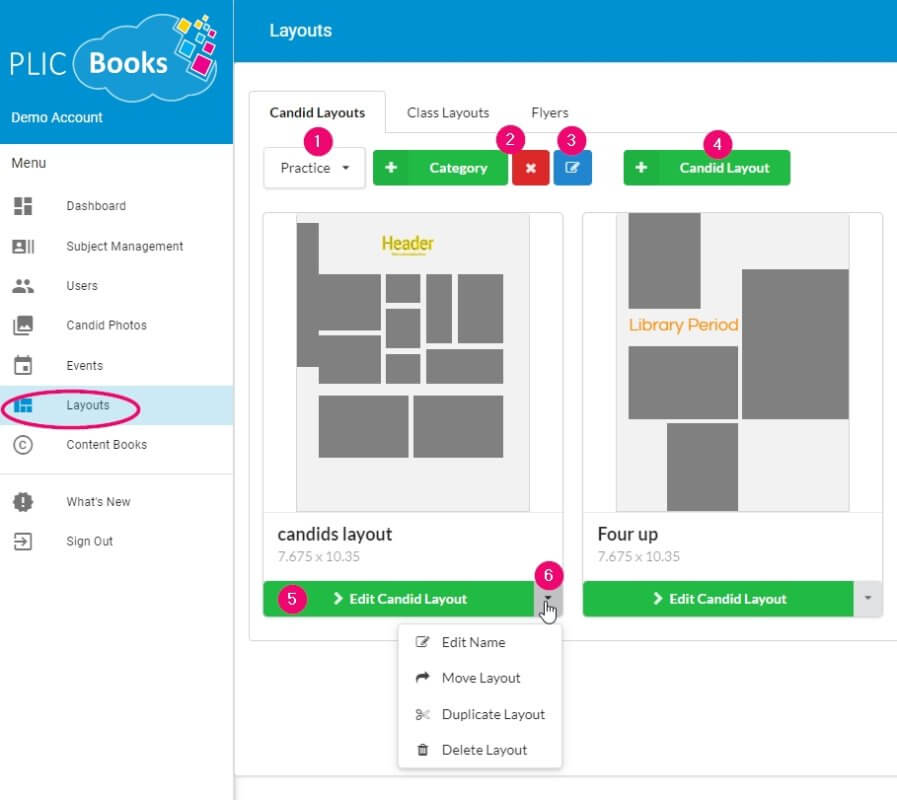
Managing saved layouts
To manage saved layouts from the editor, click on the top right burger menu, then choose Dashboard. In the Dashboard, click on the Layouts option on the left-side menu.
- Review saved content in your category folders.
- Add and remove categories.
- Edit category names.
- Create new candid layouts in a special layout editor.
- Edit saved candid layouts.
- Move, duplicate or delete saved layouts.
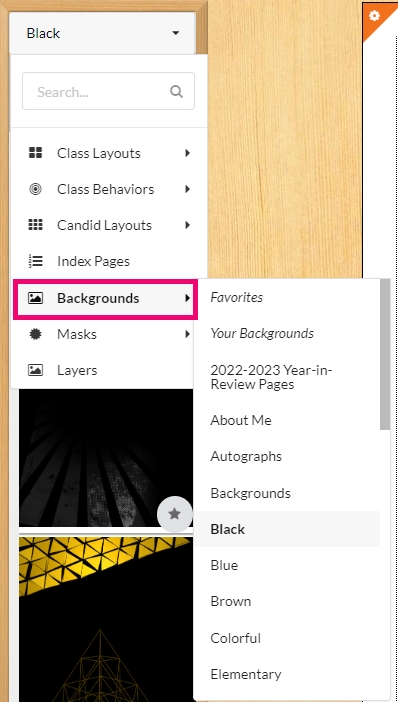
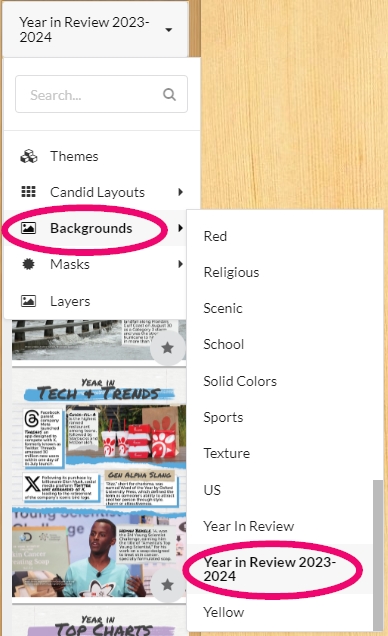
Backgrounds
Plic offers a collection of backgrounds on the left-side pane. Access the Backgrounds options, then review your options under the color- and grade-themed categories.
To add a background to your page, simply drag if from the pane to the page. Note that you can cover up a theme background by dragging a new background on top of it.
Plain color backgrounds
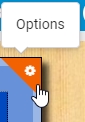
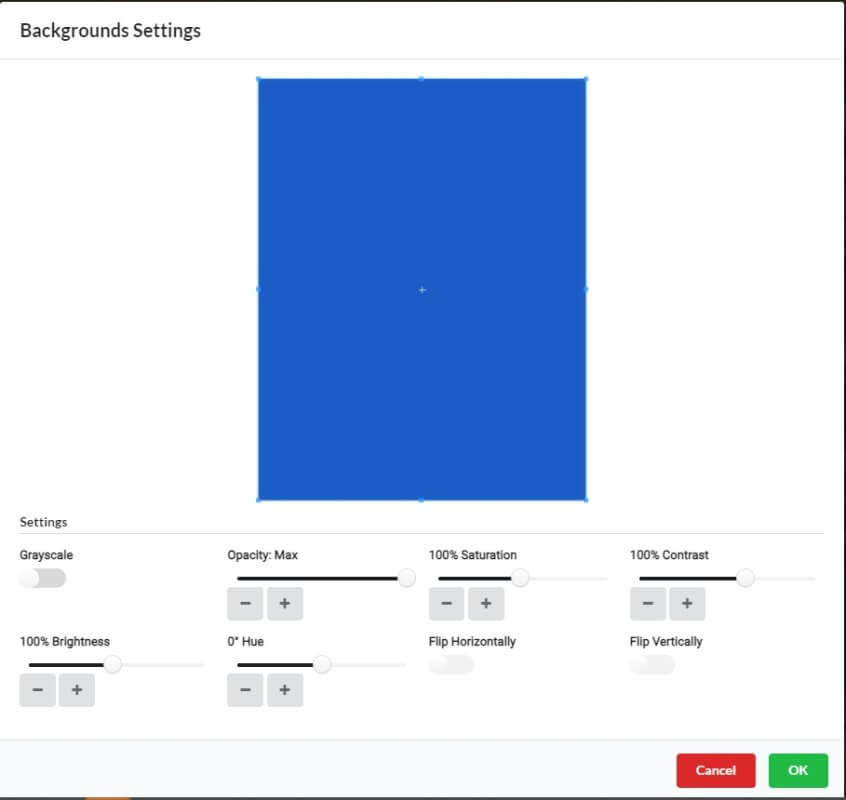
To add a plain color to your background, click on the Options gear wheel in the top corner of the page. Choose the Backgrounds settings tab to view the color settings options for the selected page.
Change the hue setting to adjust the color, then adjust the saturation, contrast and brightness options to change the intensity/shade of the color. The opacity option will make the background translucent.
To remove color from the page, return to the Options gear in the top corner of the page, and choose Revert Background.


Learn about the Studio Source Content Catalog below – this is your best source for acquiring high resolution copyright-cleared backgrounds for your book.
Adding your own backgrounds
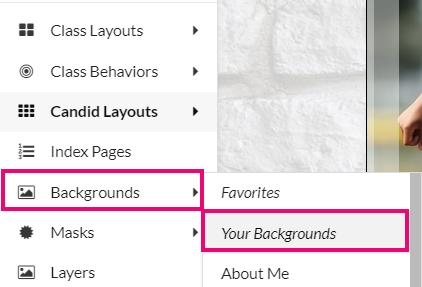
To add a custom background to your Plic collection, access the Backgrounds option on the left-side pane, then choose Your Backgrounds. Click on Add Backgrounds at the bottom of the pane to upload a jpg file that you wish to use as a background. Note that images added to the Backgrounds area will apply to fill the canvas.
If you want to use an image as a color block element or a banner, upload the file instead to a Candid image folder – this will enable the image to be dragged to the canvas like photo, then resized on the page to fill a particular area.
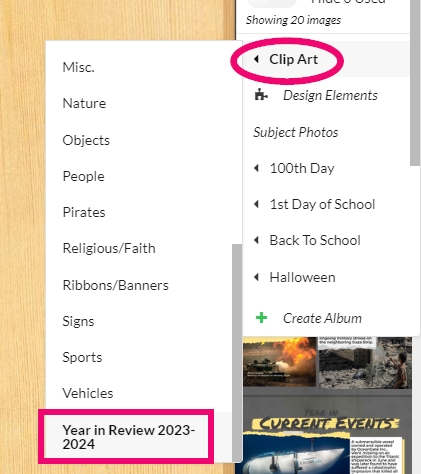
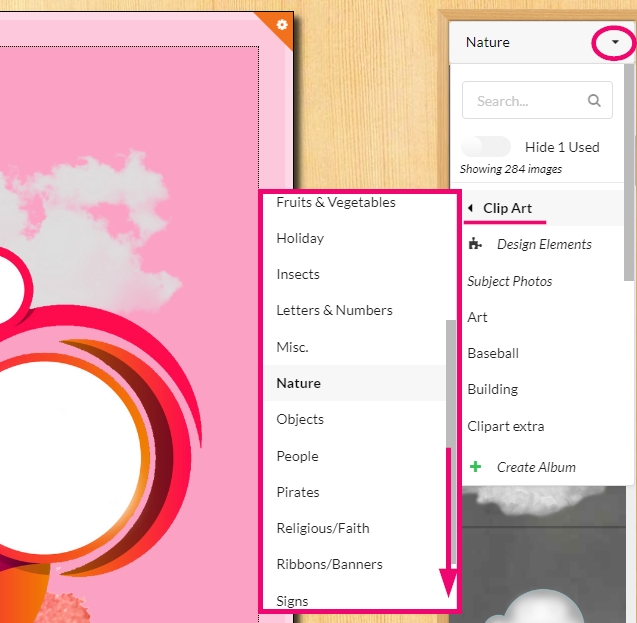
Clipart
Plic includes a collection of clipart in the right-side content pane, organized into thematic categories. Simply drag-and-drop any clipart onto your canvas, and resize it as you would any other image.
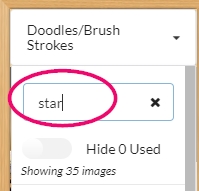
Use the Search option at the top of the right-side content pane to search for particular types of images (eg. star, flower, football).
Click the Hide Used button to only show content that is not already on a page in your book.
Tip: Generate a catalog of the design elements including in your Plic software – learn more about this Plic dashboard feature.
Additional Resources
The Studio Source Free Graphics Library
Access thousands of backgrounds and clipart for free using the Studio Source Graphics Library! Search for particular styles, themes, and colors to create a stylish yearbook, with no fear of copyright or resolution issues.
Important: The library requires a login to the Studio Source Dashboard to download content. If you are a student/volunteer, you can browse the collection without a login, just make a note of the product ID numbers to pass to your advisor so they can download the content, or add content to the cart and ask your adviser to log in for you.
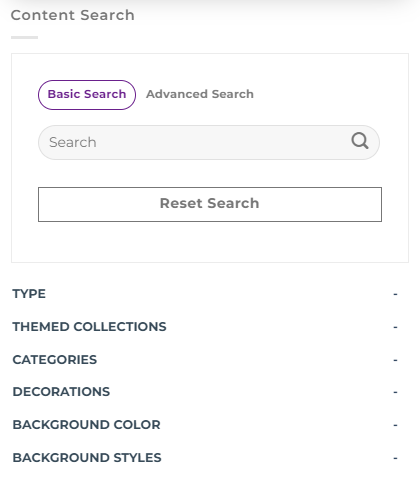
To download from the library:
- Use the Search feature to look for content by keyword, or
- Use the Filters in the left menu
- Locate one image or multiple images you want to download
- Click Add to Cart under each image preview
- Click Checkout
- Login with your Studio Source Dashboard Account (If you do not have one, ask your advisor to assist.)
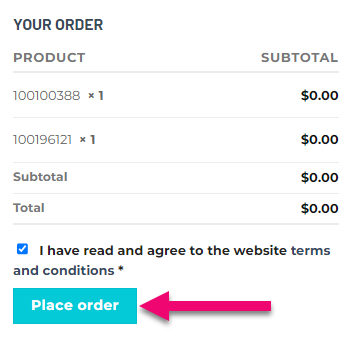
- Check the Terms and Conditions checkbox
- Click Place order (Don’t worry, no charges will be made to you personally or your yearbook account.)
- Download Links for your ordered items will appear and an email will arrive in the inbox of the person associated with the Dashboard account used to checkout. The items will be bundled into one or more larger zip files, so you won’t need to download each item separately.
- Unzip any .zip archives on your computer before uploading them to Pixami. Upload jpg format backgrounds to a Candid folder, and png format clipart to either a candid folder or the Clip art folder under Pixami’s Photo tab.
About Me Pages
Studio Source offers specialty pages to allow students to customize their books with their name, memories and favourite things of the year.
To add About Me pages:
- Navigate to a blank page (or drag a blank page to the front or end of your book preview ladder)
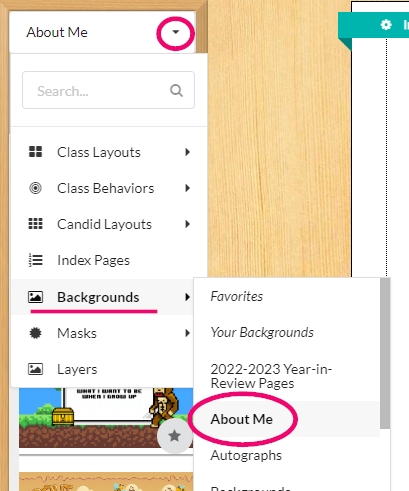
- Access the Backgrounds option on the left-side pane.
- Select the About Me album
- Click the page of your choice to apply it to your book.
Year in Review Pages
Studio Source offers all schools a selection of premade Year in Review pages to add to your yearbook. News, sports, entertainment and other topics are covered with copyright-cleared images. Add your favorite topics to your book, or include all eight pages. New content is added usually in late February to mid-March, covering the previous calendar year’s events.
To add a Year in Review with a preset background:
- Navigate to a blank page.
- Access the Backgrounds option on the left-side pane.
- Select the current year in review album
- Click the page of your choice to apply it to your canvas.
To add a Year in Review with your own background choice:
- Navigate to a blank page.
- Access the Backgrounds option on the left-side pane.
- Add your choice of backgrounds to your page
- Access the Clip Art folder on the right-side pane
- Select the current year in review album
- Drag and of the page elements to your canvas
- Resize to fill the canvas over your background.