Candid Page Design
Understanding Frames
Pages are designed in the editor using images, shapes and text. Photos, clip art, shapes may be dragged from the preview pane on either side of the page to build your page composition.
Once an element is added to the page, it appears in a frame that may be selected. Selected frames display a blue border with handles around them.
Image Frames
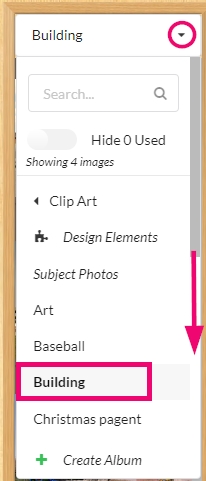
To add a photo to your page, choose one of the Candid image folders option on the right side pane.
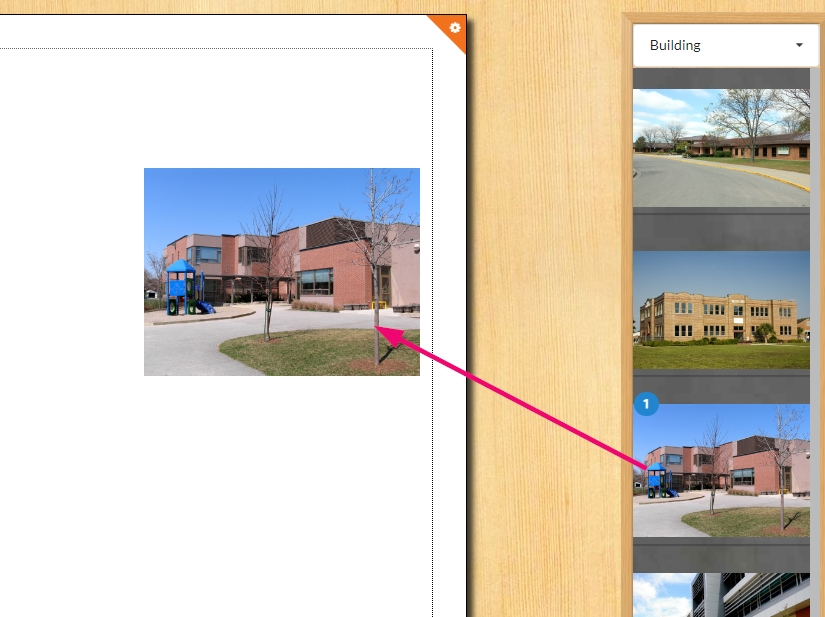
Locate an image inside the folder, then drag it onto your canvas.
The image will appear inside a frame, where you can adjust its position, size, shape and other attributes.
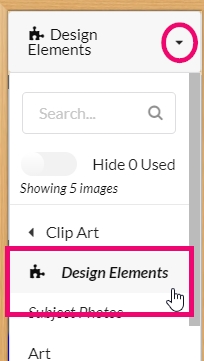
To add an empty image frame, choose the Design Elements option on the right side pane.
Drag an empty image frame to your page, where you can reposition and resize it.
When you select an image frame on your page, a toolbar will appear to provide editing options.
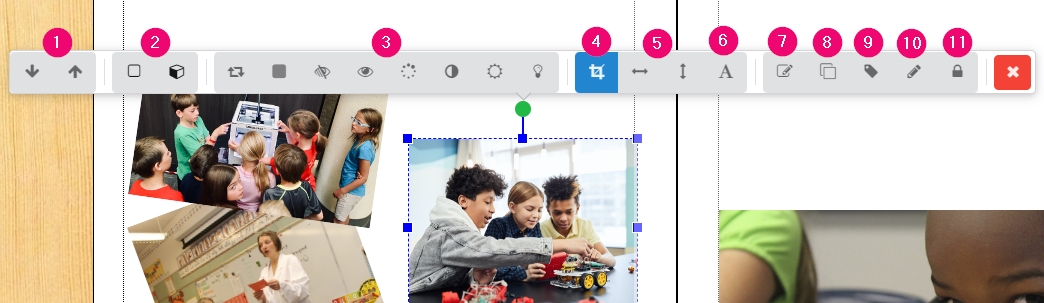
1. Frame order (move up/down)
2. Border & shadow
3. Image effects
4. Image cropping
5. Flip horizontal/vertical
6. Text caption
7. Apply effects to all elements on page
8. Duplicate
9. Image tagging
10. Manual position & size
11. Lock in place
Tip: Change where the toolbar is positioned on your page from your settings options.
- Click on the green burger menu in the top right corner of the page.
- Choose My Settings.
- Access the Toolbar Location dropdown: keep the toolbar floating above the selected frame, or lock it to the top or to side of the page.

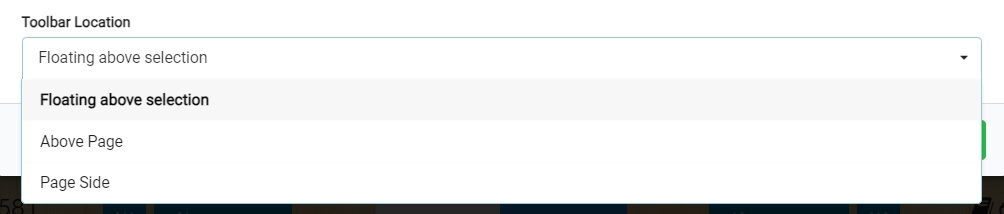
Image Size & Position Tools
To move an image to a new position on your page, simply click down on it and drag it.
To resize an image frame, pull on any of the blue handles around the frame’s edge. The frame will resize proportionally when you resize it on the canvas directly, making the frame larger or smaller.
To change the cropping of an image within its frame, access the cropping tool. Turn off “Lock Aspect Ratio” to change the shape of the frame itself.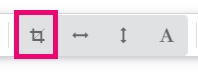
To precisely resize or position an image, use the Edit position and size option on the toolbar to set a numerical value for exact page coordinates or frame height/width size.![]()
To swap one image with another, drag the new image on top of the frame and drop it. Confirm that you want to replace the current image.
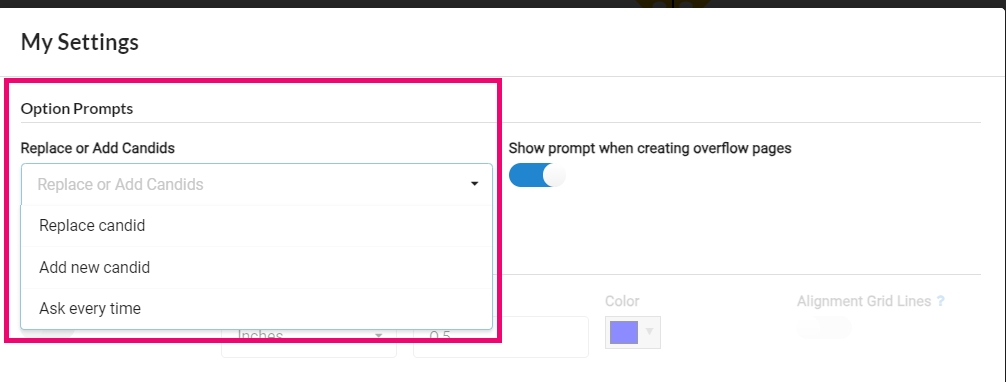
Image swapping behavior may be customized under the Settings menu.
1) Click on the green burger menu in the top right corner of the editor.
2) Choose My Settings.
3) Select one of the three options for candid swapping: always replace an image in a targetted frame; always add a new candid frame on to the page (never swap) or ask every time. The last option provides you with the most flexibility, particularly if you are adding a lot of images to a page.
To rotate an image, click on the rotation handle and drag it to spin the frame.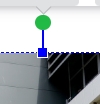
To duplicate an image, select it, then access the Duplicate button on the toolbard. Make an exact copy of an image frame on the current page or add the copy to another selected page. You can also move the current frame to another page by adding a destination page number.![]()
Note that standard keyboard shortcuts also work to copy, cut and paste selected frames.

Click on the lock icon on the tool bar to prevent an image frame from being moved, or swapping the photo from the frame. Click on the lock icon over the image frame to unlock it.![]()
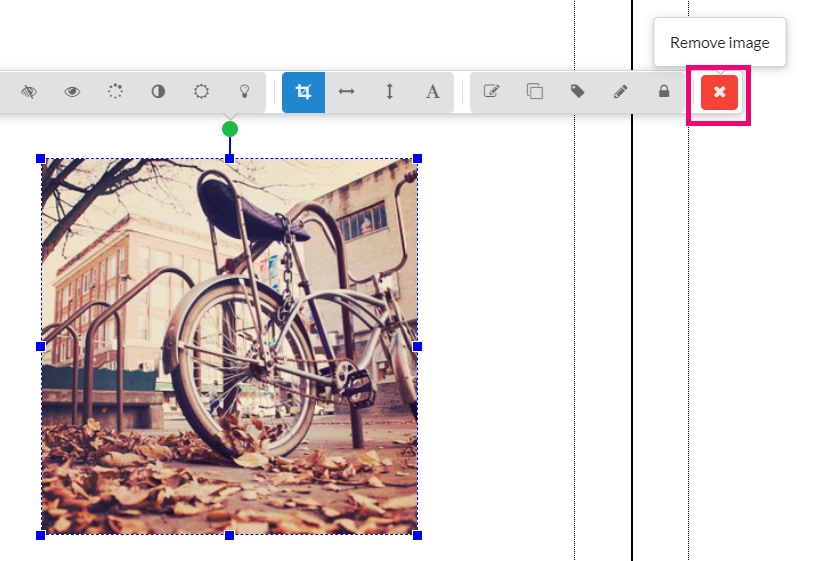
To delete an image, simply selected it and hit the delete key on your keyboard.
You may also click the red X button on the floating toolbar to remove the image, leaving the frame in place.
To flip an image horizontally or vertically, use the flip tools.
All elements are layered on your page in the order they were dropped. To move an image up or down the layer stack, click on the up or down arrows on the tool bar. Each click moves the image up/down one position.
Image Borders, Shadows & Shapes
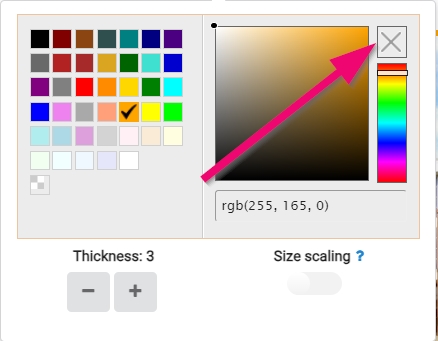
Add a border around your image, in your choice of colors and widths. Turn on Size Scaling to resize the border proportional to the image size on the page.![]()
Turn off the border by clicking the X in the top right corner of the border editor.
Add a shadow to your frame, in your choice of color, depth (spread), intensity, scale and rotation.![]()
Turn off the shadow by clicking the X in the top right corner of the shadow editor (in the same manner showed for the border editor).
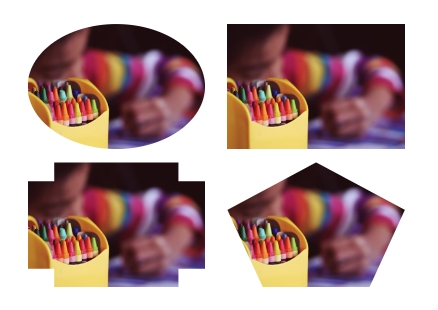
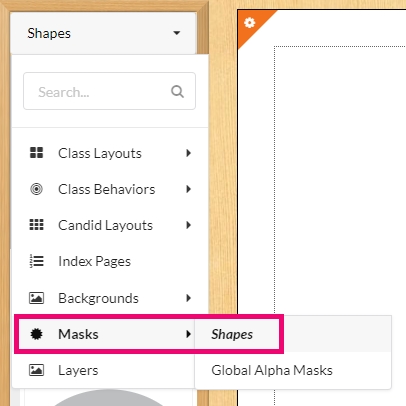
To change the shape of an image frame, access the Masks >Shapes option from the left-side pane. Drag any of the shapes onto an image frame to apply it.
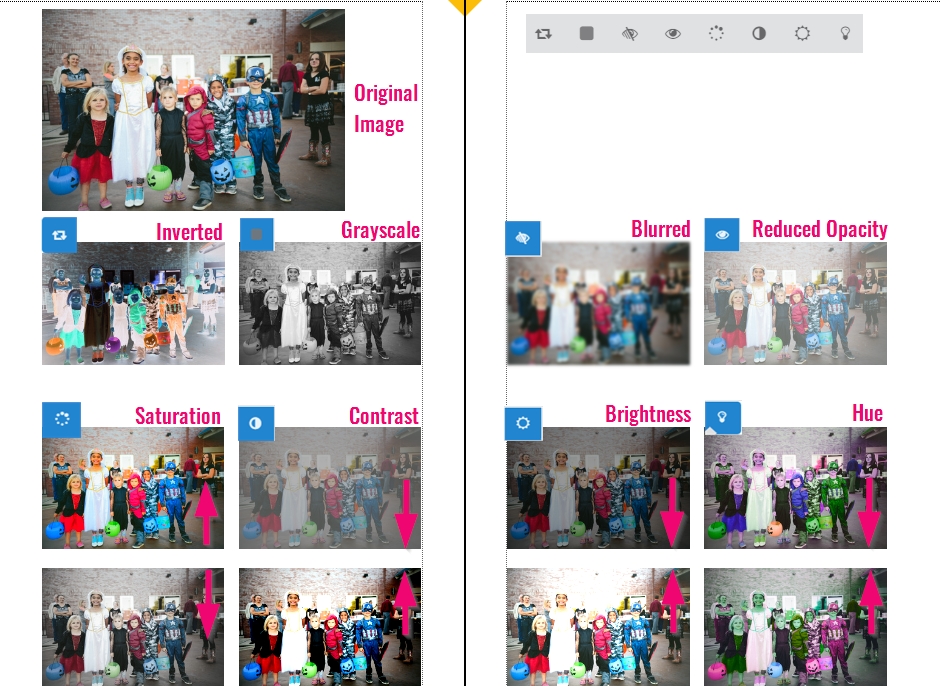
The toolbar offers an array of decorative image effects which may be used in combination with one another.
- Invert the colors of your image
- Greyscale transforms the image to b&w.
- Blur out an image for an interesting background effect.
- Reduce the opacity to allow the background to show through.
- Saturation makes color more or less intense.
- Contrast adjust the relative value between light and dark areas.
- Brightness lightens/darkens the image.
- Hue shifts the colors.
Tip: Be very careful when adjusting brightness, contrast, saturation and hue effects when correcting images – if your monitor is not professionally color-calibrated, you may find your images do not appear as intended on your printed page.
To create a uniform look on all your images on your page, use the Apply Effects to Entire Page option.
Select a single frame then click the Apply Effects to Entire Page to copy its attributes to all other frames on the page. This is a short-cut to adding borders, shadows and other effects uniformly to one side of a spread.![]()
Text Caption Under Image
Add the image file name below the frame.
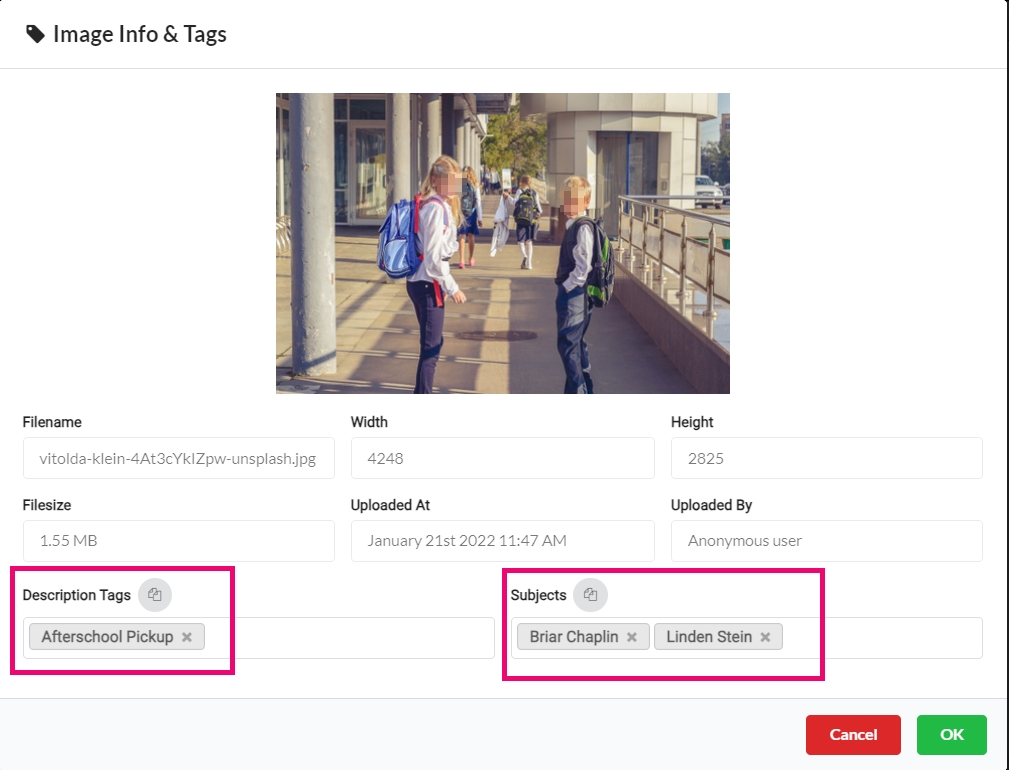
Image Info & Tagging people
Access full details about the selected image (filename, dimensions, size, upload info). Add descriptive info about the image, and tag it with the names of the people who appear in your portrait set — which is important if you want to create an index.![]()
Creating a Grid Layout
To create an evenly spaced grid layout, drag a single empty image frame from the Design Elements area on the left-side pane to your canvas. Resize and reposition the empty frame to cover the entire area where your grid will appear.
Next, select choose the Grid option on the frame tool bar. (Note this option is not available on frames that include images). Split your frame into rows and columns, adjusting the spacing between the frames as you like.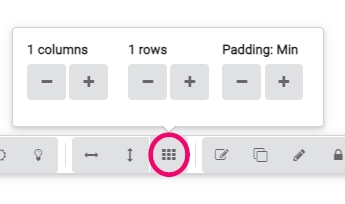 Once the grid has been created, drag photos into the empty frames. Use the cropping tool to adjust the image within the frame.
Shape Frames
Shapes and lines are available in the Design Elements area of the right-side pane. Drag a shape or a line to place it on your page. Shapes are moved and resized in the same manner as image frames and have all the same toolbar features as image frames.
As soon as you drag a shape onto your canvas, the Masks > Shapes window will open on the left-side pane to allow you to easily change from the default shape to one of the many options.
Text Frames
Text Size & Position
Add a blank text frame to your page by double-clicking on the page. A new frame will appear, ready to be customized.![]()
Or access the Design Elements folder on the right-side pane, then drag a new text element from the pane to your canvas.

Click once on a text frame to edit its contents – start typing, or selecting text within the frame to apply options from the text toolbar.
Click again on a text frame to select the frame itself. The frame can then be moved or resized.
To rotate a text frame, select it then drag on the green handle to spin the frame.
To delete a text frame, select it. Click the red X icon on the toolbar.
All elements are layers on your page in the order they were dropped. To move a text up or down the layer stack, click on the up or down arrows on the tool bar. Each click moves the image up/down one position.
To make a copy of a text frame, select it, then access the Duplicate button. Make a copy of the text frame on the current page or another selected page or move the selected frame to another page by adding a destination page number.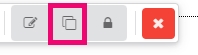
Click on the lock icon on the tool bar to prevent a text frame from being moved, or swapping the photo. Click on the lock icon over the image frame to unlock it.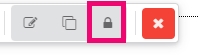

Font Attributes
When a text frame is selected, a toolbar will appear to offer editing options.

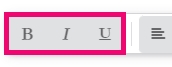
1. Font attributes (bold, italics, underline)
2. Text alignment
3. Font selection
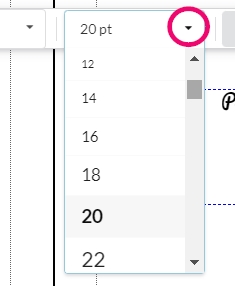
4. Font size
5. Text and background color
6. Line height spacing
7. Move frame up/down layer
8. Stroke, border, shadow & opacity
9. Apply style to entire page
10. Duplicate selected frame
11. Lock in place
Choose among the preset fonts available in the text editor.

To view a list of all fonts available, go to the Plic Dashboard to generate a content catalog.
Select text within the frame to apply a preset font size.
Select text within the frame to apply bold, italics or underline attributes.

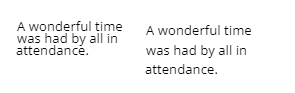
Text Alignment
Select text within the frame to justify text to the left, center, right or to full alignment. ![]()

Select text within the frame to choose a preset line spacing height.
Text Color & Outline
To add a color highlight to text, select the text within the frame. Add color to the text itself, and/or apply a background color behind the text
Add a contrasting outline around your selected text in your choice of colors and thickness.
![]()
Turn off the stroke by clicking the X in the top right corner of the border editor.

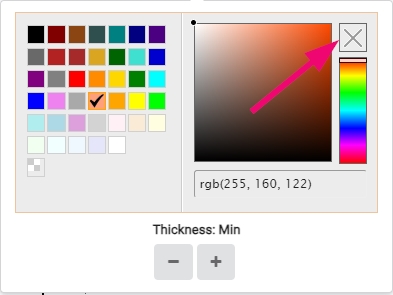
Add a border around your text frame in your choice of color and thickness.
![]()
Turn off the outline by clicking the X in the top right corner of the border editor.

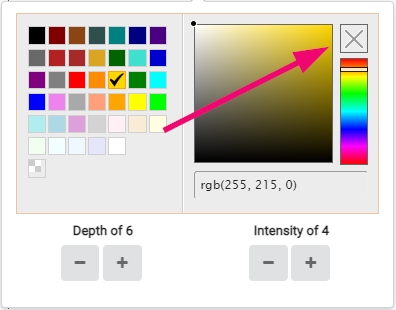
Add a drop shadow to selected text.
![]()
Turn off the shadow by clicking the X in the top right corner of the border editor.

Change the opacity of the entire text frame.
![]()

Copying Text Attributes
Text effects may be copied to all elements on a page in a single click.Select a text frame then click Apply Effects to Entire Page to copy its attributes to all other text frames on the page. 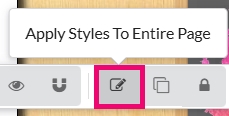
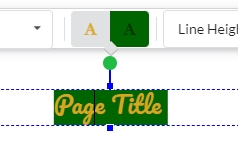
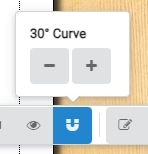
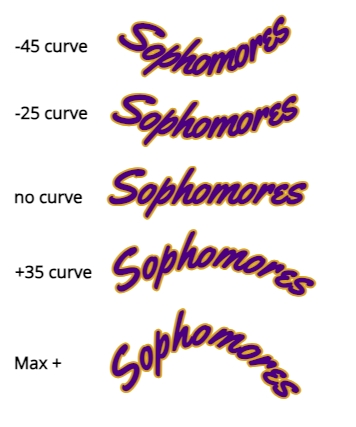
Curved Text
Apply a curve to selected text. Click on the curve icon, then use the – / + buttons to adjust the level of the curve for your text.
![]()
Deleting frames from a page
Select individual frames to delete them from the page, either using the delete key or the toolbar’s red X icon. To clean off an entire page, use the steps outlined in Themes, Layouts & Decorations article.