Image, Text and Shape Frames
Use Advanced Frame techniques to enhance your yearbook’s design. Learn all about the basics of image, text, and shape frames, including adding, selecting, moving, and resizing in the Frame Basics article.
Image Frames
Image frames hold photos, background textures, and clipart.
Cropping & Repositioning Images

To crop & reposition an image inside its frame:
- Select the image
- Click Crop on the toolbar
- Resize and Reposition the yellow border to achieve the desired image cropping
- Click Apply
Note: This process is not destructive to the image, and you can always recrop it to expose more or less of the image in its frame.
Borders, Drop Shadows, & Edges
To add a border:
- Select the image
- Select Borders in the frame menu
- Adjust the Border Slider to change the width
- Access the Color Chip to change the color
- Check the box to Apply to All images, if desired
- Click Done

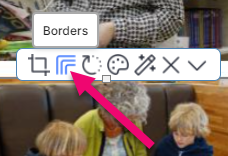
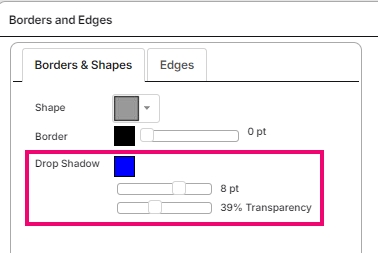
To add a drop shadow:
- Select the image
- Select Borders in the frame menu
- Adjust the Drop Shadow Slider to increase the width
- Click on the Drop Shadow Color Chip to change the color
- Adjust the Transparency
- Check the box to Apply to All images, if desired
- Click Done
To change the border shape:
- Select the image
- Select Borders in the frame menu
- Click the Shape Dropdown Menu
- Select new shape
- Click Done
Note: To remove the border, repeat steps 1 & 2 above, then click Remove Border.
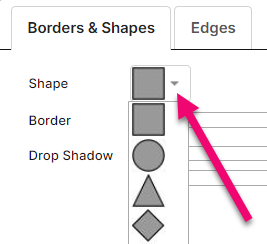
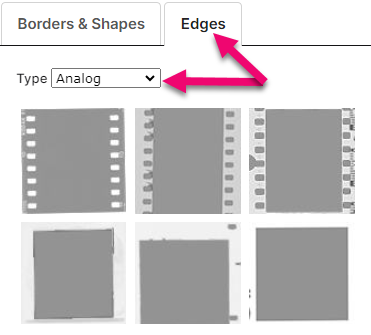
To apply decorative edges:
- Select the image
- Select Borders in the frame menu
- Click the Edges Tab
- Select the type of edge from the dropdown menu
- Select a decorative edge
- Click Done
Adjusting Image Fill
By default, images fill the frame area, fitting either to the maximum height or width of the frame (which ever is reached first), centered on the mid-point of the image.
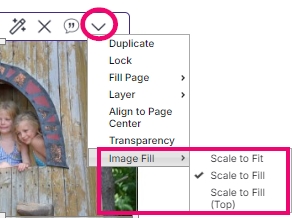
To adjust the image fill to expose the entire image:
- Select the image
- Select More in the frame menu
- Click Image Fill
- Choose Scale to Fit
To orient the photo from its top edge and fill the frame:
- Select the image
- Select More in the frame menu
- Click Image Fill
- Choose Scale to Fill (Top)
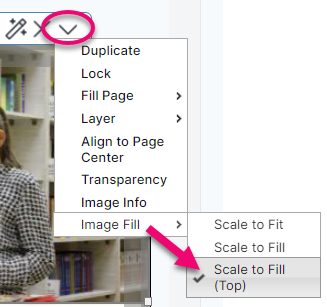
Tip: To return the image fill back to it’s default position, choose Scale to Fill in the menu.
Replacing & Autofilling Images
To replace an image:
- Click & Drag a New Image from an album towards the frame with the image to be replaced
- Drop the new image when the Target Frame displays a green border
If your page/spread contains a layout, you may use autofill to add or replace images on the page.
To autofill multiple image frames:
- Navigate to the image folder of your choice
- Click Auto Fill above the preview area
- Choose one of the two options
- Replace existing photos
- Only fill empty photo frames
- Click OK
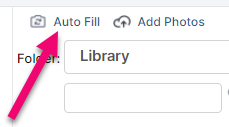
Image Effects
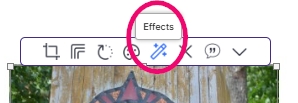
Apply effects to your images using the Effects options.
To begin:
- Select the image
- Click Effects
- Choose between the options described below
- Adjust – Brightness & Constrast, Auto-Fix, Sharpen
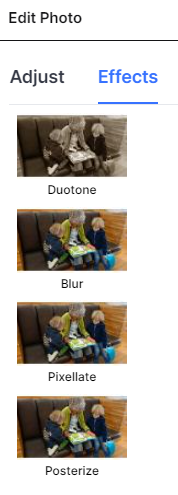
- Effects – Duotone, Blur, Pixellate, Posterize
Note: The Revert button restores the selected image to its default levels.
Brightness & Contrast, Auto-Fix, & Sharpen
These controls are generally used for image correction.
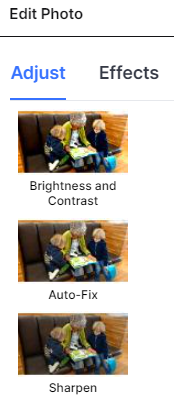
Brightness changes the overall amount of light in your image.
Contrast changes the amount of difference between light and dark areas in your image.
Auto-Fix applies a color, brightness and contrast correction to your image.
Sharpen applies a higher degree of contrast between light and dark edges within an image.
Duotone, Blur, Pixellate, & Posterize
Duotone recolors greyscale images with 2 colors. Choose from 18 options including greyscale and sepia.
Blur defocuses your image. Apply this to soften images and textures for a diffused background effect.
Pixellate adds blurriness to the image in individual single-colored pixels.
Posterize recolors the image with fewer colors.
Note: The effects apply to the frame itself, so any image dropped into the frame will have the selected effect applied to it.
Colorizing an Image

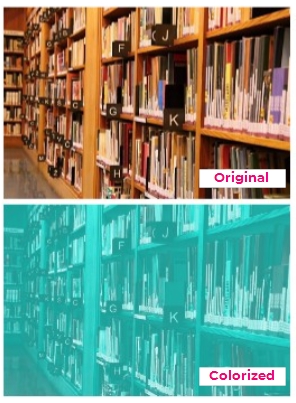
To colorize an image:
- Select the image
- Select Colorize in the frame menu
- Choose a shade on the Rainbow Slider
- Pick a shade from the Gradient
- Click OK
Choose Clear Color to restore an image to its default.
Transparency
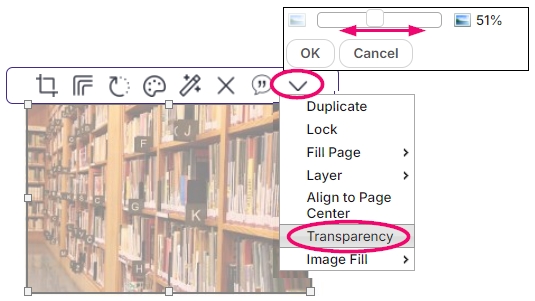
To change an image’s transarency:
- Select the image
- Select More in the frame menu
- Select Transparency
- Adjust the slider
- Click OK
Text Frames
Using Text Frames allows you to type any text you want and change it’s style.
Formatting Text
To customize your text:
- Select the text frame
- Click Edit in the frame menu
- Type your text in the box
- Choose any of the Attributes described below
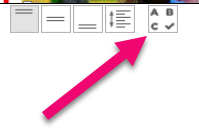
Font Style, Size, & Alignment
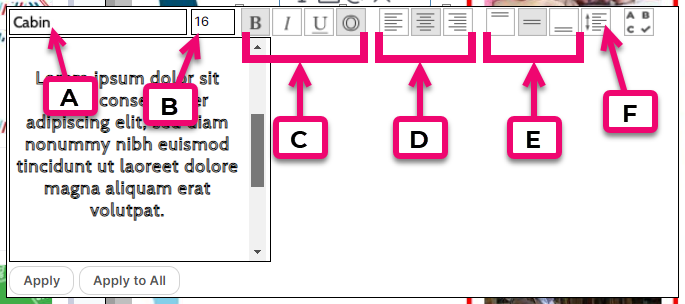
- A. Font Dropdown – Choose from over 100 different fonts!
- B. Font Size Dropdown – Choose a font size or type a custom size
- C. Font Style – Choose Bold, Italic, Underline or Outline
Note: Not all of the available fonts contain styles these.
- D. Horizontal Alignment – Choose among Left-aligned, Centered, or Right-aligned
- E. Vertical Alignment – Choose Top, Center, or Bottom Alignment
- F. Line Spacing – Choose any value between 6 and 144 to adjust the spacing between lines of text
Tip: Choose Apply to set the font type to the selected text frame, or choose Apply to All to set the font to all text frames on the page.
Text Color, Borders, & Drop Shadows
To change the text color:
- Select the text
- Select Color & Borders in the frame menu
- Click the Text Color Chip
- Choose Apply or Apply to All
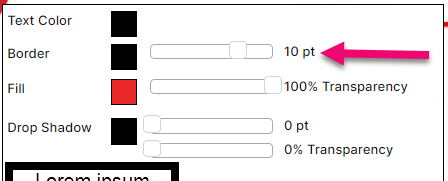
To add a border to the text frame:
- Select the text
- Select Color & Borders in the frame menu
- Adjust the Border Slider for the desired thickness
- Click the Border Color Chip to change the color
- Choose Apply or Apply to All
To change the text frame’s color:
- Select the text
- Select Color & Borders in the frame menu
- Click the Fill Color Chip to change the color
- Adjust the Transparency slider as desired
- Choose Apply or Apply to All
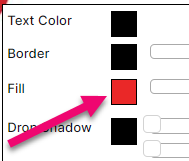
Tip: Change the text frame’s color to make text stand out against busy backgrounds.
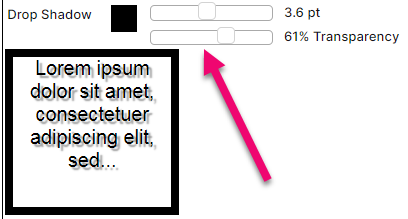
To add a drop shadow:
- Select the text
- Select Color & Borders in the frame menu
- Adjust the Drop Shadow slider for the desired thickness
- Adjust the Drop Shadow Transparency slider as desired
- Click the Fill Color Chip to change the color
- Choose Apply or Apply to All
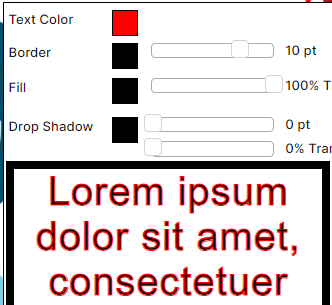
Changing Outlined Text Color
To change the color of outlined text:
- Select the text
- Select Color & Borders in the frame menu
- Click the Text Color Chip to change the outline color
- Click the Fill Color Chip to change inside the outline
- Choose Apply or Apply to All
Spell Check
To run a spell check:
- Select the text
- Select Edit in the frame menu
- Click Spell Check
- Click the text highlighted red
- Select a suggestion
- Click Apply
Troubleshooting and Design Alternatives
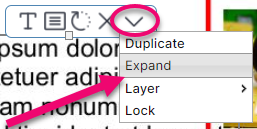
If a student’s full name is not showing in the existing portrait label, you can use Expand to legnthen the text frame to the edge of the adjacent frames.
To expand the text frame:
- Select the text frame
- Select More in the frame menu
- Select Expand
The Studio Source Catalog contains many decorative alphabets and numbers. Each character is saved as a separate png image file to drag & drop onto your canvas.
Look in the Search Filters on the left for Decorations > Alphabets and Numbers to find them.
Check out the Additional Design Elements article to learn about a suggested online tool to generate custom png word art.
Shape Frames
Shape frames display color, and can be bordered and shadowed.
Changing Color & Adding a Border
To change the color:
- Select the shape
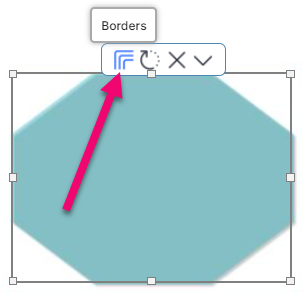
- Click Borders in the frame menu
- Click the Fill Color Chip
- Choose a shade on the Rainbow Slider
- Pick a shade from the Gradient
- Click Done
To add a border to a shape:
- Select the shape
- Click Border in the frame menu
- Adjust the Border Slider for your desired thickness
- Note: For no border, adjust the slider to 0pt
- Click the Color Chip for Border
- Choose a shade on the Rainbow Slider
- Pick a shade from the Gradient
- Click Done
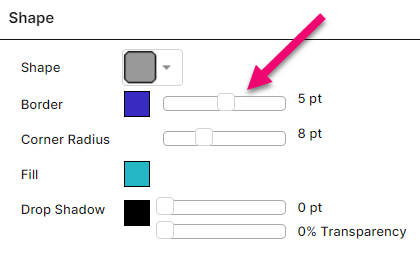
Changing Shape, Adding a Shadow, & Adjusting Transparency
To change the frame shape:
- Select the shape
- Click Border in the frame menu
- Click the Shape Dropdown Menu
- Select the desired shape
- Adjust the Corner Radius as desired
- Click Done
To turn on a shadow:
- Select the shape
- Click Borders in the frame menu
- Adjust the Drop Shadow Slider
- Adjust the Drop Shadow Transparency as desired
- Click the Color Chip to change the color
- Click Done
To adjust transparency:
- Select the shape
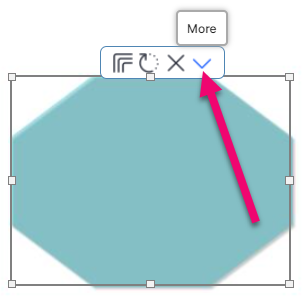
- Click More in the frame menu
- Select Transparency
- Adjust the slider as desired
- Click OK
Using Shapes Effectively
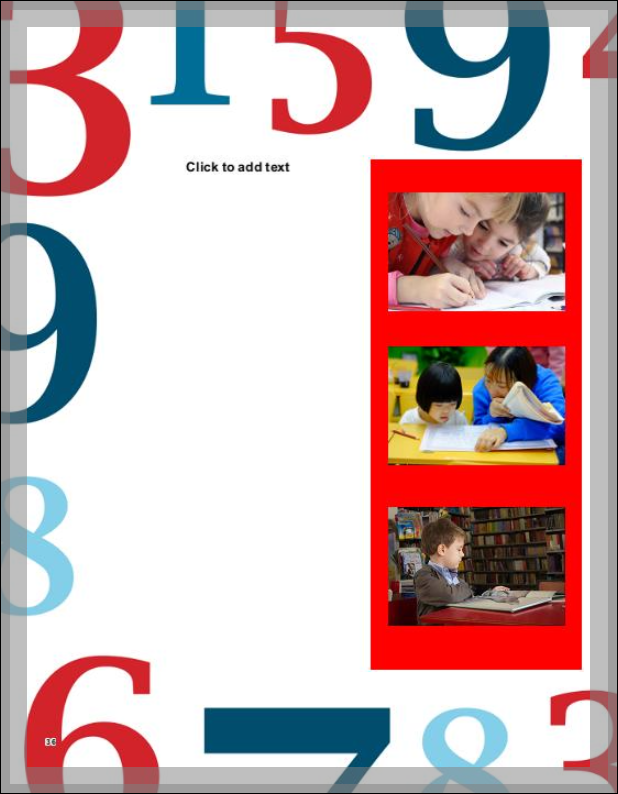
Use shapes to Color Block your page.
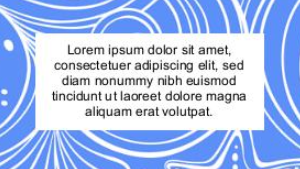
Layer Text Frames over a shape frame to help text stand out.
Create Bounding Boxes by applying a shape with a border and change the fill to the same color as the background.
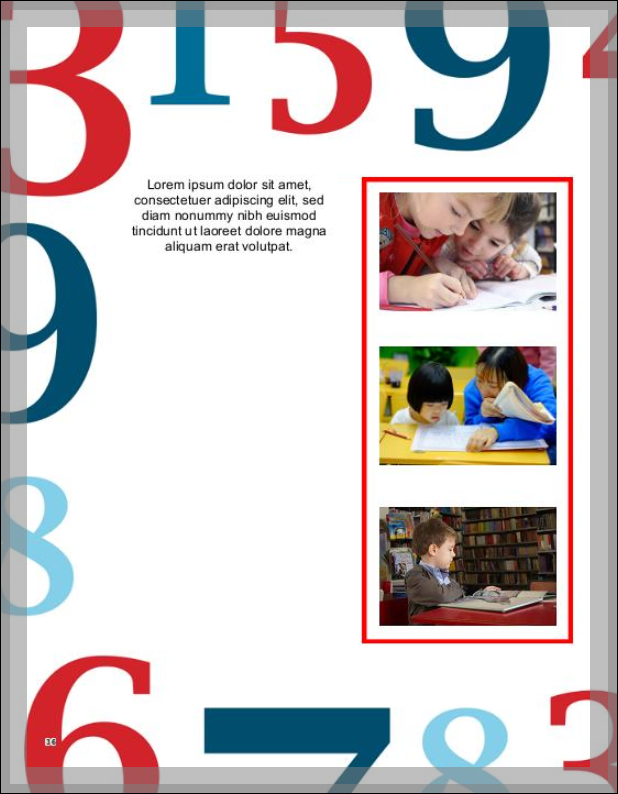

Create a Caption Box to connect text to images.
Alerts & Warnings
When an error on the page occurs, an Alert message will appear, containing a description of the error and information about how to correct it.
A Yellow Alert icon will appear on the page at the location of the error. The message text will be available by clicking the Help icon at the top left of the page until the error has been fixed.
Common Errors
- You have a low resolution photo. Choose a different photo or reduce the size of the image frame will eventually cause the warning to vanish, though you may encounter images too small/low resolution to use.
- A text frame is placed too close to the edge of the page. We recommend you move the text box inside the gray ‘safe area’ to ensure that it will not be trimmed off in production.
- Your pages may have been rearranged, and affect a frame (photo or clip art) that was on both sides of the spread. This frame now displays a warning icon. Please review and make any changes.
- You may have a Portrait photo that is being overlapped by another photo or design element.
Low Resolution Image Tips
When selecting images to upload for your yearbook, follow these rules to ensure print-quality images:
- Submit high-resolution JPG files (300 dpi) taken directly on a camera or phone.
- Do not submit screenshots of photos from the phone’s camera reel. Instead, upload the source image itself.
- Do not use images downloaded from websites (particularly for page backgrounds) – these are often to small to use, plus they often violate copyright rules.
- Avoid using online collage-makers, as these usually output low-resolution content.
Tip: IMPORTANT! When an error occurs on the page, it’s very important that you locate and correct it before submitting your final book. You will be responsible for any uncorrected errors that show up in the final yearbook.
