Portrait Page Design
Portrait pages are composed of labeled photo grids organized by grade, classroom or staff groups. Portraits are applied to pages in Pixami’s editor by using the portrait wizard tool. Use this tool to choose which groups appear in your section and to define how the grid is formatted — set rows/columns, label position & styling, header (page title) styling, featured images, etc.
Important: Do not attempt to create a portrait page by dragging images onto a page. Using the portrait wizard tool ensures that any updates made to your portrait set will automatically apply to your portrait grid — adding/removing new portraits, updating names, will autoflow to your pages.
Portrait Page Workflow
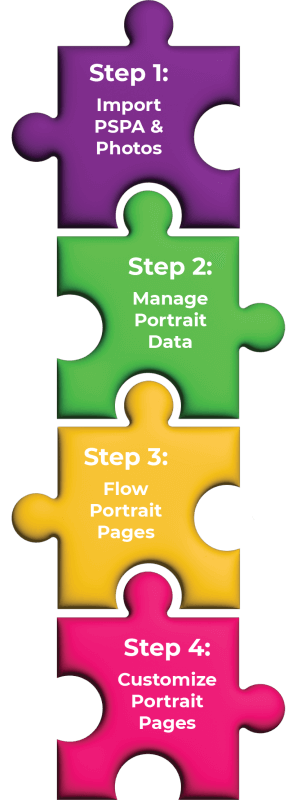
Follow these steps to design your portrait pages:
- Import your portrait package into Pixami by following the steps in the Importing a PSPA & Photos section of the Importing Portraits & Managing Data article.
- Review, correct, and add information to your portrait database by following the steps in the Managing Portrait Data section of the Importing Portraits & Managing Data article.
- Flow your portraits using the Portrait Wizard.
- Customize your portrait pages in the editor.
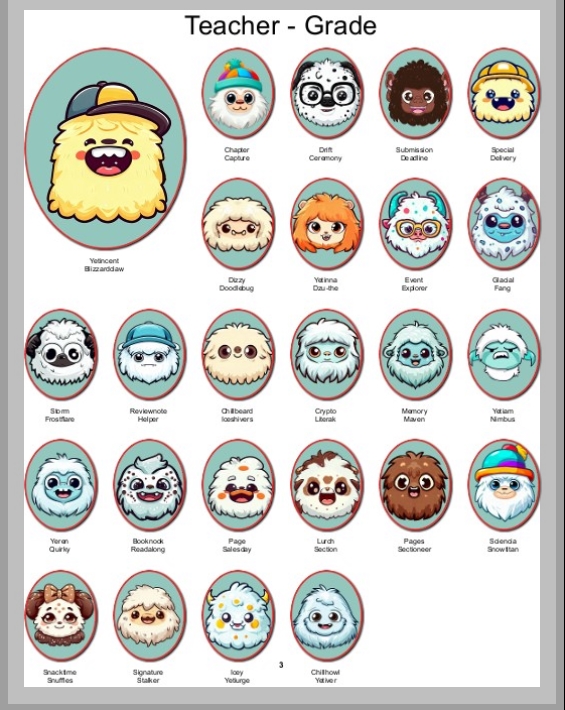
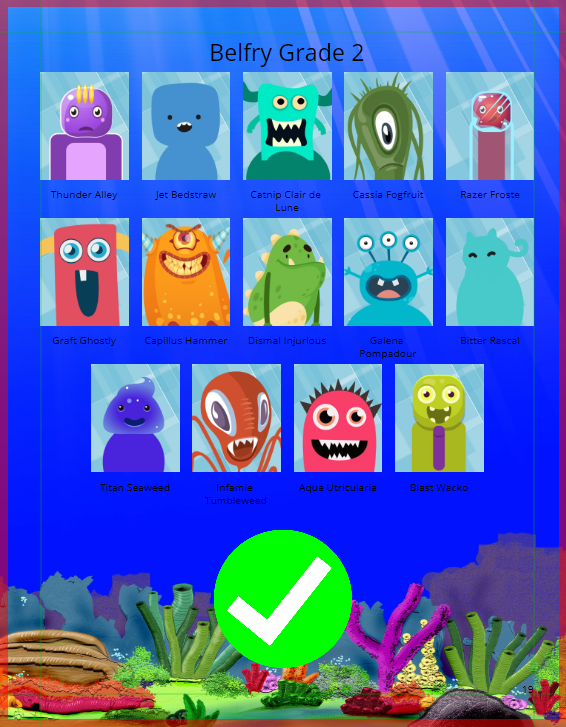
Portrait Page Structure
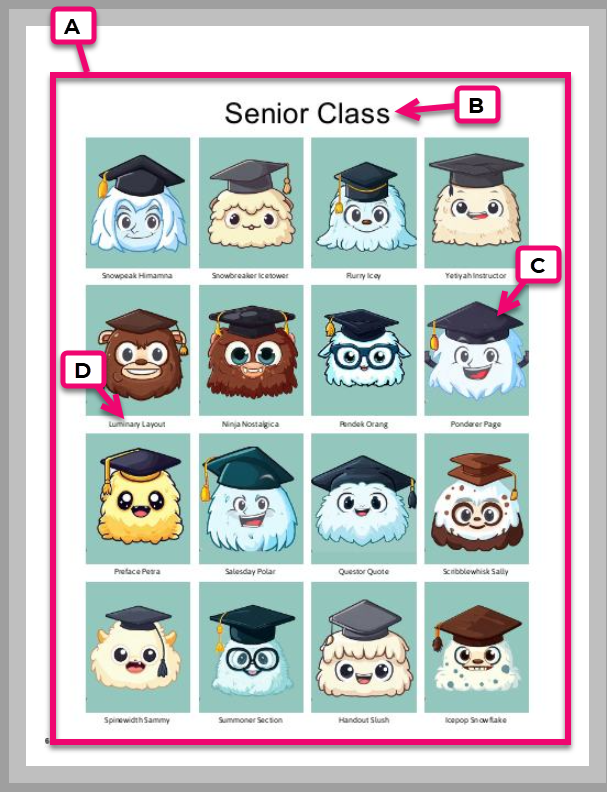
- A. Portrait Grid – the arrangement of all elements on the page
- B. Header (Page Title) – applied in the Portrait Wizard or customized on your page after flowing
- C. Portrait Images – added to the grid using the Portrait Wizard
- D. Labels – display the name, and optionally the salutation or job role of a person. These may appear under the image or in a column beside the grid.
Flowing Portraits in a Section
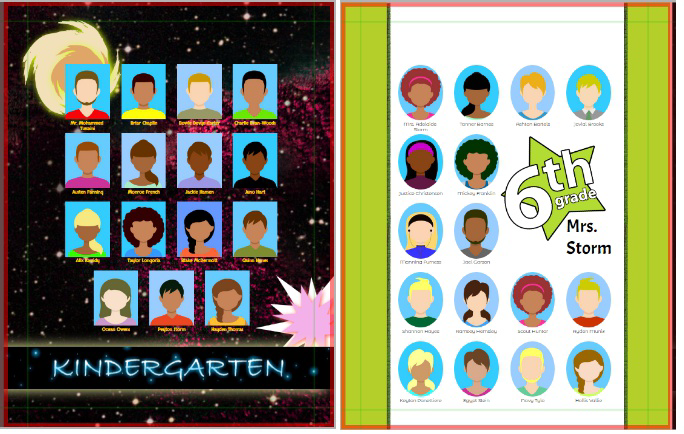
Prior to creating a portrait grid, import your portrait package under the Photos tab. Importing the images sets up a portrait data base, grouping people into grades/classrooms/staff folders and associating names to photos. These groups are selected to flow onto your pages.
Tip: On your book ladder, create one section per grade, adding as many pages as required to add all your portraits to the section. Learn more about Sections in the Book Management article
For example, an elementary book may have a staff section and sections for each of their grades on their ladder. If the 4th grade has three homeroom classes that need to be flowed onto separate pages, then the 4th grade section will need at least three pages added to it. If PreK has four very small homeroom groups that will be flowed 2 classes per pages, then at least 2 pages should be added to that section.
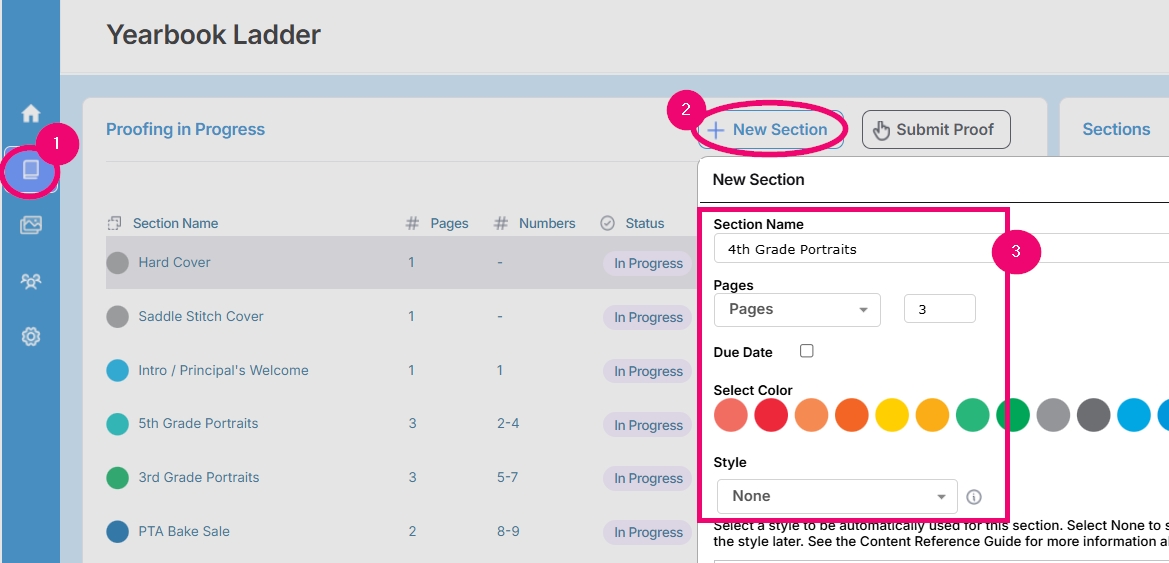
STEP 1- Create a Section on your ladder with the number of pages required to hold all portrait groups. Open the section in the editor.
Note: Don’t add Styles/Layouts to these pages.

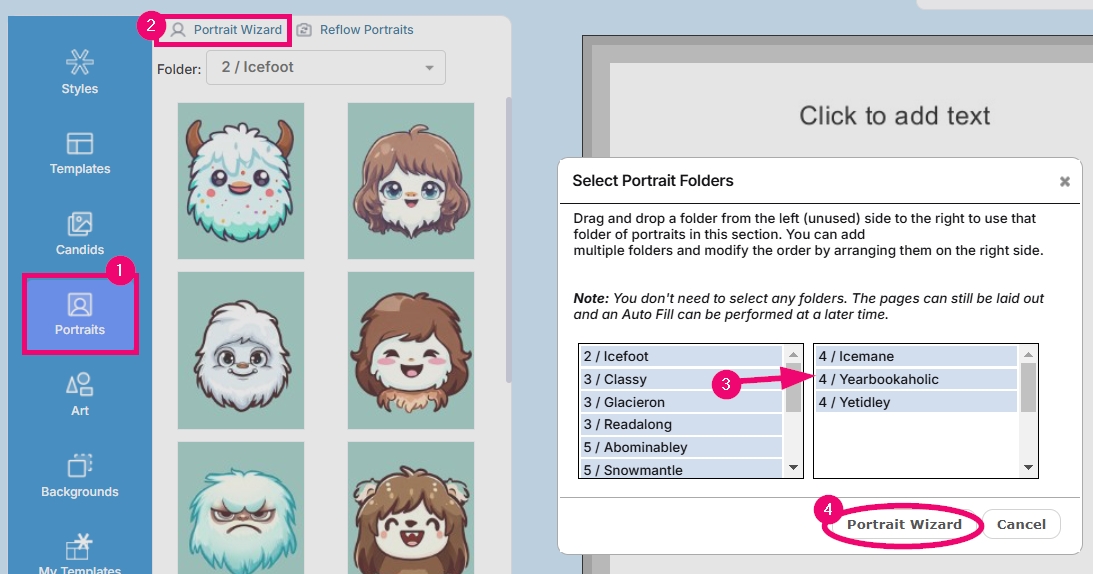
STEP 2- In the editor, access the Portraits Tab. Click on Portrait Wizard. Drag & drop folder(s) from the left pane to the right pane to select which groups should appear in the section. Click the Portrait Wizard button to proceed.
Note: Do not add templates, backgrounds, photos or other decorations to these pages prior to launching the Portrait Wizard.
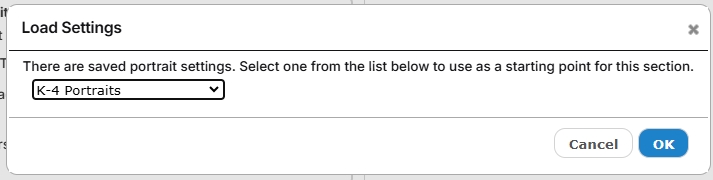
STEP 3- If applicable and desired, choose a previously saved preset.
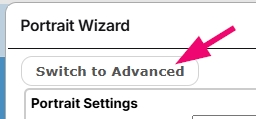
STEP 4- Click the Advanced settings button. (Basic mode provides a limited set of options to quickly get portraits on the page.)
STEP 5- Set your grid using portrait settings; style your text elements (page titles and labels); determine rules for multiple group flows and last rows. Details on these features are below.
STEP 6- Apply the portrait grids to the section pages.
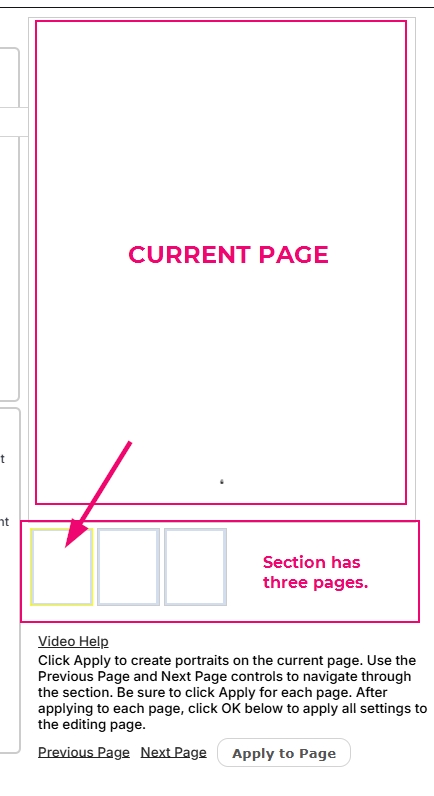
To preview and apply the settings to a page in your section, click on one of the small page previews on the right side of the wizard window. Note that you can skip a page in the section (for example, if you have pages reserved for candid collages).
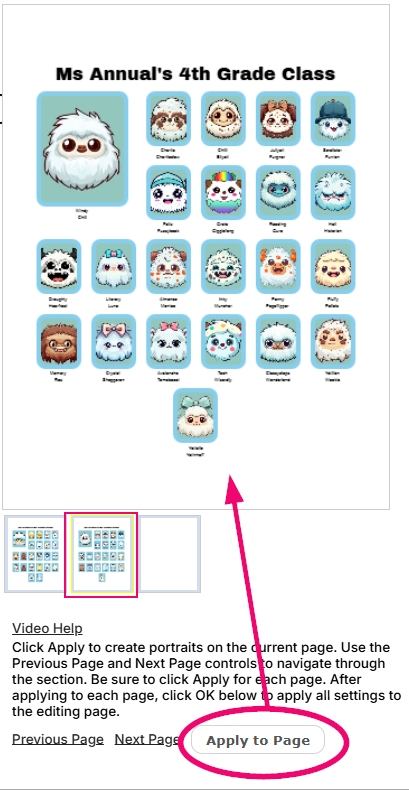
Click the Apply to Page button to preview your grid. If changes are required, reconfigure the settings, and apply again. Change pages by clicking on the small page previews, apply portrait grids until you run out of pages or portraits.

When all pages have portrait grids set to your satisfaction, click on OK to finalize. The portrait grids will now be set up in the editor for further customization.
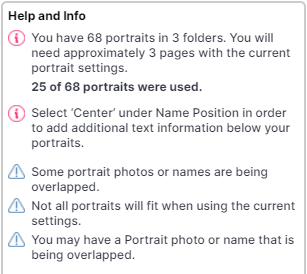
Important: Check the Help and Info section of the Portrait Wizard for additional information.
An Alert can appear due to things like, the amount of text in the student name not fitting in the allotted space. You can adjust the font size, name position, and other settings until all of the names fit properly. The Alert icon will disappear when there are no issues remaining.
Setting Up Portrait Grids in Advanced Mode
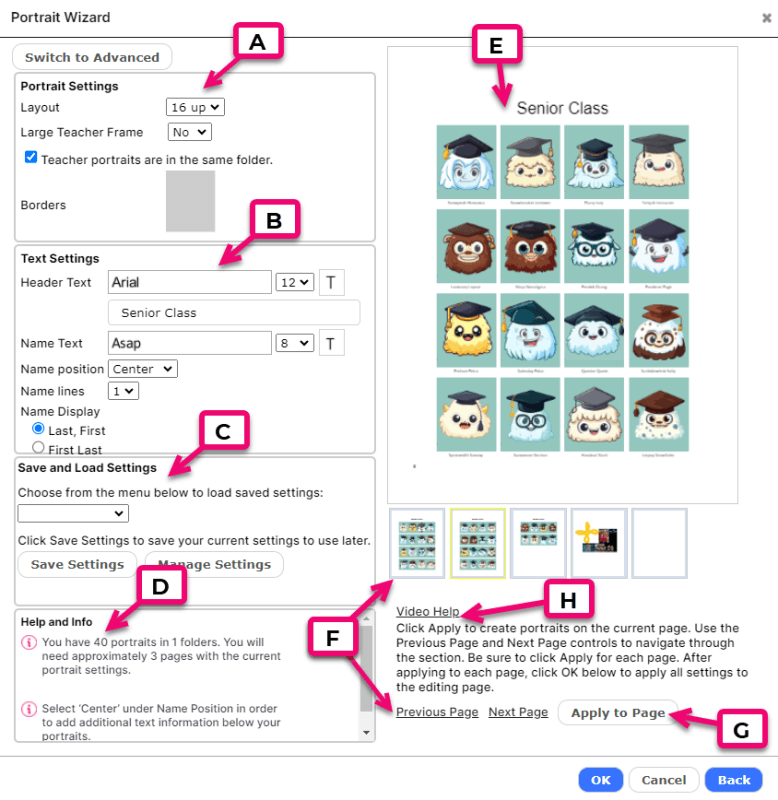
The Portrait Wizard is organized to help you easily find the settings to configure, to provide tips and warnings, and to access presets.
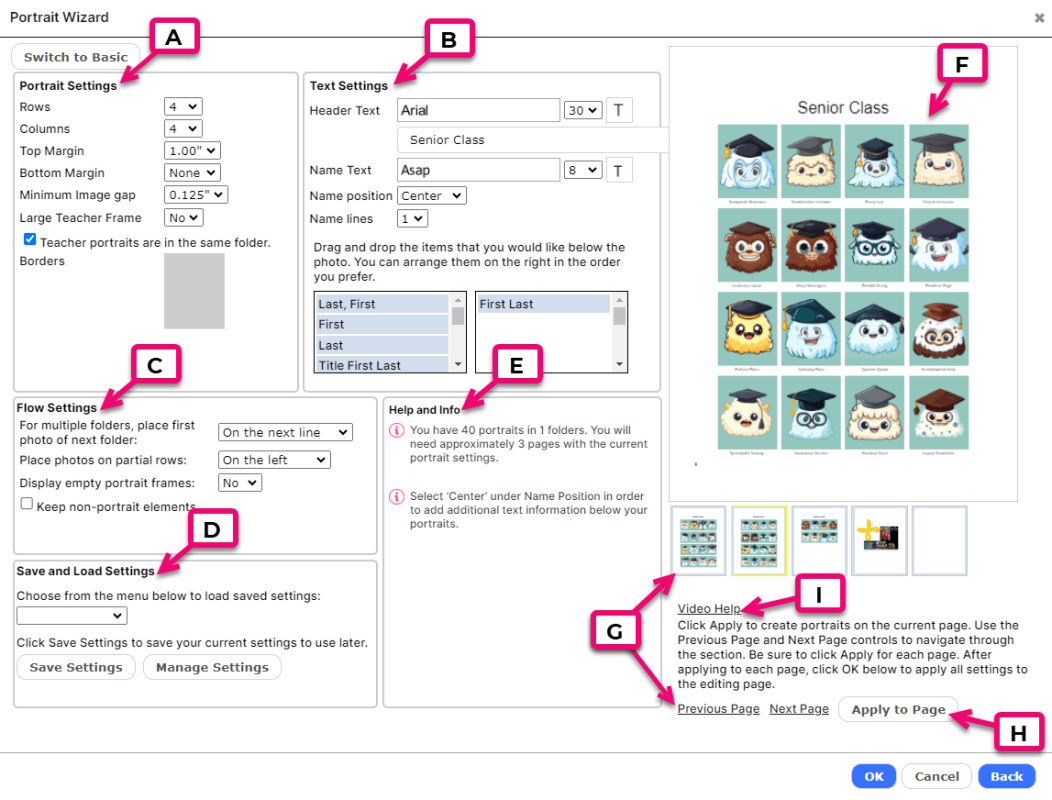
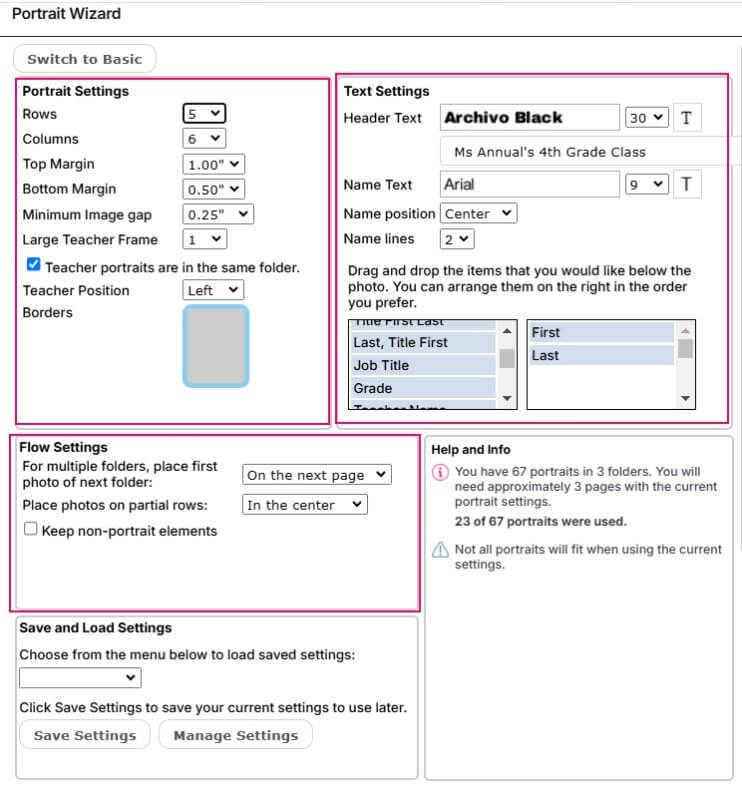
- A. Portrait Settings: Adjusts the grid settings – how the rows/columns of images are set on the page.
- B. Text Settings: Customize placement and styling of the header (page title) and portrait labels.
- C. Flow Settings: Provides options on how the grid will start/stop and how multi-group flows be applied to the page.
- D. Save & Load Settings: Create and access saved grid settings.
-
grid.
- E. Help & Info: Warnings and tips for your grid.
- F. Layout Preview: Shows a live update of your portrait grid.
- G. Page Navigation: Displays your section pages and highlights the current page.
- H. Apply to Page: Click to apply your current settings to the selected page.
- I. Video Help: Tutorial video of the portrait wizard
Portrait Grid Settings
Customize the row/column placement on your grid.
First, choose the number of rows and columns to use on your grid. The more rows/columns, the more images per page.
If you need to clear space at the top or bottom of the portrait grid, add a top or bottom margin. The portrait grid will condense itself above/below the margin, making the portrait images smaller.
Change the minimum image gap to increase/decrease the space between the rows/columns. A smaller image gap means your portrait images will be larger on your page.
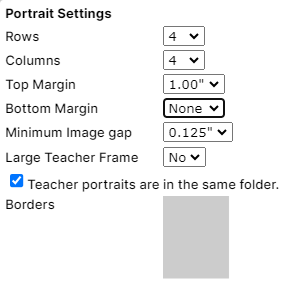
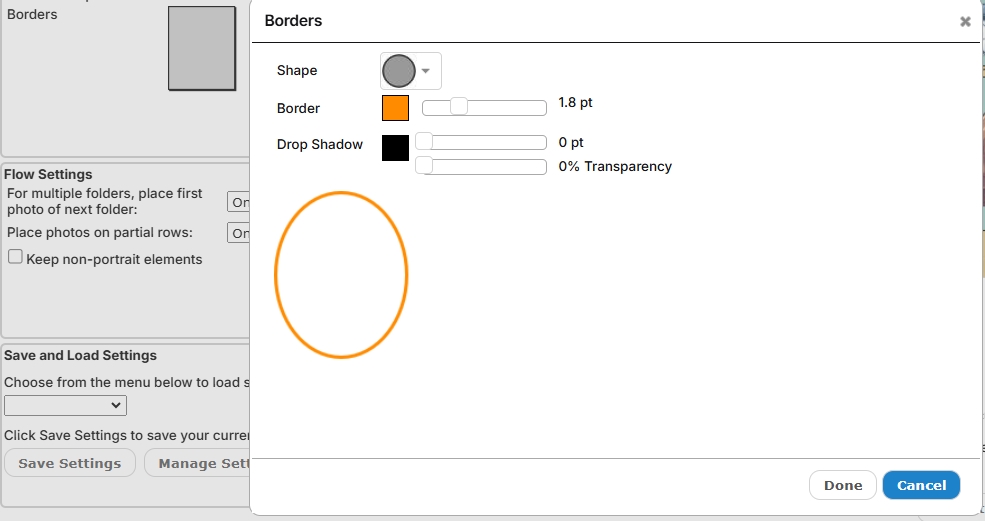
Click on the Border preview (the grey frame) to open the frame border tool. Change the frame shape, border color, size, and shadow options. Note these may be customized directly in the editor after the portraits have been added to your page.
Tip: If backgrounds and other elements have been added to your page prior to placing your portrait grid, be very sure to check off the Keep non-portrait elements checkbox on prior to applying your grid to the page. If this box is not on, your added elements will be deleted.
Featured Teacher Frames
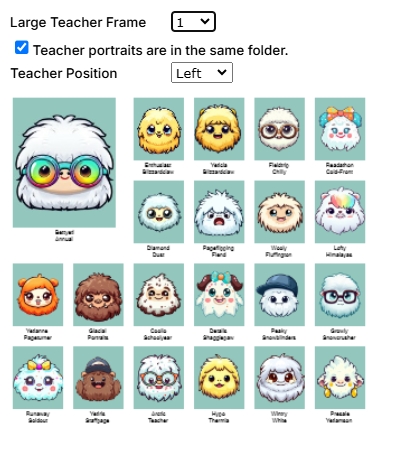
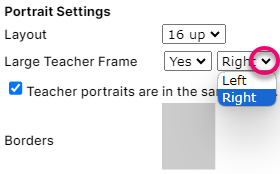
Turn on the Large Teacher Frame option to place teachers in double-sized image frames. Choose the number of frames to add, keeping in mind that your column settings determine number of featured frames that may be added (eg. 3 featured requires 6 columns).
Only turn on the Teacher Portraits are in the same folder checkbox off if the teacher photos have been added to their classroom groups. The first image(s) in the portrait group will automatically flow into the featured frame.
Choose the position of the frame – either the left or right side of the grid.
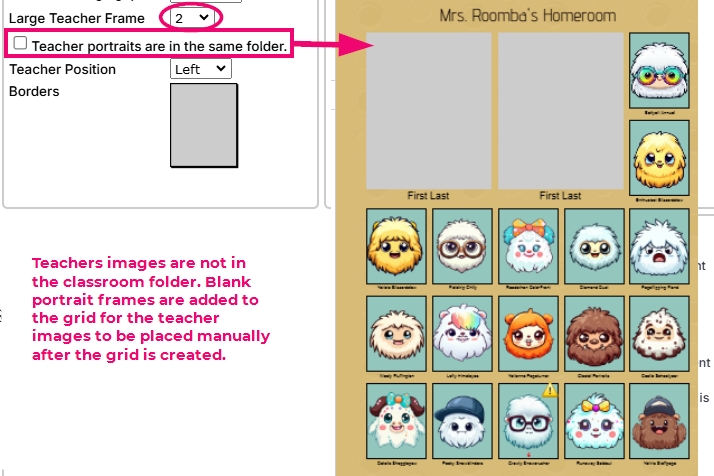
If the teachers portraits were not included with the students, leave the Teacher Portraits are in the same folder off. The teacher portraits are added after the portraits have been flown in this case, directly in the editor. To add the images, locate the teachers folder on the Portraits tab, find the teacher’s image then drag it into the empty frame.
Text Settings – Labels and Page Titles (Headers)
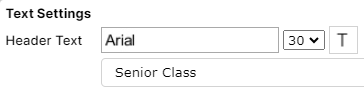
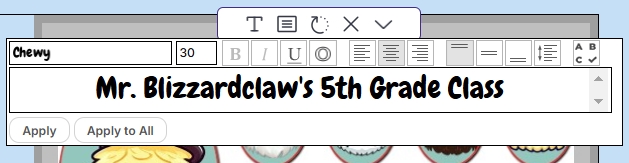
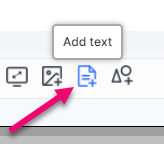
Specify the styling and content for headers and labels. Choose a font and size (usually 30 pts or above) for your page titles (headers). Click on the T icon to choose a color swatch. If you like, type the name of the current page below the font settings, or add placeholder text (eg. Teacher – Grade) to customize after adding the portrait grids to your page.
Adjust your label settings: choose a font and a font size (eg. 8 points). Click the T icon to change the font color.
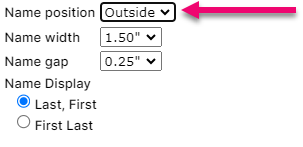
Choose where to position the labels by changing the Name Position.
Outside will place the names labels will appear at the end of the portrait row. Outside labels may be customized further: set the width of the label frame and the gap between the individual names. Last, choose the format of the name – either Last, First (eg. Adams, John) or First Last (eg. John Adams).
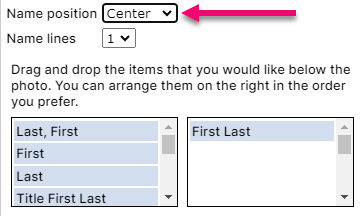
Center will place the names labels underneath the portrait images.
Center labels may be customized further: choose the number of lines to display the names. If students have long or hyphenated names, use 2 lines to ensure the names will fit. Next, choose the information to display in the label. In addition to the name, you may wish to include job titles and or salutations (eg. Mr. John Adams, Principal). Note that this information must be added to the portrait database to appear in the label.
Tip: If you see a yellow Alert icon on any of the portraits in the preview, this may mean that the amount of characters in the student name label will not fit in the allotted space. You may see more detail in the Help and Info section. You can adjust the font size, name position, and other settings until all of the names fit properly, at which time the alerts will disappear.
Multi-Group Flow Settings
If you are flowing more than one group into the current section, Flow Settings set how groups flow relative to each other.
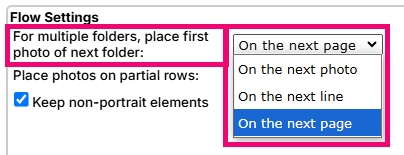
Choose where the next group will start:
- On the Next Photo – The first photo in the next folder will be placed next to the last photo from the previous folder
- On the Next Line – The first photo in the next folder will start on a new row on the same page
- On the Next Page – The first photo in the next folder will start on the next page in the book
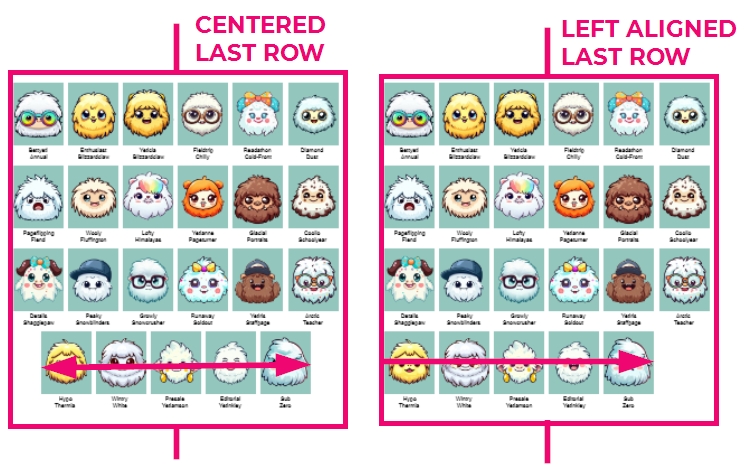
Choose how the last row of the grid will behave:
- On the Left – Partial rows will align to the left side of the page
- In the Center – Partial rows will be centered on the page
- On the Right – Partial rows will align to the right side of the page
- On the Inside – Partial rows will align to the inside of a page
- On the Outside – Partial rows will align to the outside of a page

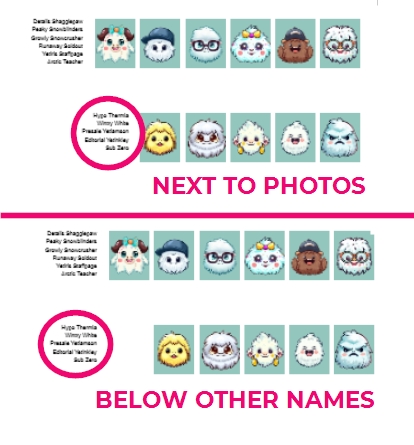
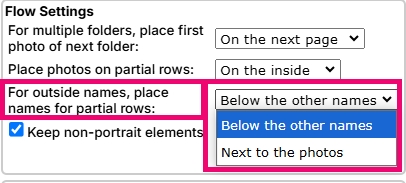
For outside names, place names for partial rows…
- Below the Other Names – The names will be kept in line with the other names on the page.
- Next to the Photos – The names will move over according to where the partial row photos end.
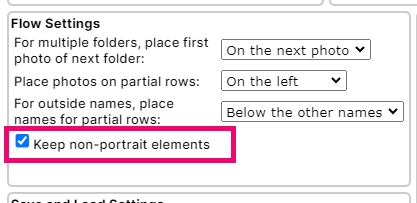
Preserving decorative changes on your page
If you have already decorated your portrait pages with custom backgrounds, text and clipart, click the “Keep non-portrait elements” checkbox.
If you do not check this box, the Portrait Wizard will delete existing all other elements on your page.
Saving Portrait Page Settings
You can save the current Portrait Wizard settings and then apply them to other portrait pages.
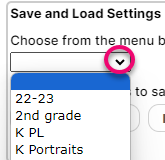
Apply previous saved settings from the dropdown.
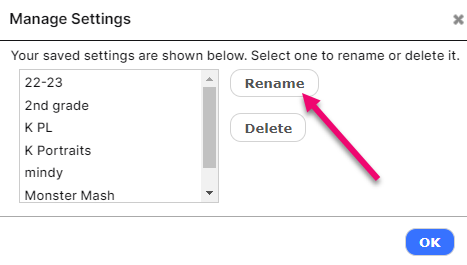
To rename or delete saved settings, click Manage Settings. Select the saved setting, choose to rename or delete it.
Basic mode is only recommended if you intend to apply a premade layout onto your page. It does not include customization features that are used by most schools.
- A. Portrait Settings: Adjust the number of frames in the portrait grid
- B. Text Settings: Customize the header and portrait labels
- C. Save & Load Settings: Save your current Portrait Wizard settings for later use
- D. Help & Info: Indicates the number of pages required to flow your portraits based on your current settings.
- E. Layout Preview: Shows a preview of your portrait grid.
- F. Page Navigation: Displays your section pages and highlights the current page.
- G. Apply to Page: Click to apply your current settings to the selected page.
- H. Video Help: Tutorial video of the portrait wizard
Portrait Grid Settings
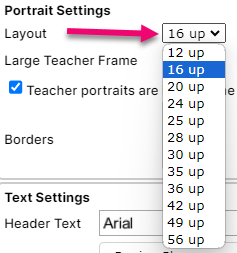
Portrait Settings define and adjust the layout of portrait grid on the page. Choose the Layout option to set the number of frames to add to the grid. Note: The number of pages required to flow your selected portrait groups may change based on this setting.
Adding a large teacher frame in Basic Mode:
To add a 2×2 frame size featured teacher image, turn on the Large Teacher Image option. Choose which side of the grid to placed the image (right or left). If the teachers have been added to the classroom folders, turn on the checkbox to indicate so – the teachers will automatically appear in the larger frames. If the teachers are not in the same folder as the students, leave this off to generate an empty large frame; you can drag the teacher’s image into the frame in the editor.
Text Settings – Labels and Page Titles
In the Header area, type the page title to appear on the current page. Note that this may be customized directly in the editor, so you may want to add a placeholder text if you are flowing multiple groups. Choose a font, font size, and click the T button to choose a color for the header.
In the Name Text area, choose the font, font size and color (T-button) for the name labels. Choose where the labels will be placed — either on the outside edge of the grid, or under each portrait. Choose the format for the name labels. Center labels enables you to set the number of lines (eg. choose 2 lines to accommodate longer family names).
Tip: If you can’t find a setting that works for your desired portrait page design, click the Switch to Advanced button, where you will have more options.
Portrait Wizard Review Video
Editing Portrait Pages
Once your portrait pages have been created, you can use editor tools to customize your portrait grid, and add backgrounds, text, candid photos, and clip art.
Check out these articles to learn more about these features:
Moving & Deleting Portrait Frames
You can delete or move individual portrait frames. The order of the portraits will be maintained, and portraits will reflow as necessary in response to any changes.
To move a portrait frame:
- Select the portrait frame
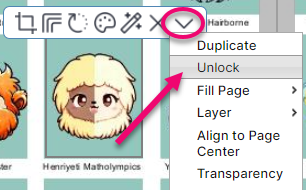
- Click More in the frame menu
- Select Unlock
- Click & Drag the frame to new location
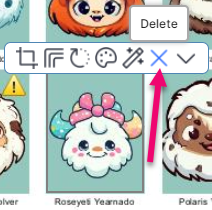
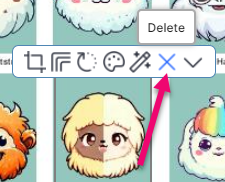
To delete a portrait frame:
- Select the portrait frame
- Click Delete in the frame menu
- Select Delete Frame
Tip: Be careful when deleting portrait frames that the last people in the group have a place to flow as they may be knocked out of the end of the grid!
Decorating Tips
When decorating your portrait pages, always keep label legibility in mind. The portrait images should be the focus of the page, and the labels should be kept free from distracting elements.
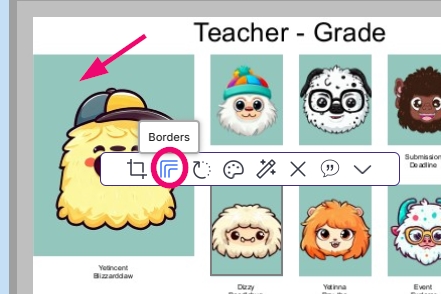
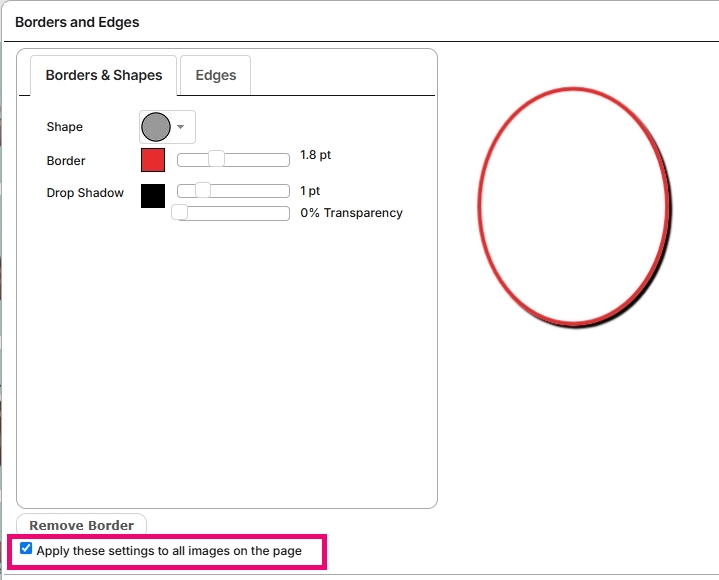
Change the portrait image frame border options by clicking on any frame on the grid to access the border editor. Choose to apply settings to all images on the page, or customize one frame.
Change the label font type or size, or add a color around the labels by clicking on any label on the page. Apply the change to all labels on the page if desired.


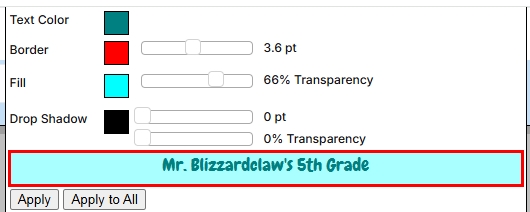
Adding a fill color at a reduced opacity can help portrait labels stand out against busy backgrounds.
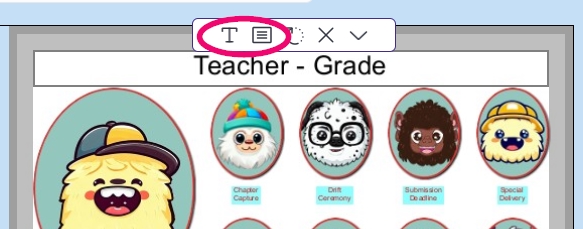
Change the page title (header) text content, font, and color options by clicking on the frame. Click on the first button on the frame toolbar to open the editor to change the header font and alignment, and click on the second option to change the color options.

Note that the page title font may be made smaller, but you will need to reflow the page in the portrait wizard to make it larger.
Be very mindful of the background you choose for your portrait pages, ensuring that all labels remain readable on every page.
Tips for choosing a background:
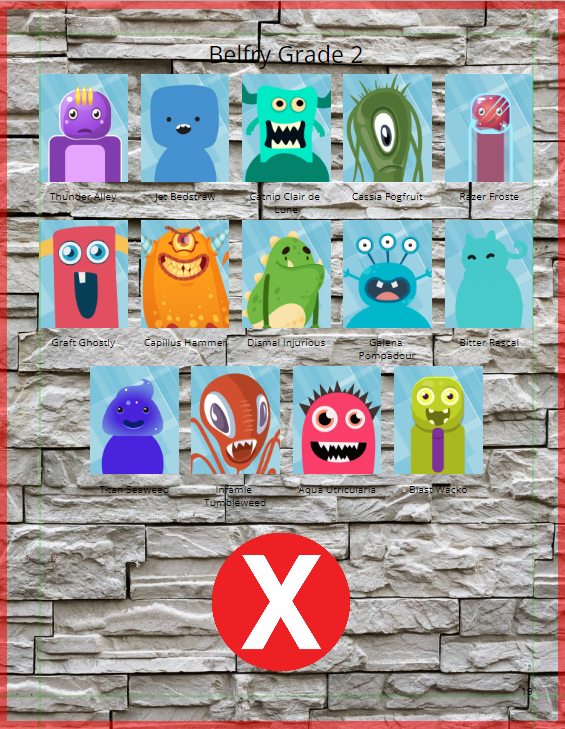
Choose matte, unshadowed textures, so that labels can stand out.
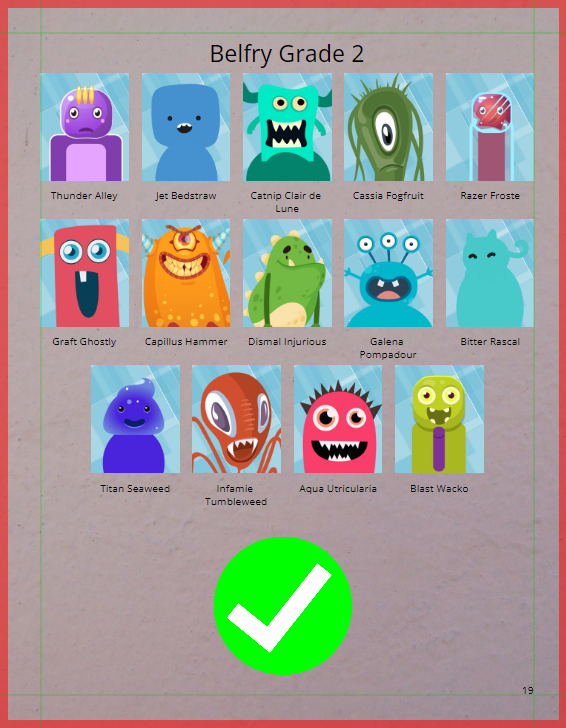

Avoid a high contrast background (If a label falls on all light, all dark, or mixed areas, getting the labels to uniformly stand out will be impossible.)
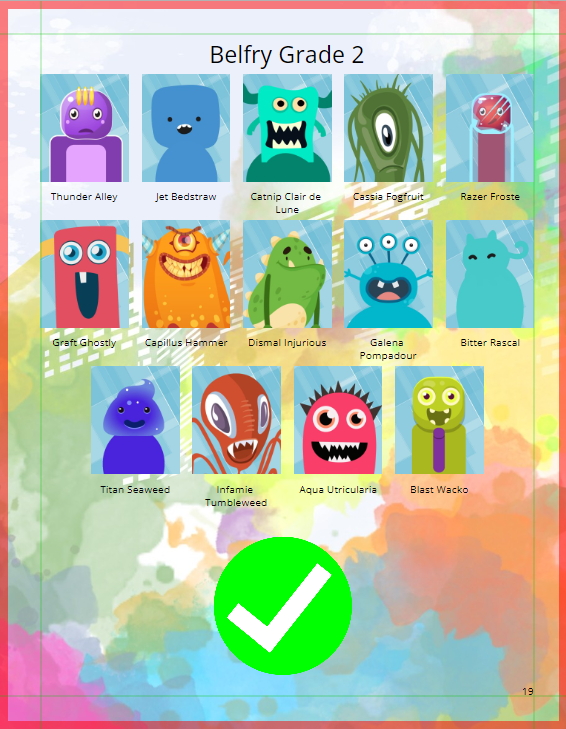
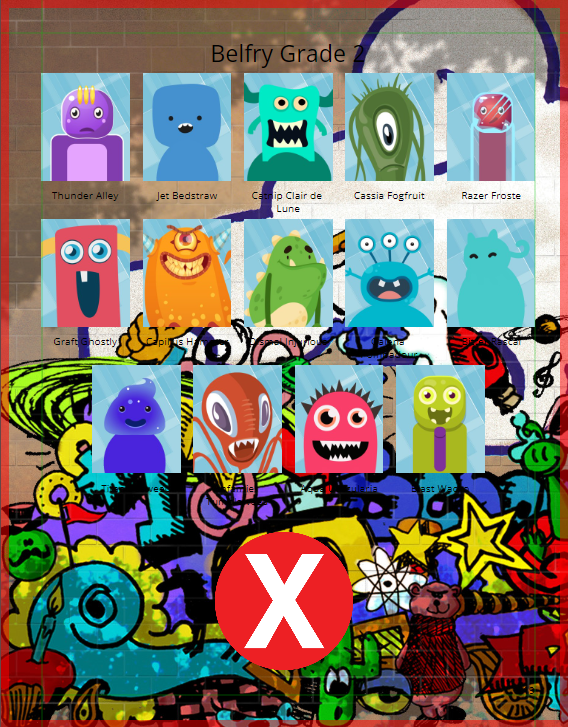
Make sure the area covered by the portrait grid is uncluttered (Images directly under the portrait grid can be distracting.)
Decorative word art graphics may be used as portrait page titles instead of being autogenerated by the portrait tab.
To clear space at the top of the page for Decorative Word Art:
- Click the Portraits Tab
- Click Portrait Wizard
- Click Portrait Wizard in the Select Portrait Folders dialog box
- Click the Top Margin dropdown menu
- Select a larger margin setting
- Click Apply to Page
- Click OK
Page Title Design Inspiration

Add a standard text frame in combination with graphic embellishments – rotated, and positioned out of direct alignment with the grid.
Page title graphics may be used anywhere on the grid. Use margins and knockouts to create extra room if required.
Tip: The Studio Source Catalog includes a collection of Letters & Numbers graphics under the Decorations area. Build your own title graphics one character at a time.
You may also want to check out the word art generator tool suggested in the Additional Design Elements article to create your own customer word art.
Tips for embellishing with shapes:
- Use a simple tinted shape frame to create color blocks on a portrait page
- Overlay a shape on to the background to define your portrait grid
- Use Pixami’s Art tab to find decorative embellishments
- Candid images may also be added to a portrait page by deleting portrait frames, creating gaps within the layout. The portraits will reflow to the next available frames. Alternatively, use the Portrait Wizard’s margin options to keep the top or bottom of the page clear.
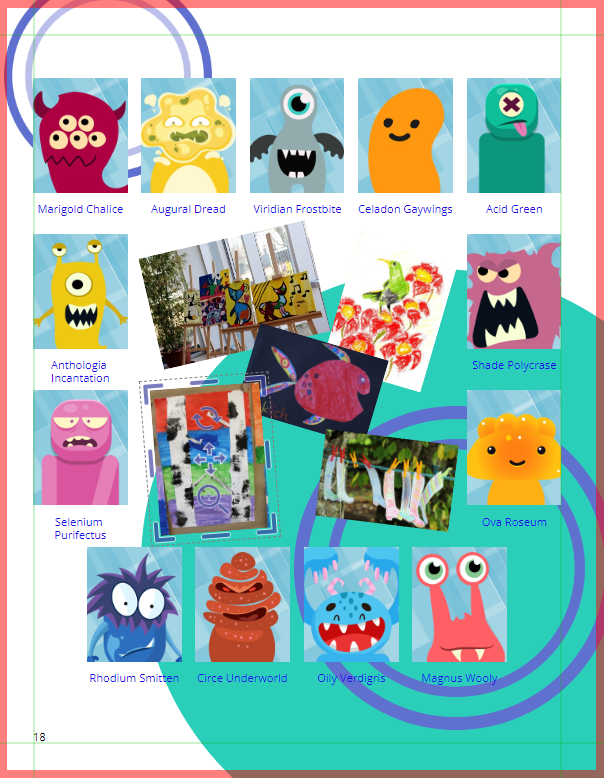
Tip: When adding decorative elements to your page, use the frame’s More > Layer menu to send them to the back of the page, behind the portrait grid.
Reflowing Portrait Pages
If changes are required to your portrait pages, there are several options available to make changes.
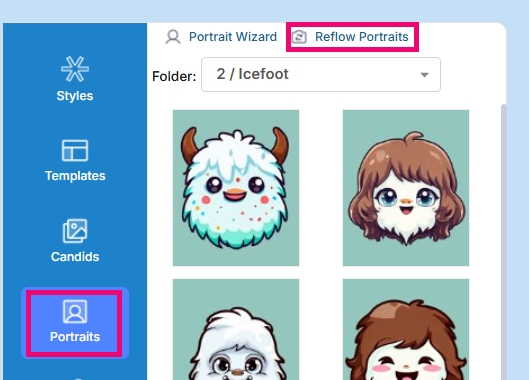
Changing groups, group order and/or label options
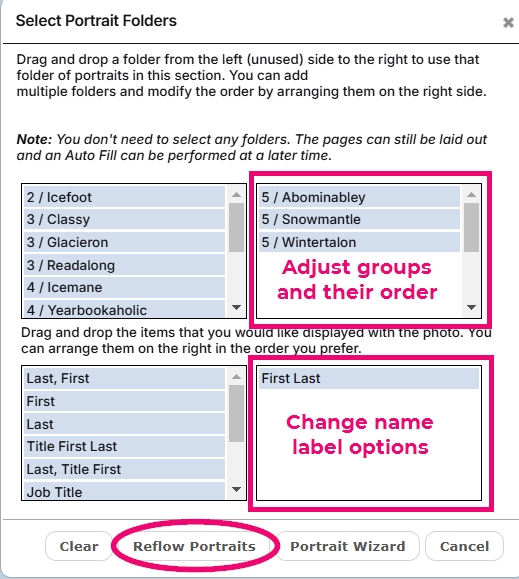
A quick reflow is possible to correct group selection, group order and/or to change the label format. Access the Portraits tab, then choose Reflow Portraits. A window will appear to offer access to the group selection and label options.
‣ To change which groups appear in the section, move groups between the right-side pane to the left-side pane. Note that adding an an additional group may not generate a new page of portraits, since the extra page must have a portrait grid applied to it.
‣ Reorder the groups on the right-side pane by dragging them up/down the stack.
‣ Drag new label options between the left- and right-side panes.
Click Reflow Portraits at the bottom of the window to apply the changes.
Changing rows/columns, label placement, header size and margins
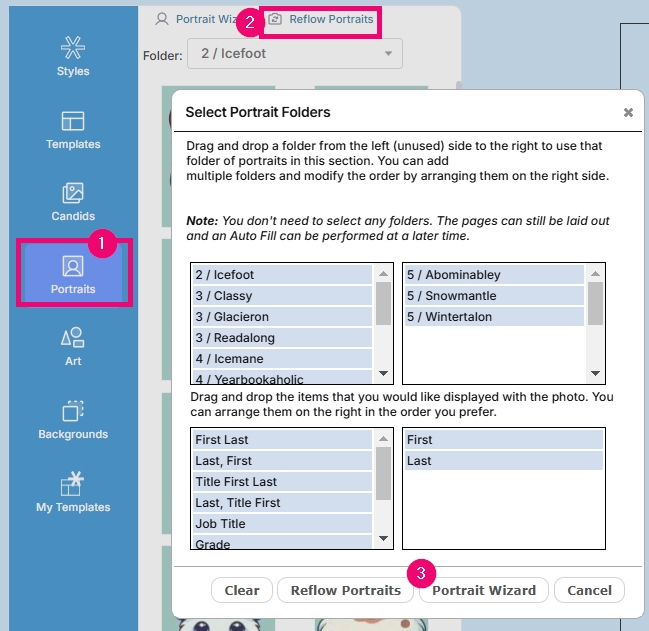
Access the Portrait Wizard again to make major changes on your grid.
Option 1: Click on the Portrait tab, choose Portrait Wizard, then move through the steps again to access the Advanced Wizard options.
Option 2: Click on the Portrait tab, choose Reflow Portraits, then click on Portrait Wizard.

OR
Using Layouts on Portrait Pages
You can apply pre-saved portrait layouts to your pages before or after flowing your portraits.
Adding a template after flowing portraits
- Flow your portraits using the steps shown above. If you intend to use a template, don’t fuss with the details – simply get the portraits onto your pages.
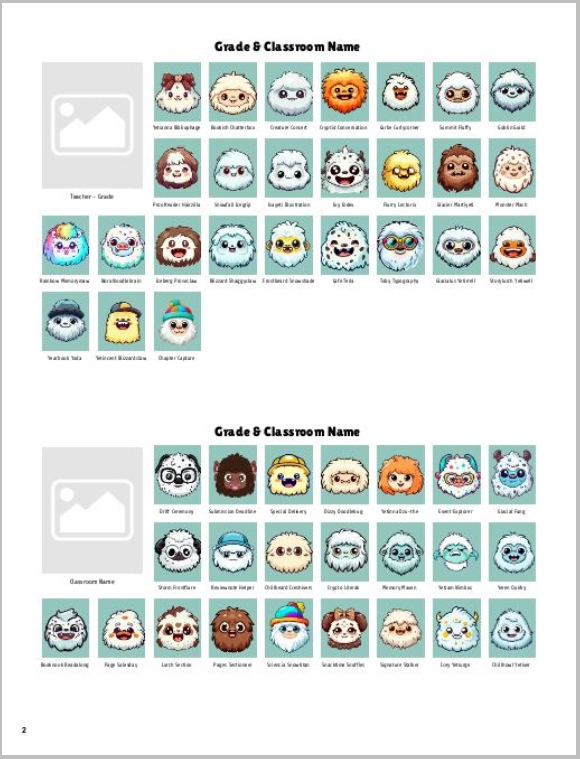
- Click the My Templates tab, choose the Category dropdown menu, and choose on of the portrait page templates.
- Drag & Drop the layout of your choice onto the portrait pages
- Replace the placeholder text in the page titles and/or featured teacher portraits with custom text, as applicable.
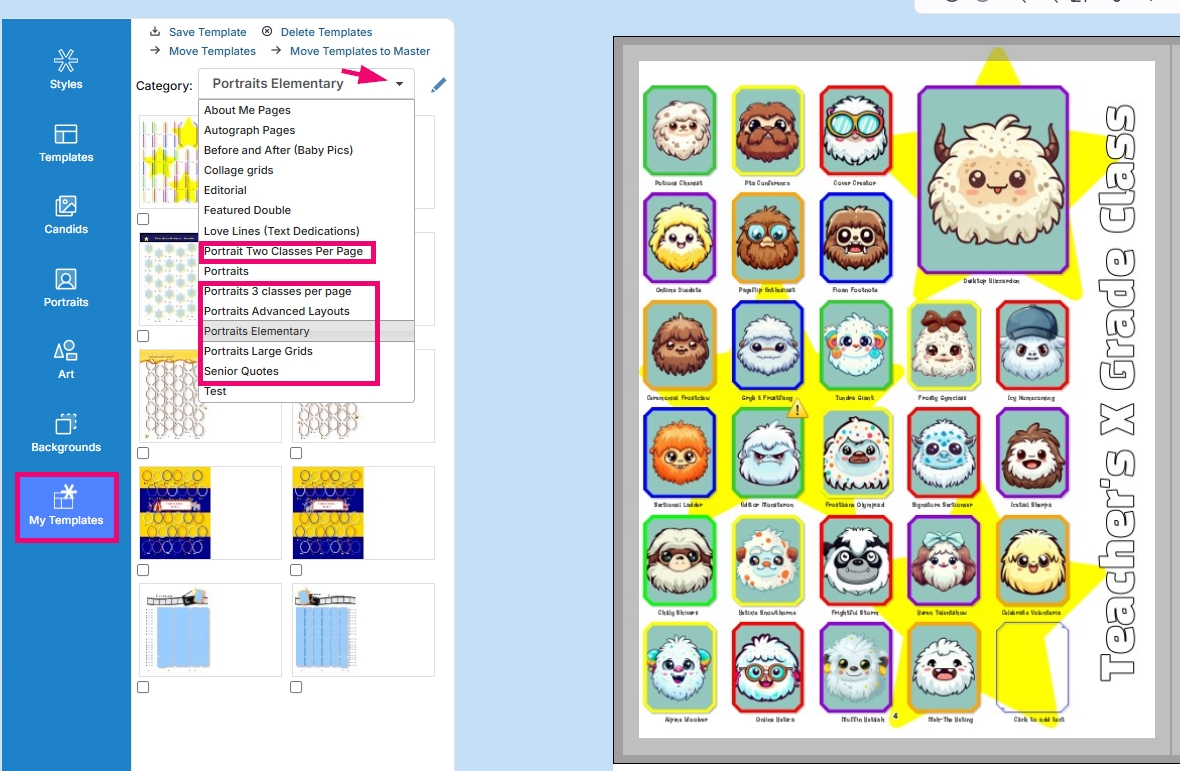
The 2- and 3- class per page layouts are particularly useful when you’ve used flow settings to start the next group on the next line. You can format two or three small classes onto a single page with titles and featured teachers using this setting.
Senior Portrait Pages
Your senior class portrait pages will often have personalized quotes, mottos and/or special memories added under the students’ name. To format your senior class portrait pages with extra space for this text, choose one of the following procedures.
Option 1 – Use a Pre-made Layout
- Flow your portraits using the steps described above.
- Click OK to close the Portrait Wizard
- Click the Templates tab to access the Special Portraits OR the My Templates tab to access the Senior Quotes category
- Drag & Drop the layout of your choice onto the portrait pages
- Replace the placeholder text under the student’s names with custom text
Option 2 – Build Your Own Layout
- Go to Portraits Tab
- Click Portrait Wizard
- Click the Switch to Advanced button
- Set Rows to 3 or 4
- Set Columns to 2 or 4
- Decrease the Bottom Margin
- Decrease the Minimum Image Gap
- Click Apply to Page
- Click OK
- Add a text frame as a placeholder for the student’s custom text
- Move the text frame into position under the name label
- Customize with placeholder text and font choices
- Align text to the top of the frame for a consistent look
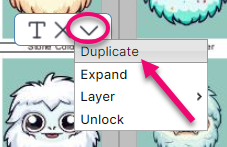
- Click More on the text frame menu
- Click Duplicate
- Move into place by the next portrait
- Repeat steps 15-16 for each portrait
IMPORTANT: Be sure to have finalized your senior portraits before beginning to transfer the students’ personalized memories into the placeholder text frames. If you add a missing graduate portrait or correct a last name, your portraits will reflow, but the text frames will not auto-arrange to follow the new portrait flow.
Tip: By request, Studio Source can enable an extra custom field in your portrait database to add extra text fields that will autoflow with your portraits. However, choosing this option will not allow you to customize the font for the extra text; it will appear the same as the entire label block. Contact Studio Source Yearbooks Support by email to request this option.
Custom Portrait Layout
Pixami allows for a lot of flexibility when it comes to the design of your portrait pages. The following steps will take you through creating a custom layout, saving it, and applying it to new pages.
To create a custom portrait layout:
- Click the Portraits Tab
- Click Portrait Wizard
- Adjust the settings in the Portrait Wizard to lay out your portraits in a layout as similar as possible to what you’re aiming to achieve
- Make Sure the “Teacher portraits are in the same folder” setting is Unchecked
- Click OK to flow the portraits
- Decide how you want to change the layout
- Unlock a portrait and the portrait label to have the ability to resize and move it to a new location
- Select each portrait & label individually or Select multiple portraits & labels (hold cmd/ctrl + click or click and drag the mouse)
- Click More on the frame menu
- Select Unlock
- Knock Out frames to open up space in the layout
- Select the portrait
- Click Delete in the frame menu
- Click Delete Frame
Note: This will NOT delete the student, only the frame. The student will flow to the next frame and the rest of the class will reflow accordingly (be sure you are not kicking anyone off the page by doing so).
- Add any additional elements such as candid frames, text frames, or clipart to the page that you wish to apply to to the rest of your pages
Note: Teachers will need to be manually dragged and dropped into the teacher frames. They will not automatically flow as they do when using the Portrait Wizard. Specific photos and text will not be applied either, but text boxes and empty photo frames you laid out will be applied for you to fill in.

- Lock all elements on the page
- Click Ctrl/Cmd + A on your keyboard to Select All
- Click More on the selection menu
- Click Lock
- Save the Layout
- Click Save Layout in the main toolbar
- Choose a Layout Category
- Select which side of the spread you intend to save (We don’t recommend saving the background at this time, there are some bugs in the software that keep it from applying correctly)
- Click OK
- To use the saved layout on another page
- Click the Saved Layouts tab
- Locate the layout you just saved
- Drag & Drop the layout onto the page
- Click the Portraits Tab
- Click Reflow Portraits
- Drag & Drop the class you want to use from the left pane to the right pane
- Click Reflow Portraits
- Check to make sure the Saved Layout applied correctly and no students were booted off of the page

Tip: For fine tuning, select the smallest Snap size to allow you to have more control over the incremental movement of your elements on the page. Learn more about this in the Snap Alignment section of the Frame Basics article.
Troubleshooting Portrait Labels
Longer names or low-lying characters may fall under the portraits beneath them. You can try three different techniques to fix this:
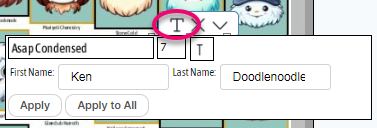
Change the label to a compact font and/or reduce the font size:
- Select the Portrait Label
- Click Edit
- Change to a smaller font size and/or a condensed font
- Click Apply
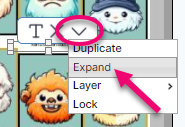
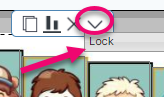
Expand the label frame:
- Select the Portrait Label
- Click More in the frame menu
- Click Expand
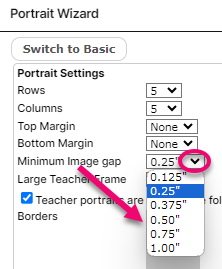
Increase the minimum image gap:
- Click the Portraits Tab
- Click Portrait Wizard
- Click Portrait Wizard in the Select Portrait Folders dialog box
- Click Switch to Advanced
- Click the Minimum Image Gap dropdown menu
- Select a larger image gap
- Click Apply to Page
- Click OK
Staff pages may include the job titles. The default spacing on portrait pages will not accommodate this extra information in the label.
To create extra space for job titles:
- Click the Portraits Tab
- Click Portrait Wizard
- Click Portrait Wizard in the Select Portrait Folders dialog box
- Click Switch to Advanced
- Click the Minimum Image Gap dropdown menu
- Select a larger image gap
- Click Apply to Page
- Click OK
To improve label legibility, try using a semi-transparent shape to tone down the background behind the portrait labels if a busy, high contrast, or shadowy background must be used.
- Add a shape to cover the entire page
- Change the shapes’ Fill to a light color
- Click More in the frame menu
- Select Transparency
- Reduce the transparency level
- Click More in the frame menu again
- Go to the Layer menu
- Select Send to Back
The label text will now stand out better against the light filter, but the background will still show through.