Navigating Pixami
The main features within Pixami are organized into six different pages to help you easily navigate the software while designing your yearbook.
The Activity Page
The Activity Page is your starting point for accessing all of the features in Pixami. Here you will see a brief overview of the status, history, and specifications of the yearbook.

- A. Quick Links: Allows you to jump directly to what you want to work on
- B. Progress Report: Real-time visual of the book progress
- C. Coverage Report: Shows how many Portraits and Candids have been uploaded and used
- D. Activity Log: User activity history
- E. Book Preview: Allows you to preview the book
- F. Calendar: Allows you to schedule due dates and events
- G. Support: Provides a quick link to the contact Studio Source Support
- H. Yearbook Info: Due date and book specifications
- I. Messages: Important messages or announcements
Progress Report
The Page and Cover Progress allows you to gauge the progress of your book with a set of color-coded progress meters.
- Not Started – Number of pages that have not been started
- In Progress – Number of pages that are in progress
- Completed – Number of pages marked complete by an editor
- Approved – Number of pages approved by an adviser
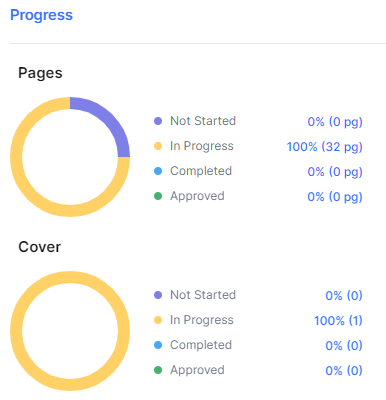
Tip: As you glance at the progress meters, more purple and less green means the book is in an early stage. As you progress though the design process, you will see more green and less purple, to indicate that the book is nearing completion.
Coverage Report
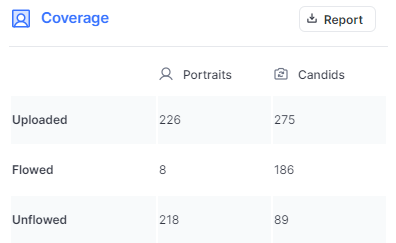
The Candid and Portraits Coverage shows the total number of Candid Photos and Portraits that have been uploaded to the software, and the number of each that has not been used in the book.
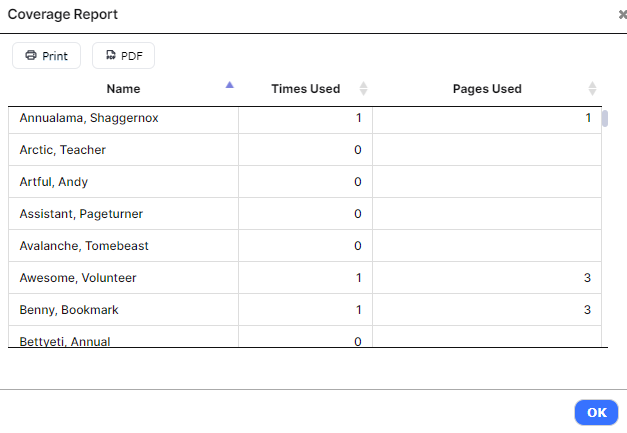
Click Report to view a Coverage Report of whose photos have been used in the book. You can also print or download a PDF of this report.
Activity Log
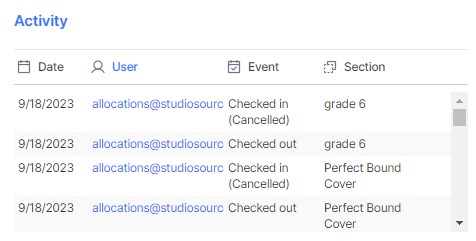
Scroll through the Activity Log to see a complete history of the book. Items are arranged chronologically with the most recent at the top of the list. The user and book section are shown for each event.
Calendar
Add events to the calendar to help you keep track of important dates throughout the school year. These could be important due dates, when yearbooks go on sale, school events to be covered in the yearbook, etc.
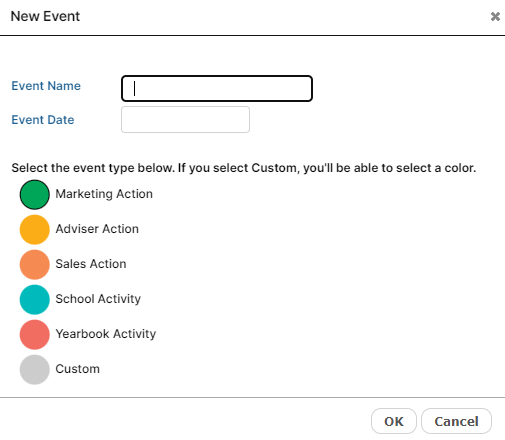
To add an event to the calendar:
- Click Edit
- Click New Event
- Type Event Name
- Choose a Date
- Select Event Type
- Click OK
Yearbook Info
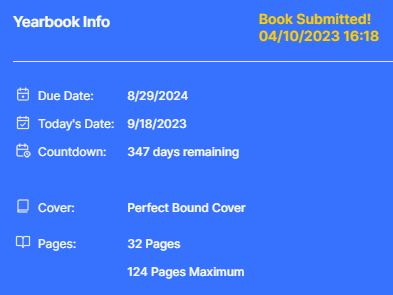
The Yearbook Info box displays the:
- Due Date of your Yearbook
- Today’s Date
- Countdown of Days Remaining
- Cover Type
- Number of Pages
- Quantity Ordered
Note: These items are submitted by your studio.
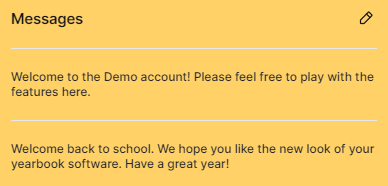
Messages
The Messages box displays any important messages or announcements from your yearbook provider and from your yearbook adviser.
To edit the Adviser message:
- Click the Edit Icon
- Type a New Message
- Click OK
The Yearbook Page
The Yearbook Page allows you to set up and organize your yearbook using a planning ladder, arrange and modify individual sections, assign sections to different users, and check out sections for editing.
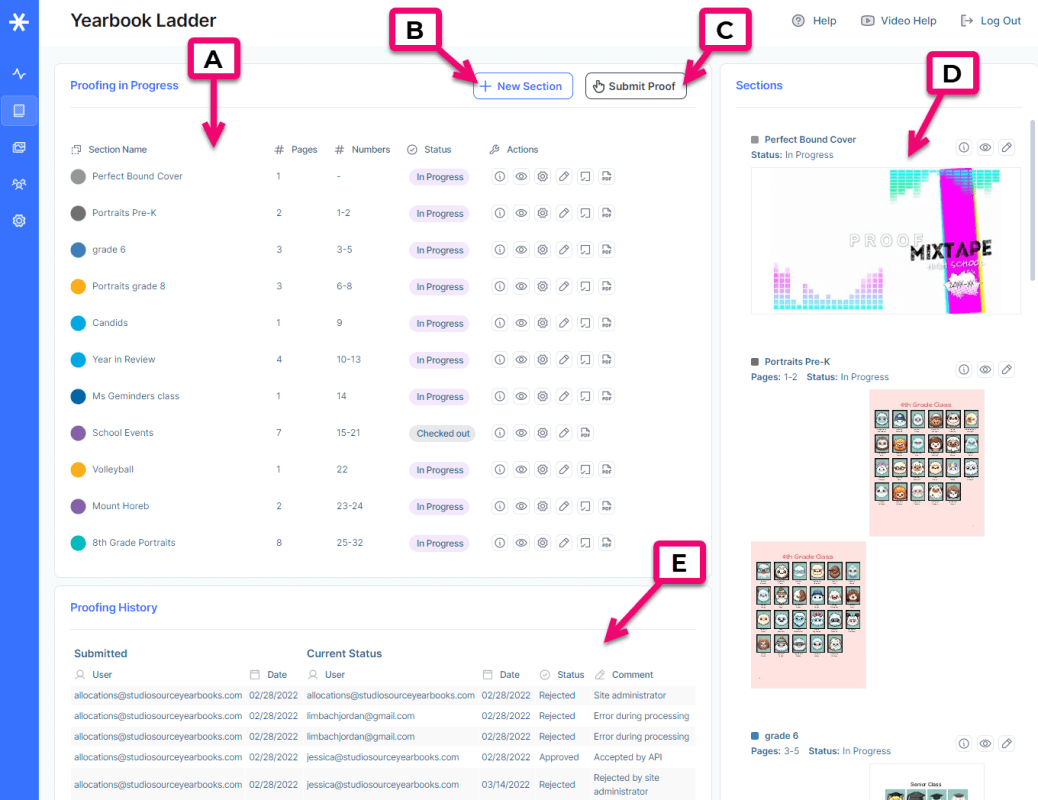
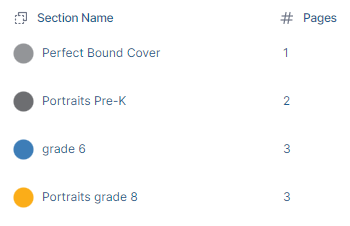
- A. Yearbook Ladder: The pages of the yearbook arranged into sections
- B. New Section: Button to add a new section to the yearbook ladder
- C. Submit Proof: Button used to submit proof to the Studio Source Dashboard
- D. Section View: Thumbnail version of each book section
- E. Proofing History: Details each time a submitted proof is rejected or approved
Yearbook Ladder
The Yearbook Ladder helps you organize the book and determine the overall number of pages needed. To learn more about the Yearbook Ladder, check out the Book Management article.
Section View
The Section View, located on the right side of the Yearbook page, displays a current thumbnail version page, and provides shortcut access to key functionality.
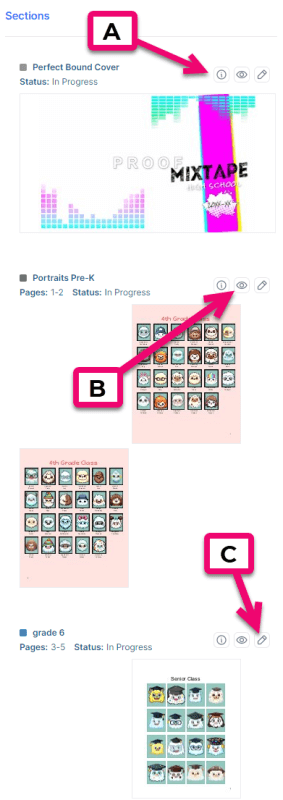
Section View features:
- Clicking on a section in the Yearbook Ladder will scroll that section into view in the Section View
- Each section in the Section View is color-coded with the ladder color for that section, and displays the Section Name, Status, and Page Range
- Icons on the Section View provide access to key functionality from the Yearbook Ladder.
- A. Info/Messaging Icon: Shows a history of the section and allows anyone with access the ability to comment on that secton
- B. Preview: Click to see an online preview of the selected section
- C. Edit: Click to check out a section of the yearbook and work on it’s design
Note: Users with Editor or Adviser privileges can double-click on a section thumbnail to bring up the Modify Sections dialog.
The Photos Page
On the Photos Page, you can add and organize photos and clip art for your yearbook. This is only accessible by users with Adviser, Editor, Staff, or Photographer privileges.
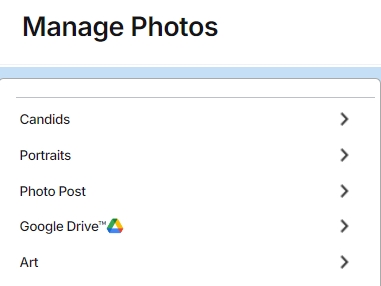
The Photos Page is organized into collapsible tabs where your images can be organized into folders:
- Candids – Allows you to upload and organize your candid photos
- Portraits – Allows you to upload and organize your school portraits
- Photo Post – Allows students, staff, and parents to submit photos to your yearbook without logging into the software
- Google Drive – Allows you to access your drive via a secure login. Learn more about this feature here.
- Art – Allows you to upload your own clip art
Tip: To learn more about each tab, check out the respective articles for each: Candids, Portraits, Art, & Photo Post.
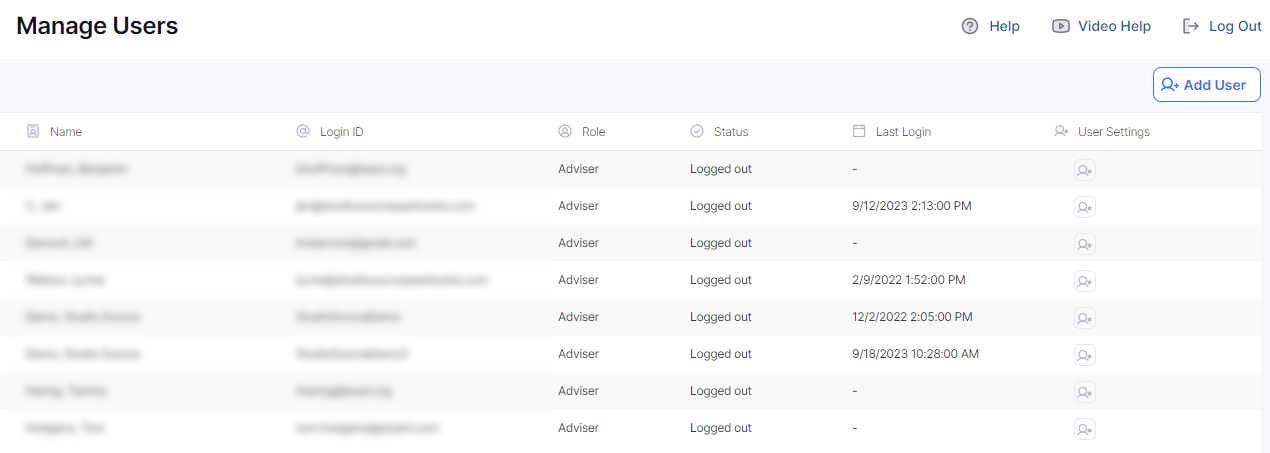
The Users Page
On the Users Page, you can add or remove users, edit the user’s permissions, or reset a password. Check out the Team Management article to learn more.
The Configure Page
The Configure Page allows an adviser to choose which themes, backgrounds, fonts, elements, and clip art is available in the Page Editor. It also allows you to view and reset page numbers.
Managing Content
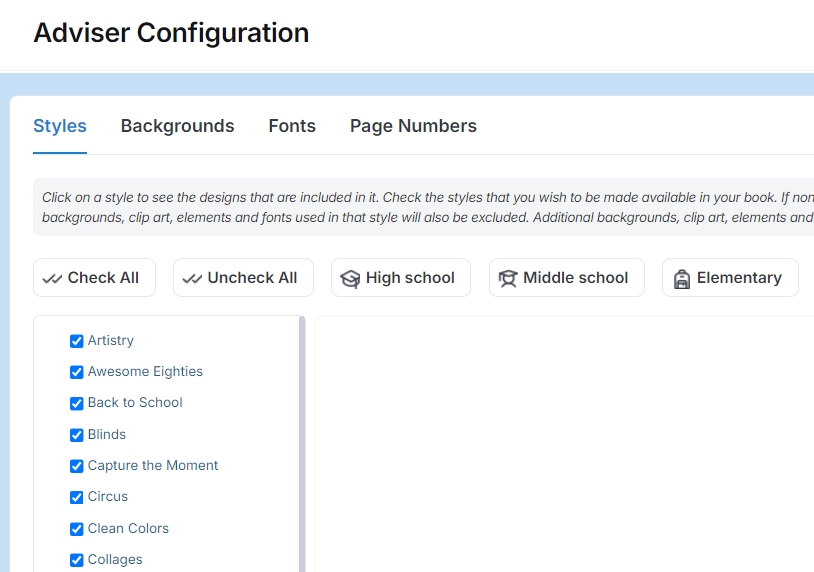
To select specific content:
- Select Themes, Backgrounds, Fonts, Clip Art, or Elements at the top of the page
- Click a Category to preview it’s contents (Theme Info is displayed to the right of the theme preview and contains detailed information about the contents of the theme.)
- Click the Checkbox next to the content that you would like to be available in the Page Editor
- Click Save
Note: Only the selected content will be available to use in the yearbook. If no content is checked, then all content will be shown.
Tip: Themes are organized in categories for Elementary School, Middle School and High School.
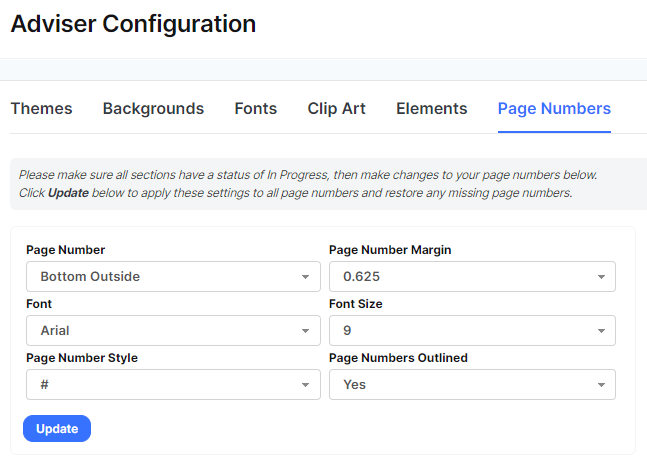
Managing Page Numbers
To view/edit the page number status and position:
- Select Page Numbers at the top of the page
- Choose Placement: Top, Bottom, Inside, Centered, or Outside
- Page Number Margin (distance from the edge of the page (in inches)): 0.25, 0.3125, 0.375, 0.5, 0.625, 0.75
- Select Font: Arial, Comic Sans, Times New Roman, Trebuchet, or Verdana
- Choose Font Size (points): 9, 10, 11, 12
- Select Page Number Style: #, -#-, or #/#
- Choose Outline: Yes or No
- Click Update
The Page Editor

The Page Editor is where you will design the pages of your yearbook by adding layouts, backgrounds, photos, text captions, clip art, and many other design features. To learn more about designing your yearbook, check out the Page Editor article.