Frame Basics
In the Page Editor, frames can be added to your page to design your yearbook. Below you will learn what frames are and the basics on how to use them. For more uses of frames, check out the Shapes, Text, & Image Frames article.
What is a Frame?
All objects on your page exist inside a frame. There are three types of frames:
Image: Container used to hold and manipulate photos, decorative backgrounds, or clipart.

Text: Container used to hold and manipulate any quantity of words, all styled with the same font attributes.
Shape: Container used to hold and manipulate color block elements.
Adding a Frame to a Page
Add an Image Frame to a page in one of two different ways:
- Add image directly to page
- Choose an image from the Content Menu in Candids, Clipart, or Elements
- Note: Learn more about sorting, searching and managing images in the Candid Photo Management article
- Drag and drop The image onto the page
- Choose an image from the Content Menu in Candids, Clipart, or Elements
Add an empty image frame
Click the Add Image Frame icon on the main toolbar to place an empty frame on the canvas. To fill an empty frame, dragging an image from the Candid area then drop it on the empty frame when the frame glows green. The image will auto-size to the frame to expose as much of the image as possible
To add a Shape or Text Frame to a page:
Click the Shape or Text icon on the main toolbar.
Tip: Learn how to add images to the Background and create custom Layouts with image frames in the Additional Design Elements article.
Selecting Frames
To select a single frame:
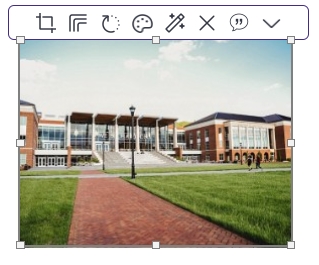
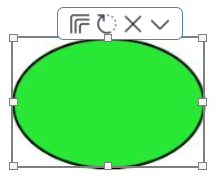
Click on the image, shape, or text you want to select. The frame will highlight, a menu and handles around its edges will appear.
To select multiple frames individually:
- Hold the Control Key (Windows) or Command Key (Mac)
- Click each frame with your mouse
To select all frames in an area of your canvas:
- Click and Hold the left mouse button
- Drag down across the area with the frames
Tip: A multi-selection of frames will allow you to apply certain attributes to all of the frames at the same time.
Duplicating Frames

To duplicate a frame:
- Select the frame
- Select Duplicate in the frame menu
- The new frame can be moved, resized, and edited with new content
Tip: Use duplication to create uniform styling on your page – use one styled frame to make additional pre-formatted copies, which can then be customized with a new image or different text.
Moving & Aligning Frames
After selecting one or more frames, they may be moved by dragging them to a new position or by using the keyboard’s arrow keys.
When moving a frame on your page, it will snap to the amount specified under the Grid & Snap Alignment settings. When you pull on a frame handle to resize a frame, it will also snap to a preset increment. See below to learn about adjusting the Snap Alignment.

Grid Settings
A grid may be overlaid onto the page to assist with the layout and manually aligning content as it is moved.
Note: The grid will not appear on your final printed work or proofs.
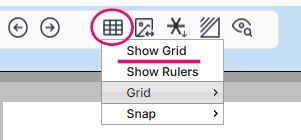
To turn on the grid:
- Click the Grid icon on the main toolbar
- Select Show Grid.
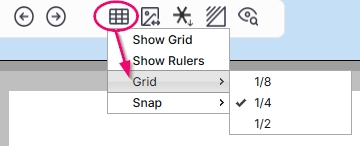
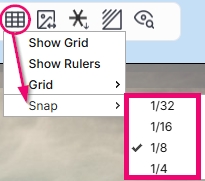
To adjust grid spacing:
- Click the Grid icon
- Hover over Grid
- Select spacing – 1/2″, 1/4″, or 1/8″
Snap Alignment
The Snap Alignment settings determine the amount a selected frame will move when using a mouse or the arrow keys on your keyboard. A smaller snap increment will displace the frame a smaller amount.
To change the snap increment:
- Click the Grid icon
- Hover over Snap
- Select new increment
Note: The snap increment you choose can be different than the grid spacing.
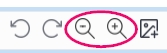
Note that you can use the magnifying glass icons to zoom in and out of your canvas. For fine-tune adjustments, zoom in on your canvas, and ensure that your snap alignment (above) is set to 1/32″.
Do not use your browser zoom to make your canvas view larger – this will distort the editor.
Aligning Multiple Frames
The align tool can be used to align multiple frames together or it can resize all of the frames to either the same width or height.
To align frames relative to each other or the page center:
- Select the Frames to be aligned (see selecting multiple frames above)
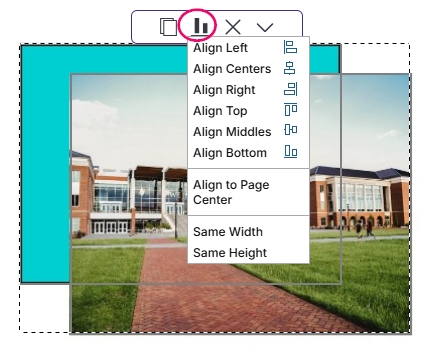
- Click Align in the frame menu
- Select the desired alignment
- Align Left to align all frames along their left edge
- Align Centers to align all frames along their center vertically
- Align Right to align all frames along their right edge
-
- Align Top to align all frames along their top edge
- Align Middles to align all frames along their middle horizontally
- Align Bottom to align all frames along their bottom edge
- Align to Page Center to align all frames across the page’s center
- Same Width to resize all frames to the same width
- Same Height to resize all frames to the same height
Tip: Use the Same Width or Height feature when you want all frames in alignment with each other to be the same size.
Resizing Frames
Handles on the frames are used for resizing. Image, text, and shape frames display eight handles (four corner, four midpoint).
Resize frames in the following ways:
- Click and drag a Corner Handle of an image, text, or shape frame to adjust the length and width simulataneously
- Click and drag a Midpoint Handle of an image, text, or shape frame to adjust the width or height independently
Note: The image inside of frames will be cropped as the frame length or width becomes smaller.
Tip: If you resize your browser window during the editing session, the resizing of the respective frames on the page may cause them to not function properly.
To fix this issue, refresh your browser and see if the problems go away. If that does not work, you can close and restart your browser, or try clearing your cache.
Rotating & Flipping Frames
Frames may be flipped or rotated. Rotation may be done at fixed increments or set to a custom amount.
To flip or rotate a frame:
- Select the frame
- Click the Flip/Rotate icon on the frame menu
- Select a preset option
- Flip Horizontally (images only)
- Flip Vertically (images only)
- Rotate 90° right
- Rotate 90° left
- Rotate 15° right
- Rotate 15° left
- Custom…
- Free…

To rotate a custom amount:
- Select the frame
- Click the Flip/Rotate icon on the frame menu
- Select Custom…
- Enter a rotation angle between -180 and 180
- Click Apply
To free rotate a frame on the canvas:
- Select the frame
- Click the Flip/Rotate icon on the frame menu
- Select Free…
- Drag the rotation handle on the frame to a new position.

Locking Frames
Locking a frame will lock the position and size of the frame. The frame will no longer display resize handles when selected.
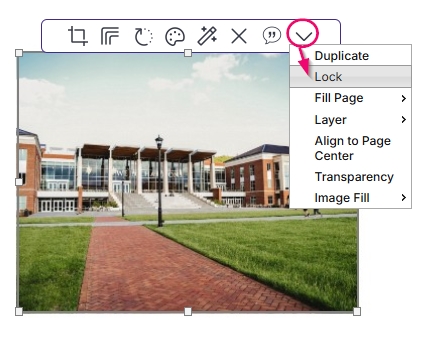
To lock a frame:
- Select the frame
- Select Lock in the frame menu
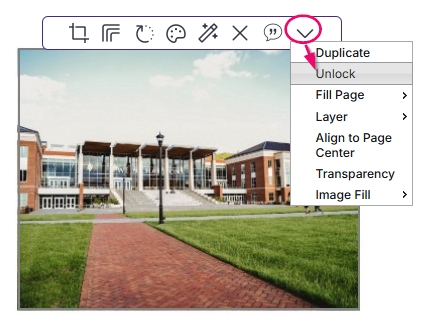
To unlock a frame:
- Select the locked frame
- Select Unlock in the frame menu
Changing Frame Order
Every frame on your page is placed in a layered order as it is added to the page. The last added frame will be in the front.
Note: Smaller frames can become hidden as larger frames are moved in front of them.
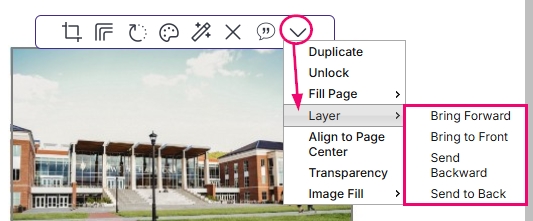
To move a frame forward or backward in the layered order:
- Select the frame
- Click Layer on the frame menu
- Choose a desired order
- Bring Forward to move the frame one layer at a time closer to the front
- Bring To Front to move the frame all the way to the front
- Send Backward to move the frame one layer at a time further to the back
- Send To Back to move the frame all the way to the back
Deleting Frames
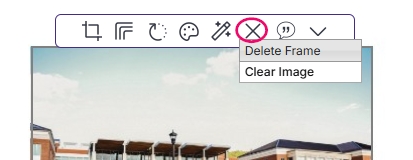
To delete a frame:
- Select the frame
- Select Delete in the frame menu
- Choose:
- Delete Frame to delete entire frame
- Clear Image or Text to delete only the image or text and leave the frame in place
Tip: A frame can also be deleted by selecting it, then hitting the delete key on your keyboard.