Page Numbering and Content Management
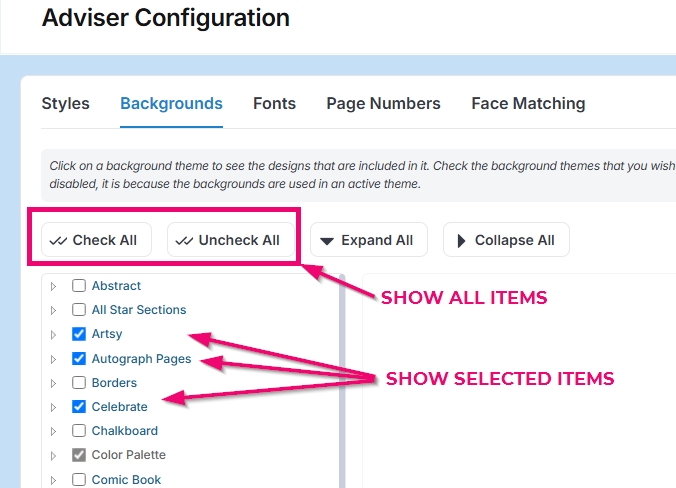
Advisers may remove or restore page numbering, change the placement/styling of page numbering and limit the Pixami decorative content displayed in the page editor. This is useful if the adviser wants to limit student designers to only use certain layouts, fonts and other decoration collections.
Configuring Page Numbering
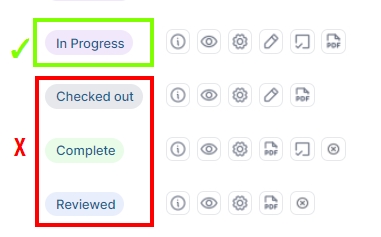
Important: Prior to making any changes to your book’s page numbering, all sections must be set to “in progress” status. Changes will not apply if any section is checked out (opened in the editor), marked as complete or marked as reviewed.
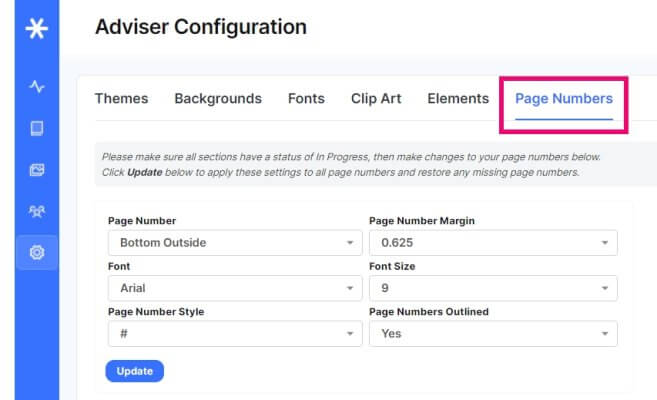
Step 3: Change the following style options for your page numbers:
1. Position: Bottom Outside and Bottom Center are recommended; books with no table of contents or index can safely choose No Page Numbering as a option.
2. Font selection: A small selection of basic fonts is available.
3. Style: Choose how the page number will be displayed: just the number, between dashes, or as a page count (eg. 2/52).
Important: Do not change page number margin setting. The margin should be set to 0.625″ to ensure that the page number is within the safe margins of your page.
4. Font size: between 9-12 points.
5. Outlining: Keep page numbers outlined to ensure that they will stand out regardless of the page background color.
Step 4: Click Update to apply any changes made to the page number styling. The Update button will also reset page numbers on all pages in your book. Use this to reset page numbers have accidentally been deleted. Note that page numbering that has been deleted on purpose will be restored.
TROUBLESHOOTING TIP: If the page numbering does not update, try toggling the position to a different type (eg. from bottom center to bottom outside) then back to your original selection.
Removing Individual Page Numbers
Individual page numbers may be deleted from pages if they are on top of photos or text. Simply select the page number in the editor, then click the X (delete key) on the top menu. If you have accidentally removed a page number, use the Undo option on the top menu to restore it within your editing session. If your section was saved, then you will need to use the steps above to reset page numbering to all pages.
Configuring Styles, Backgrounds and Fonts

The next time any one on your team launches a section in the editor, your new content selection choices will be available.


