Cover Design Guide
Cover Guidelines
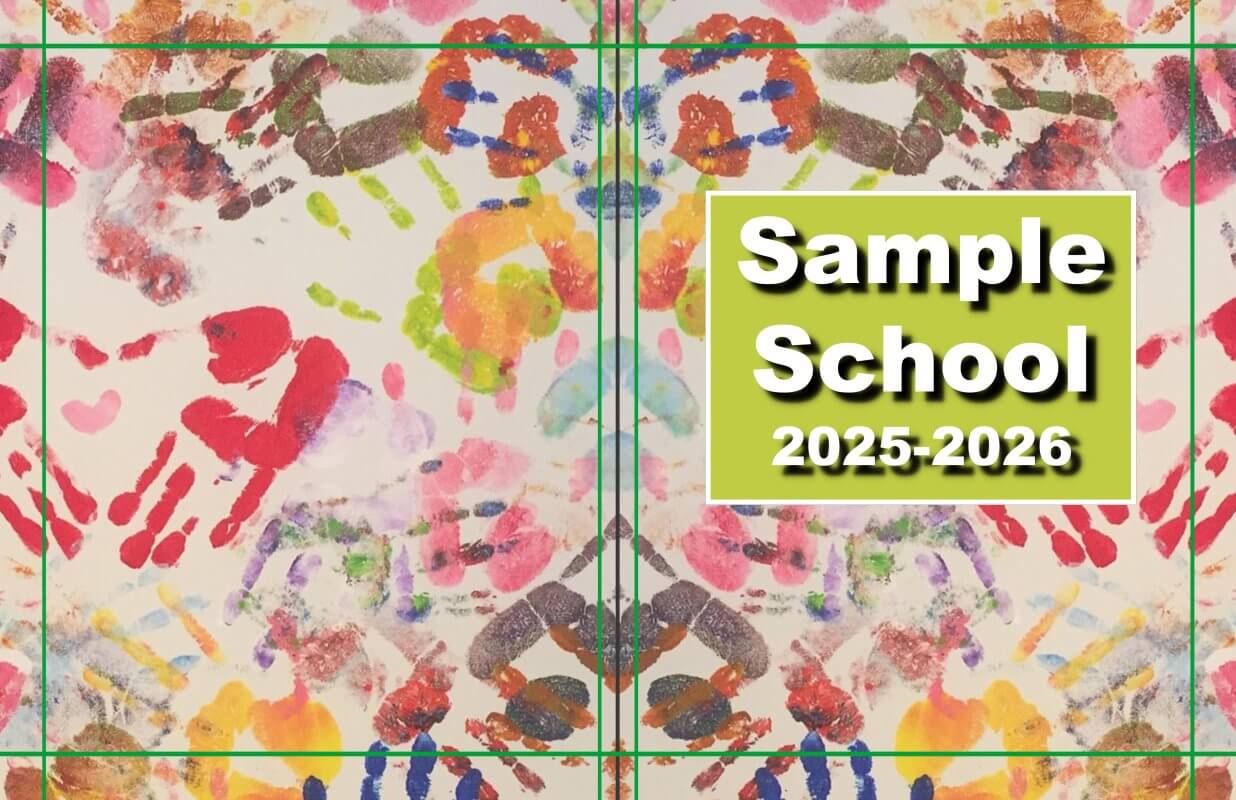
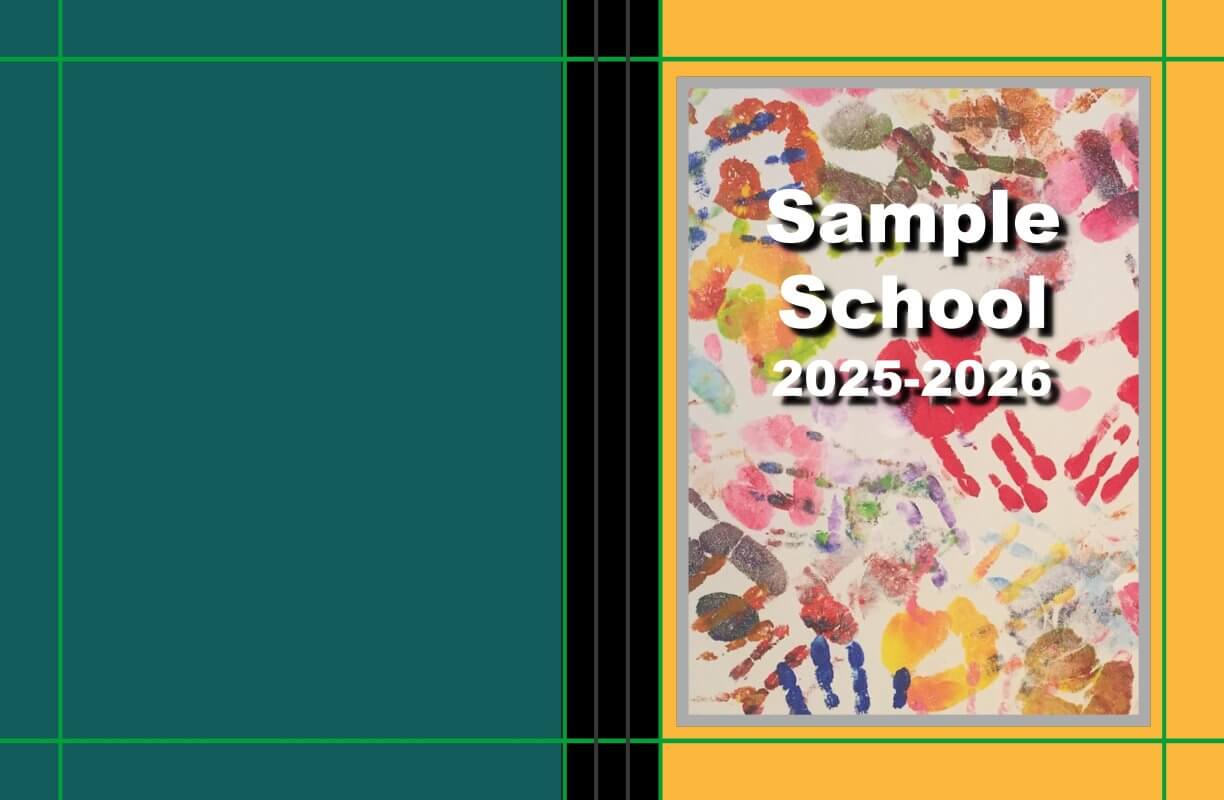
Covers are designed across a single large page, as if the book was opened facedown on a table. Below are important design guidelines that will ensure that your cover will print perfectly.
Your cover includes several important guidelines:
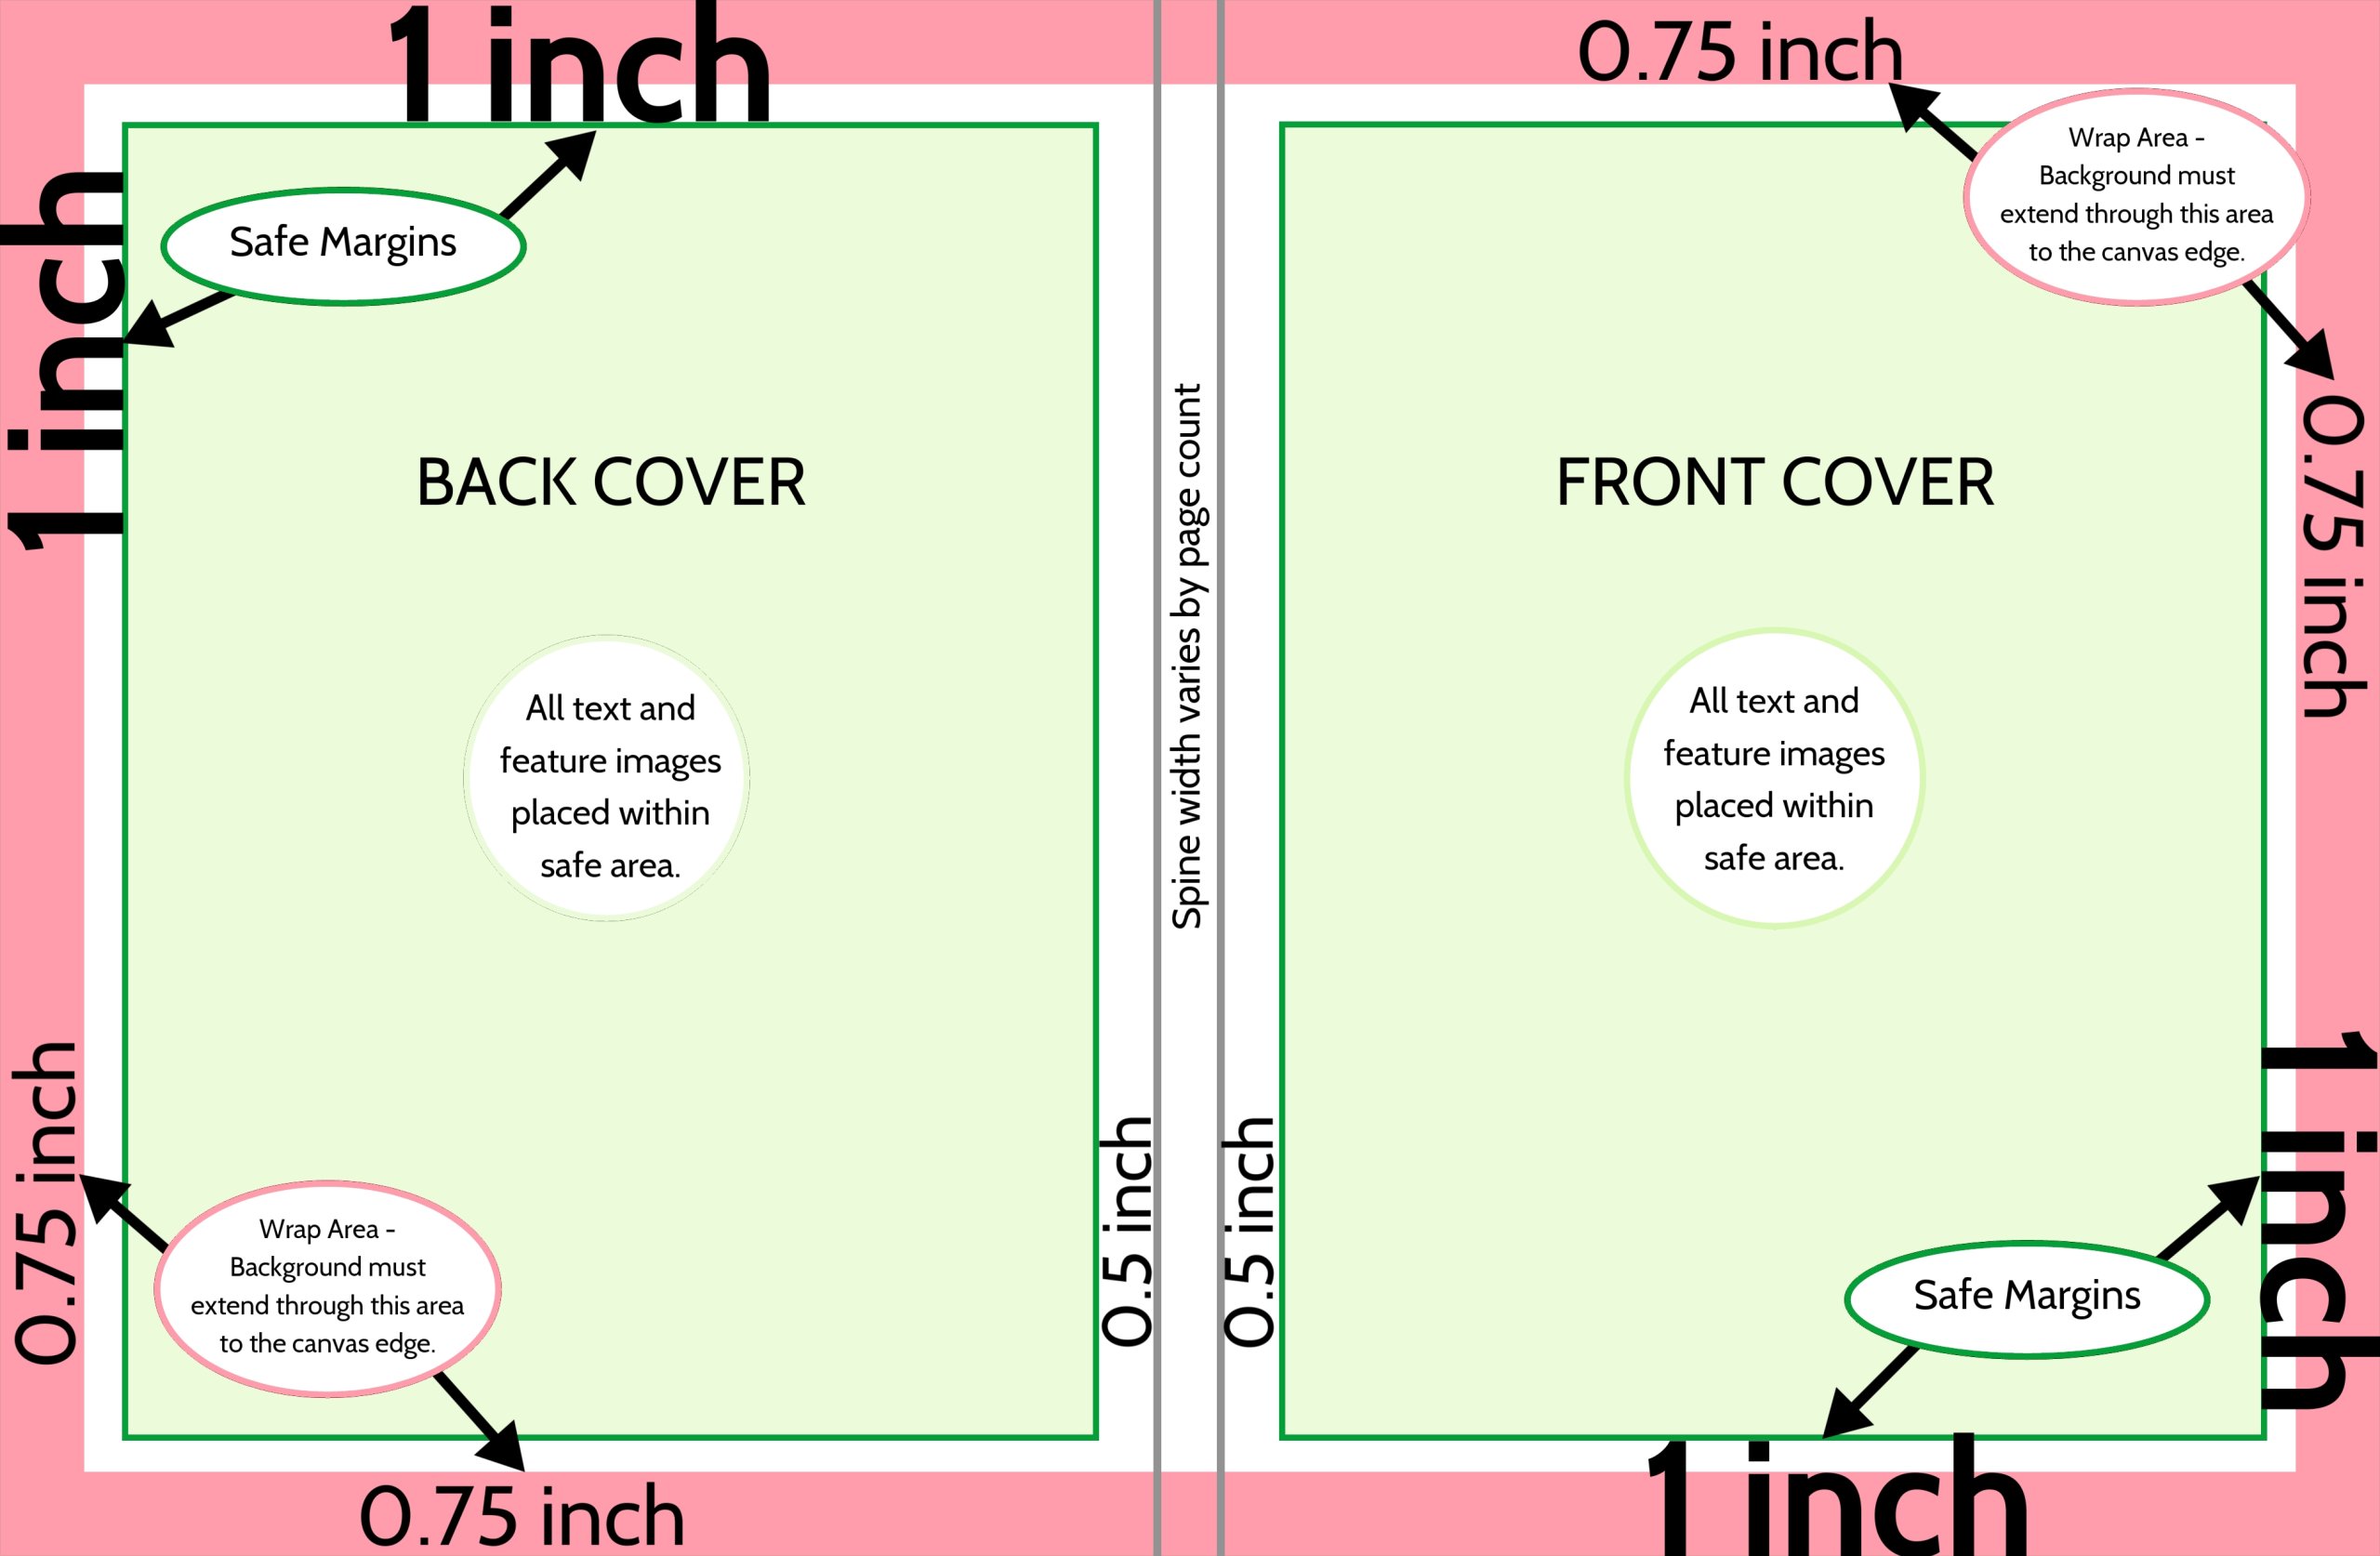
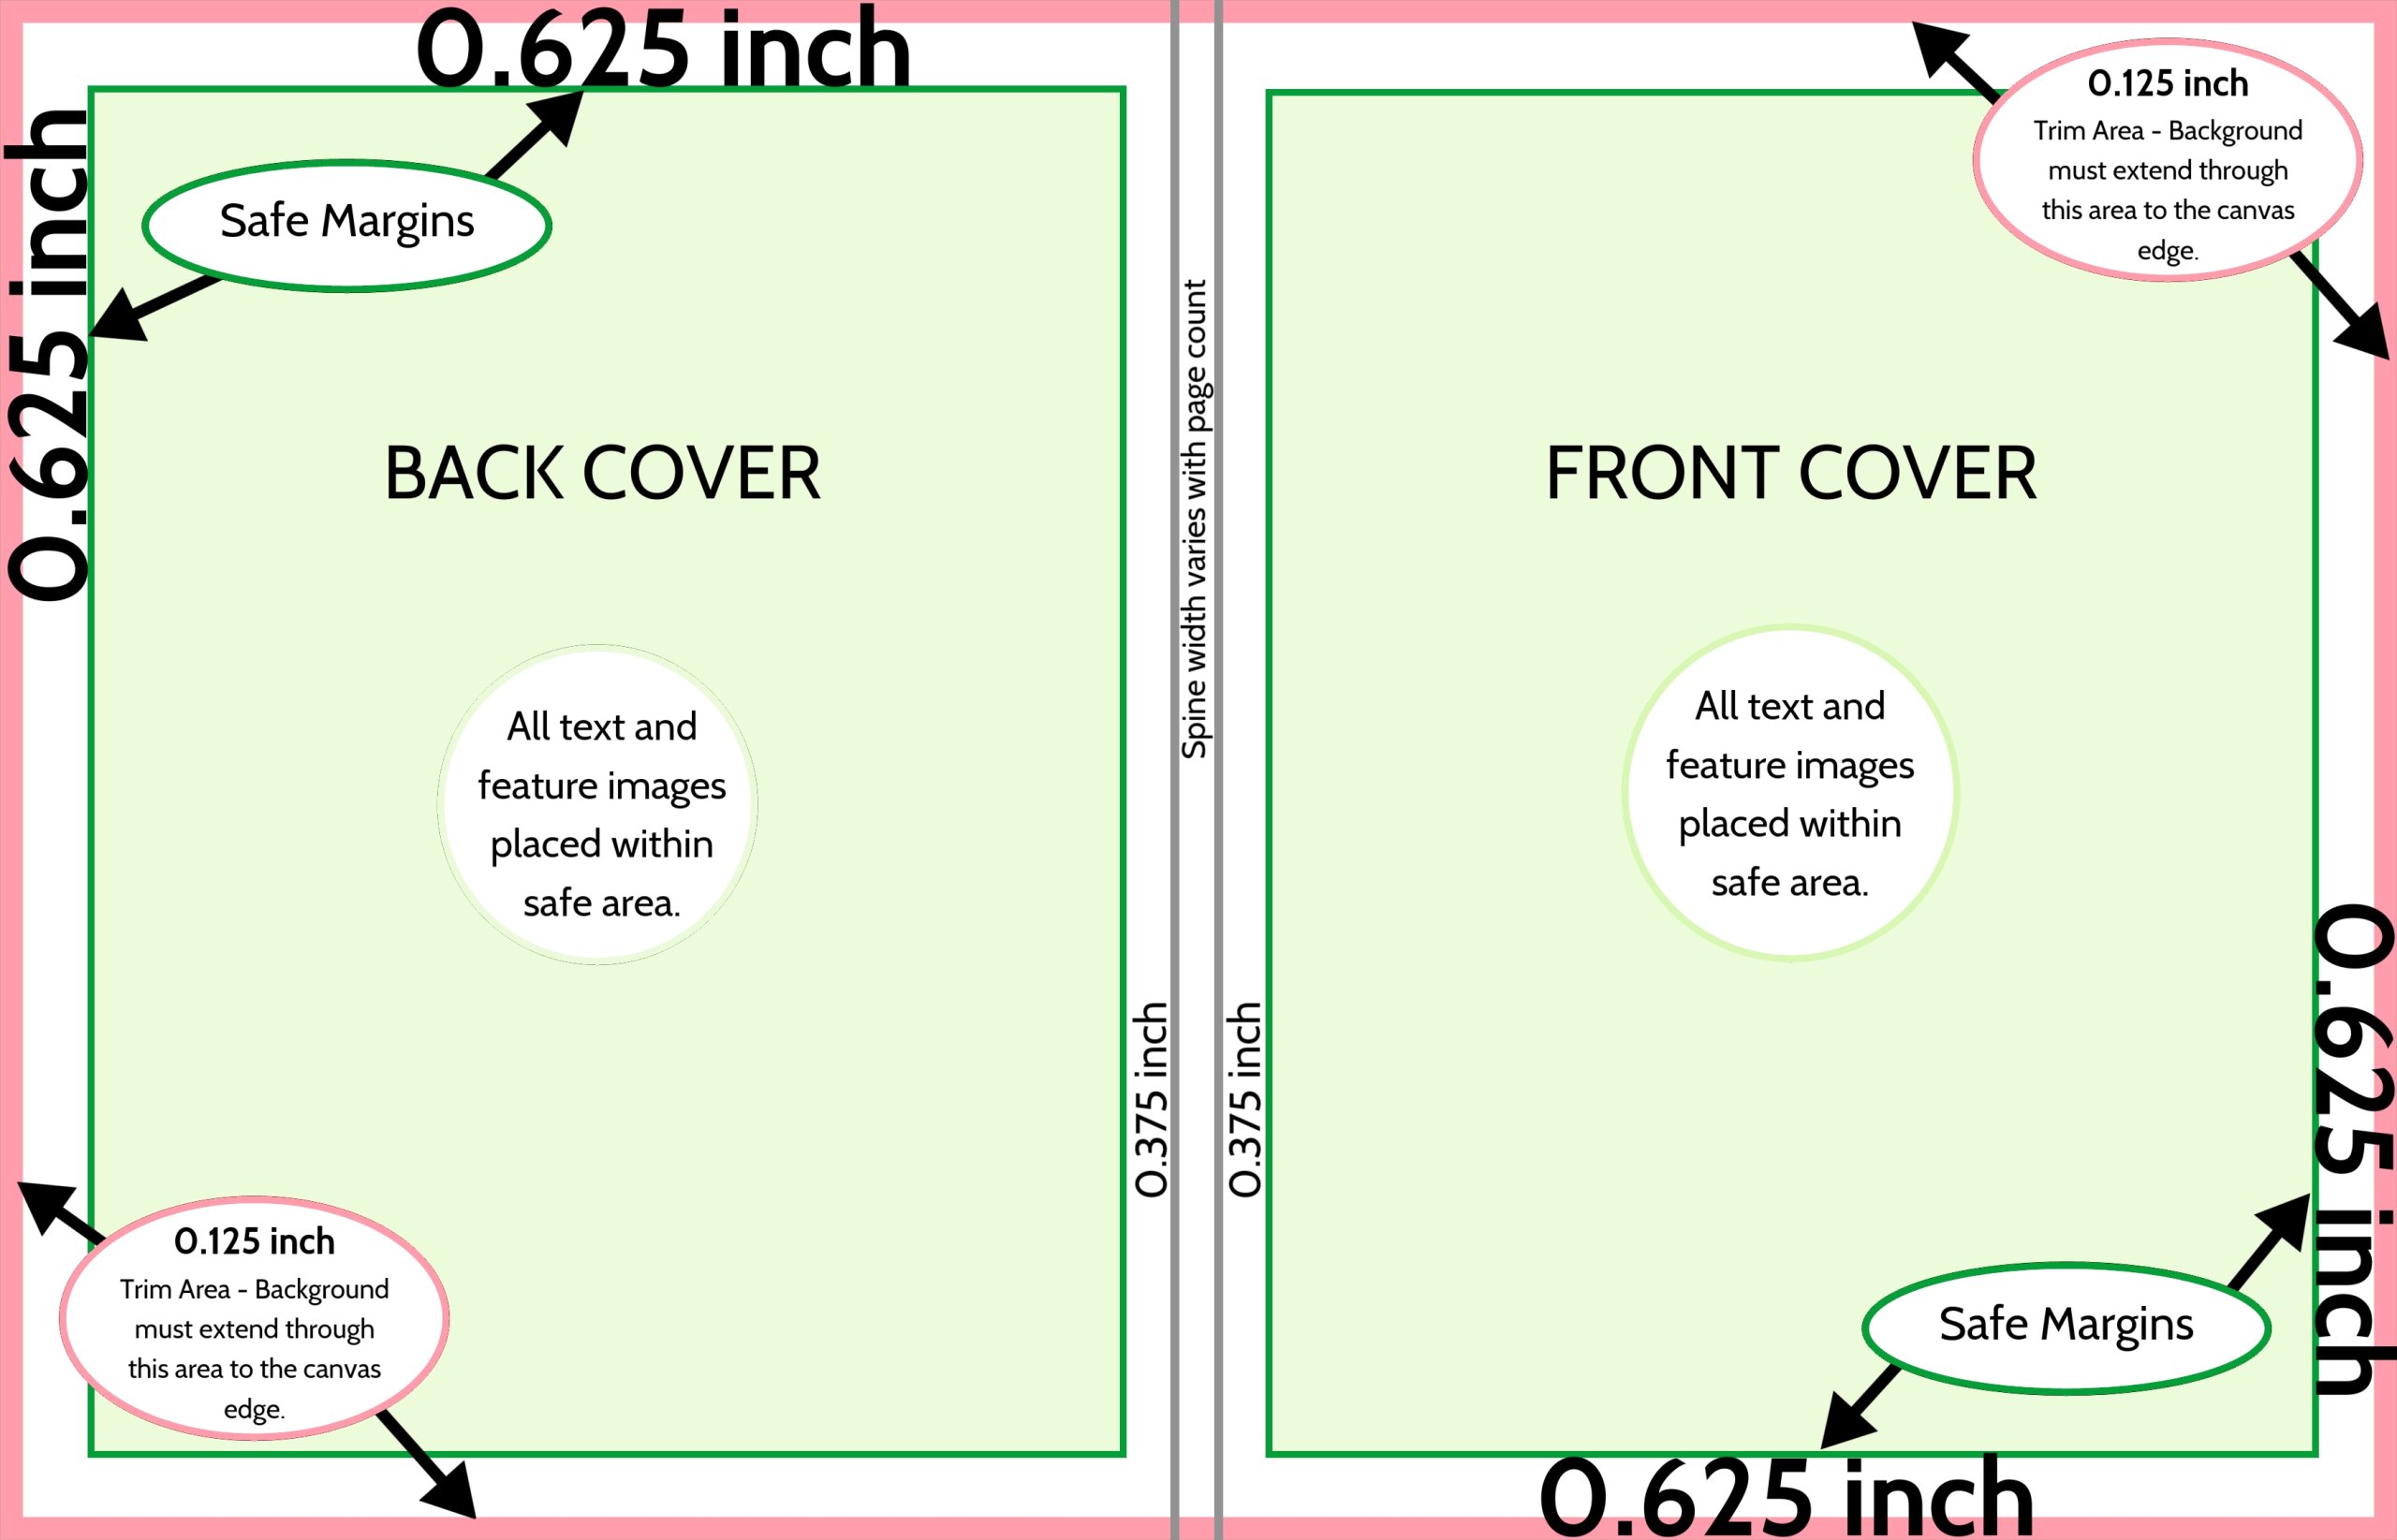
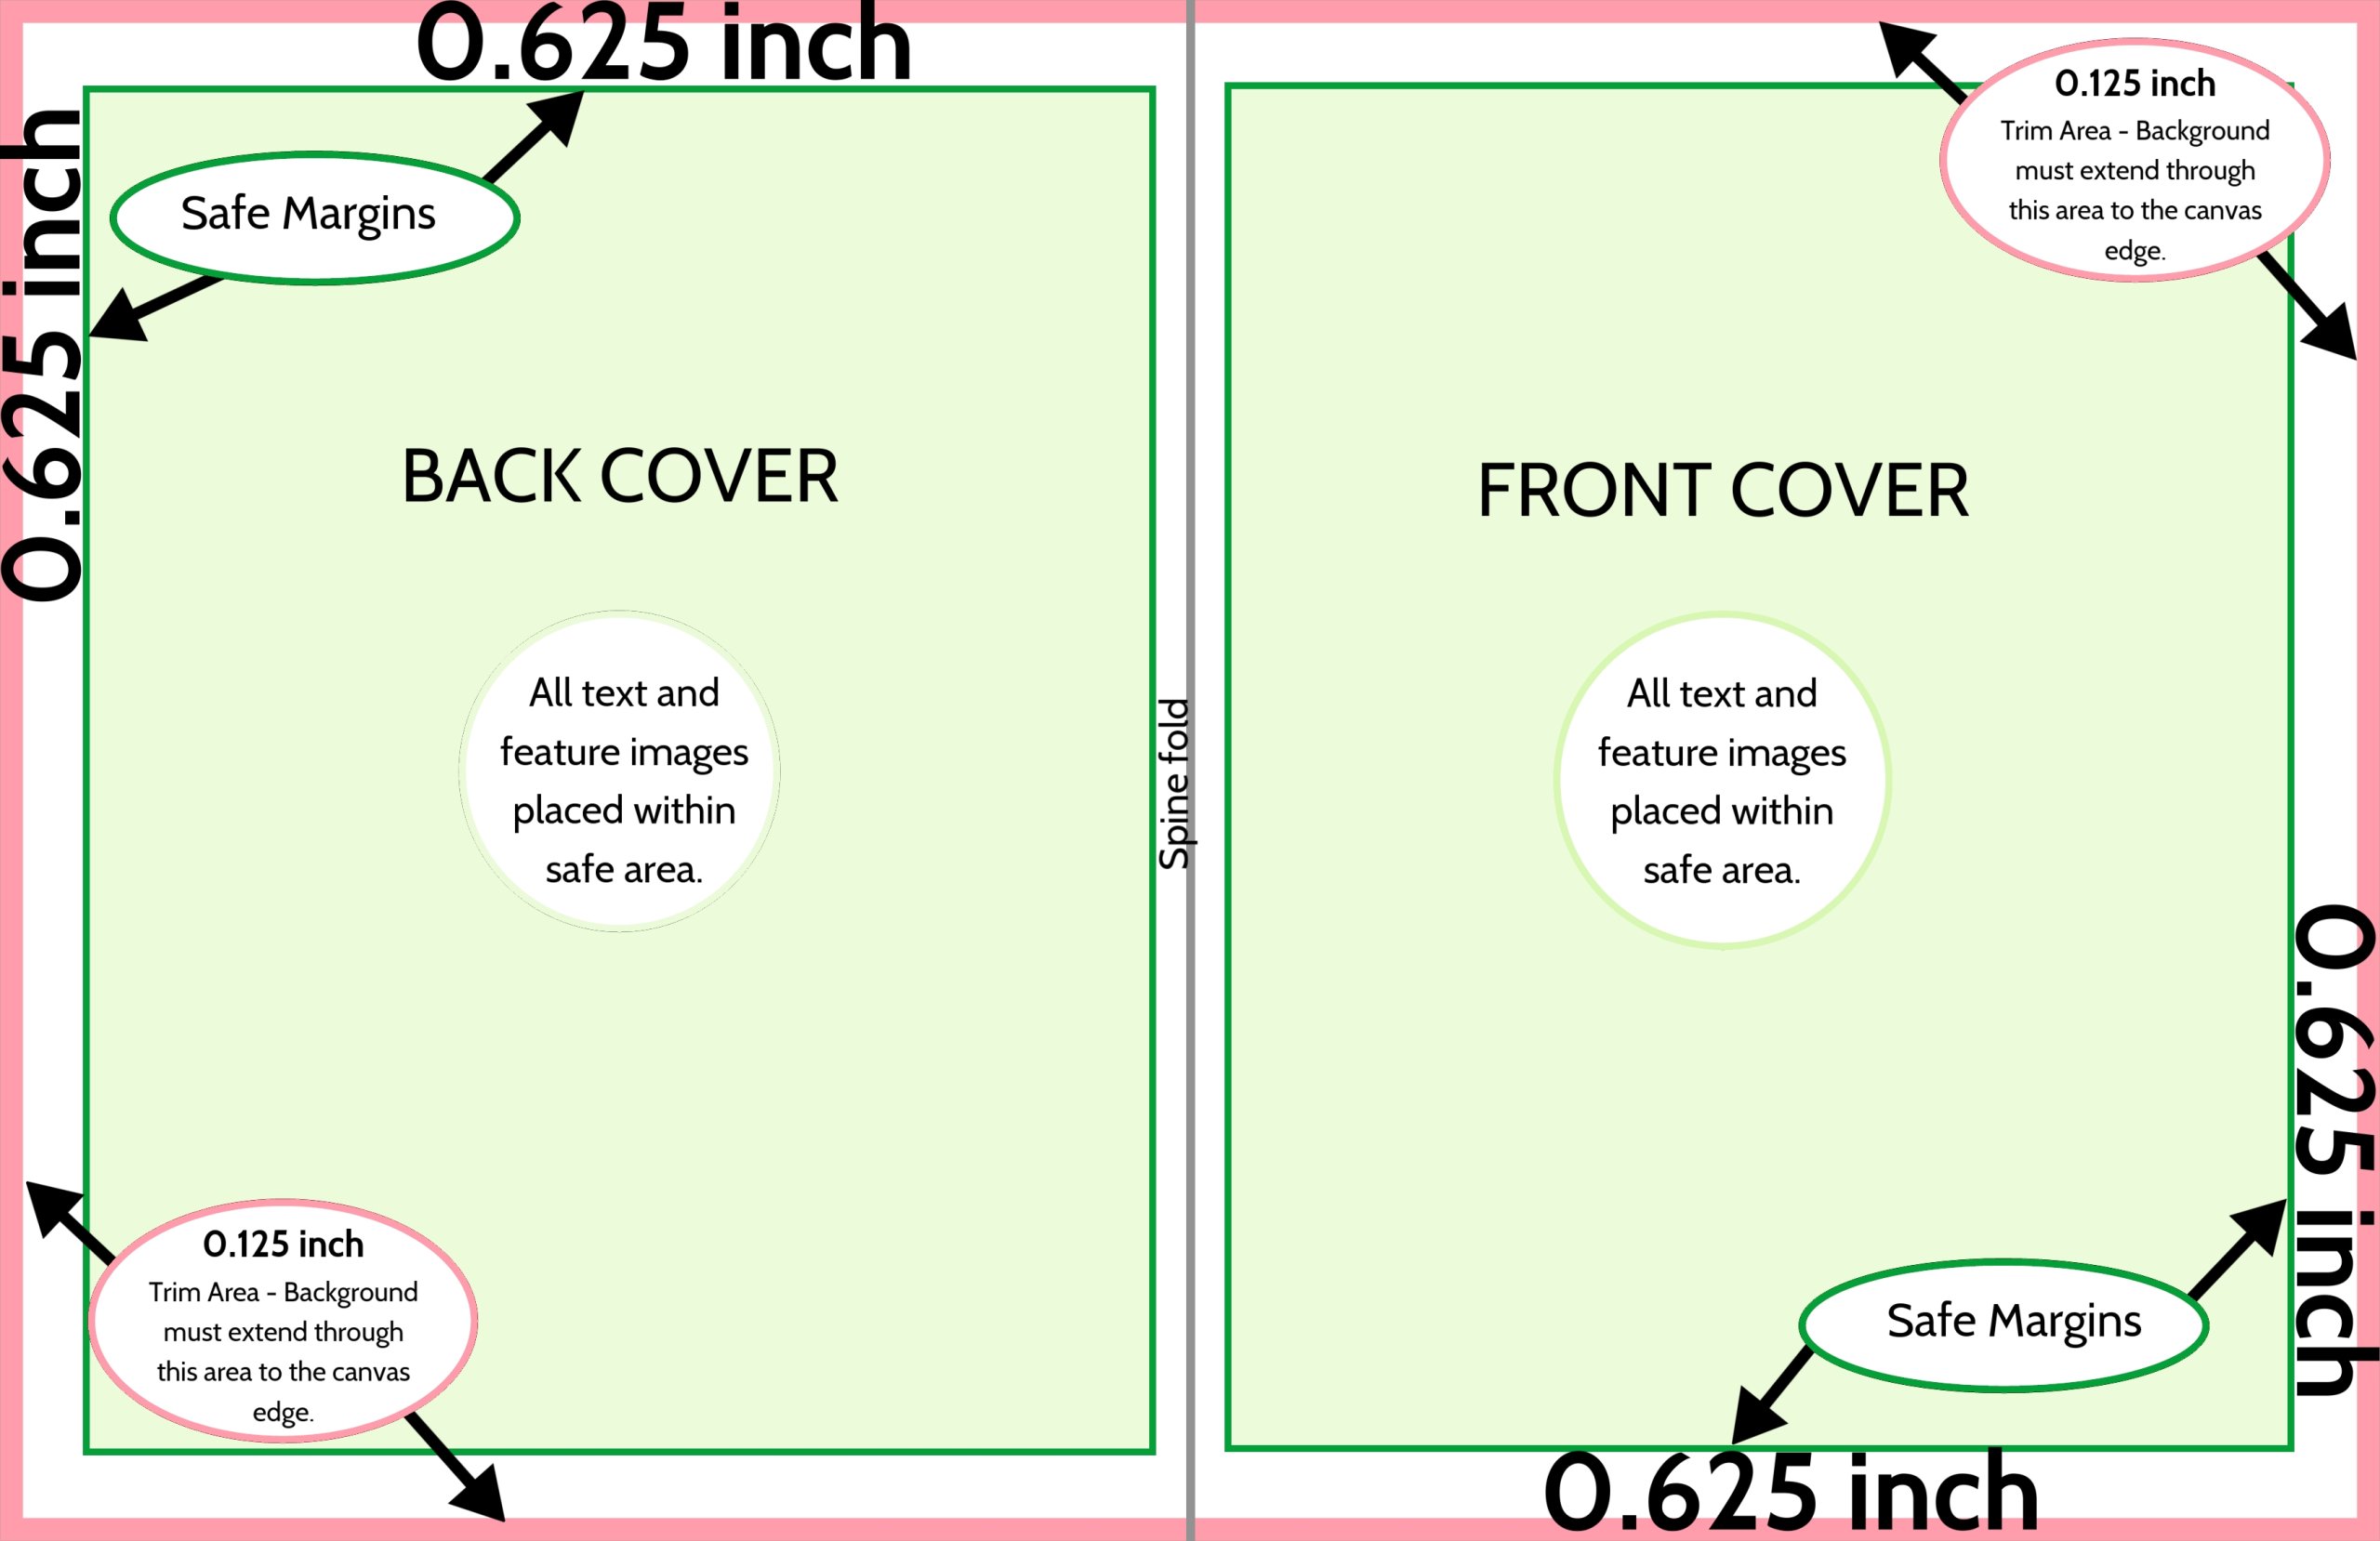
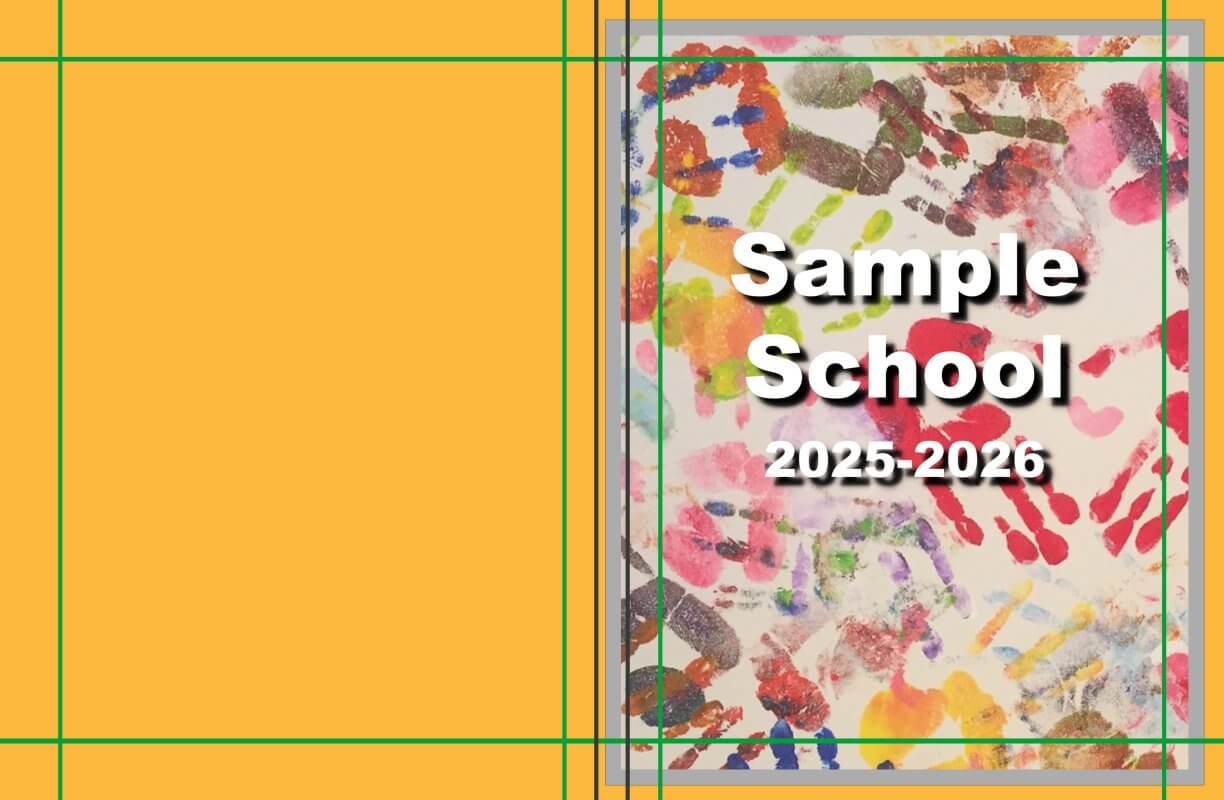
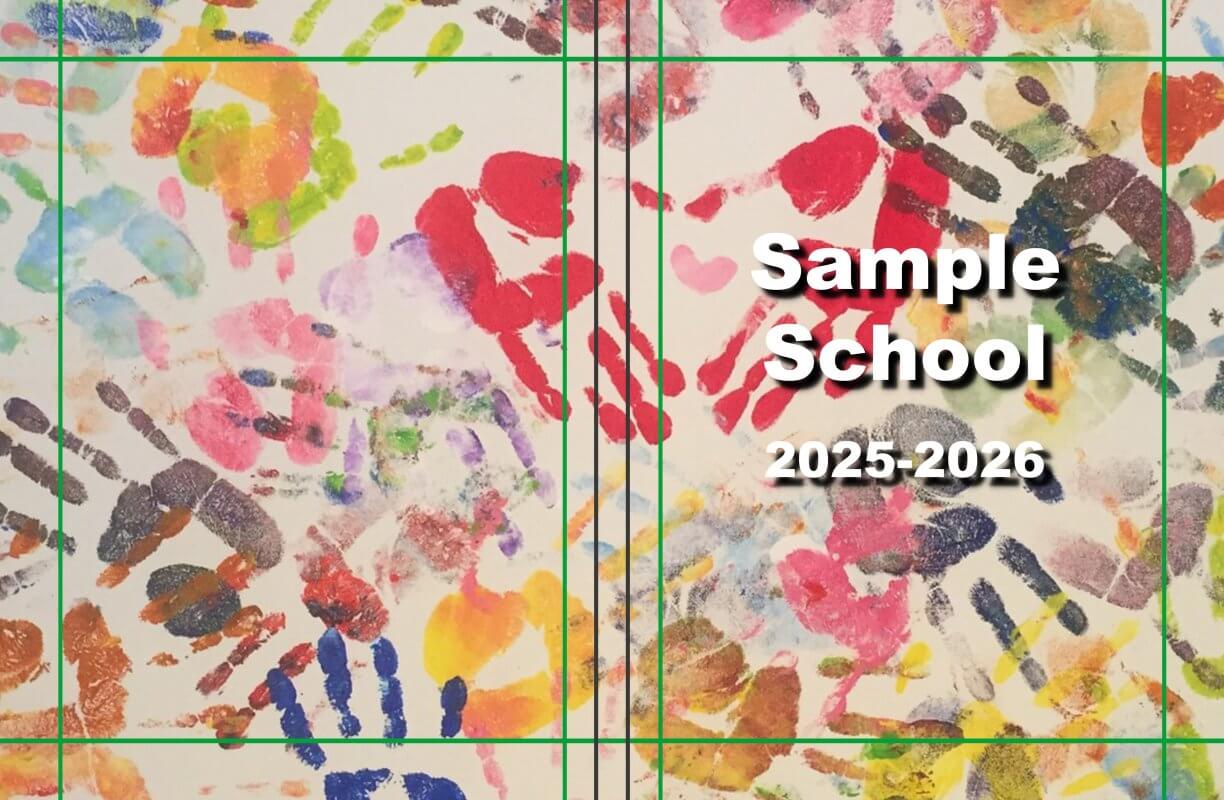
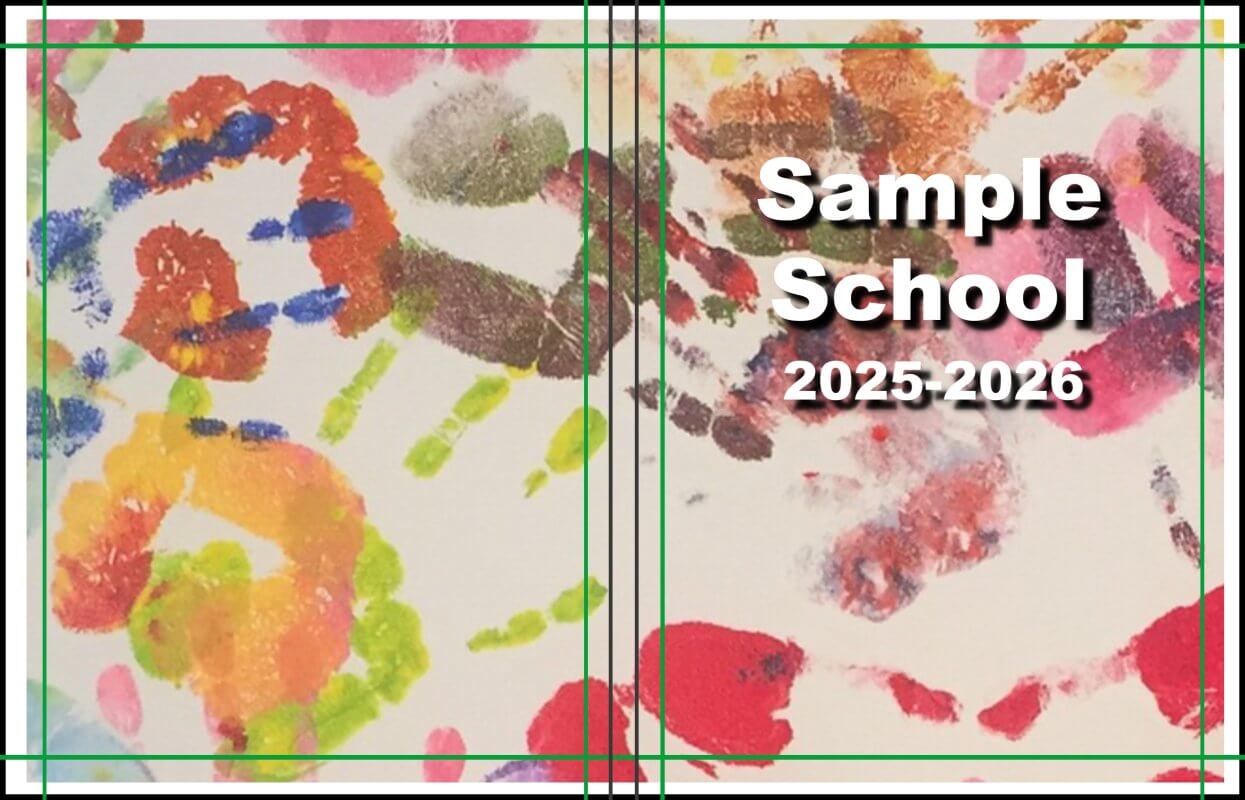
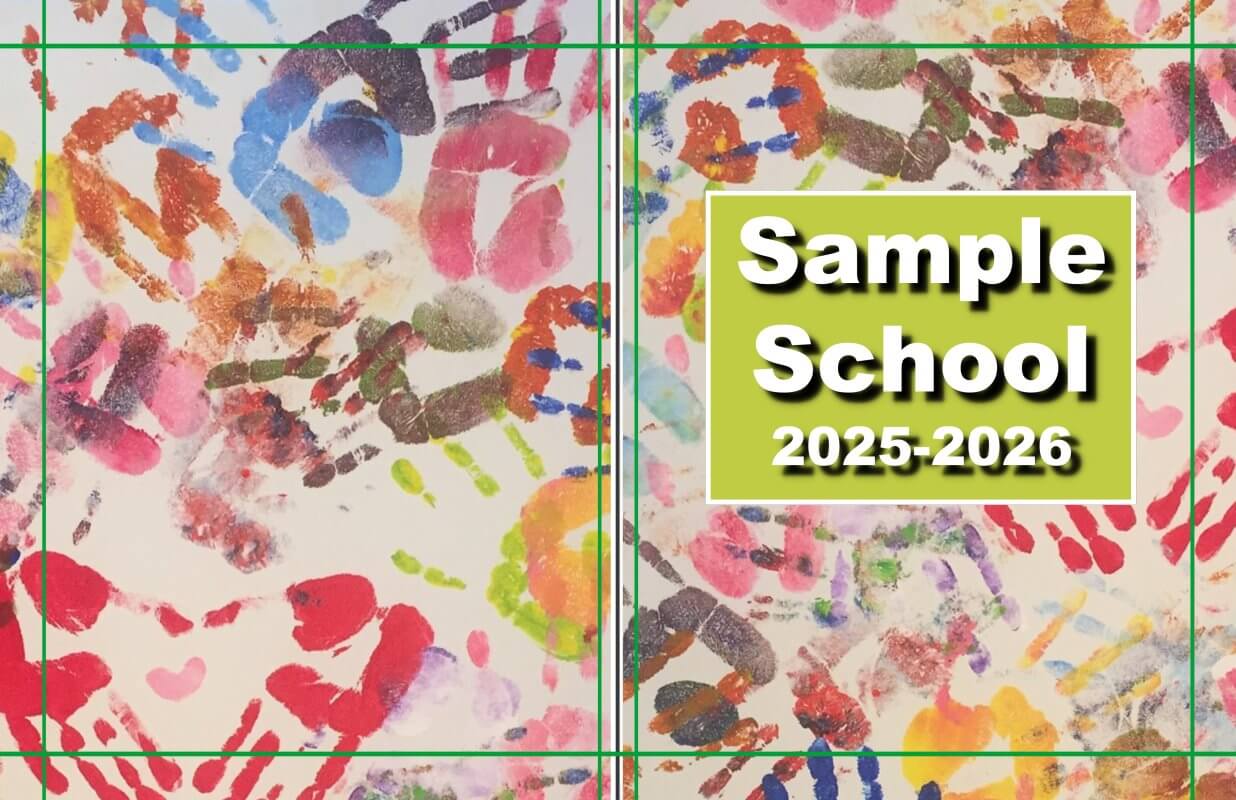
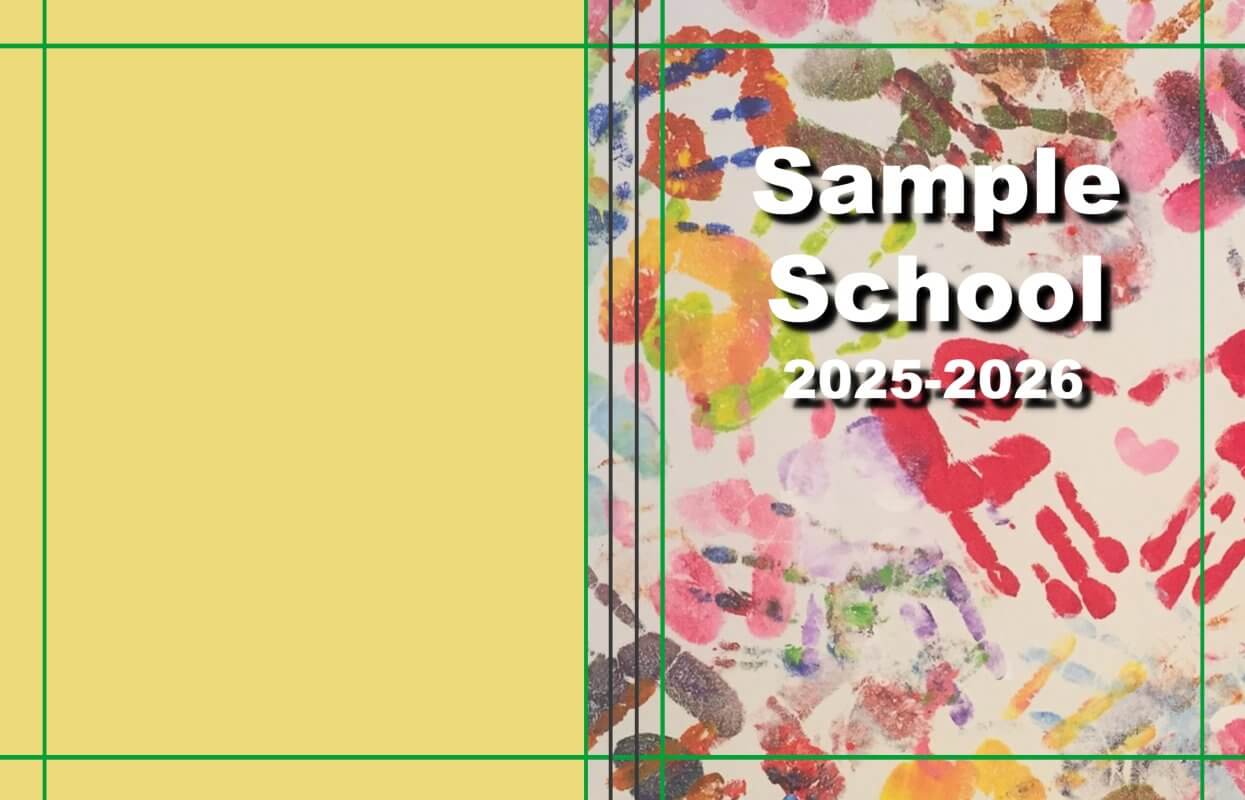
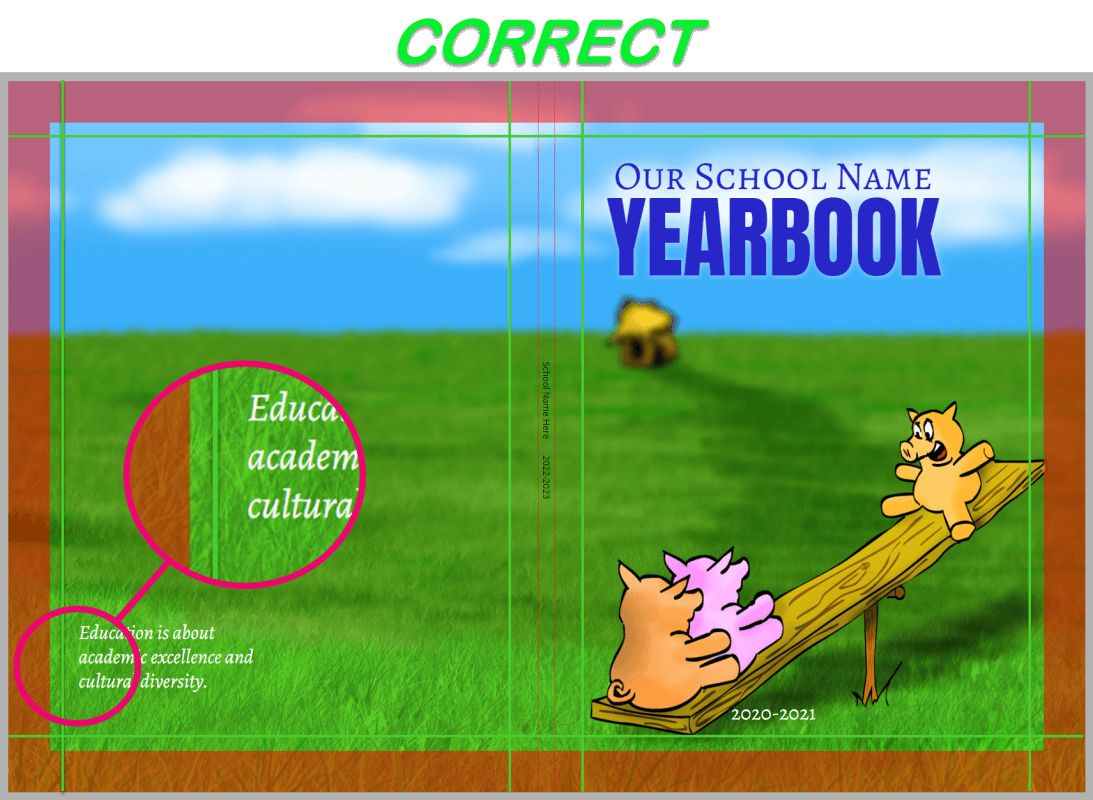
Safe margins are indicated in green in the illustrations to the right. These define the area where all text and featured images must be placed. All content placed outside of this area is at risk for trimming/clipping.
A wrap / trim area is indicated in red on the illustrations to the right. This is located around the perimeter of your cover. Background colors/textures must extend into this area to achieve a clean edge finish on your printed book. On a hard cover book, this area will flip over the back side of the cover. On a perfect bound or saddle-stitch soft cover, it will be trimmed away to achieve perfect edge-to-edge coverage.
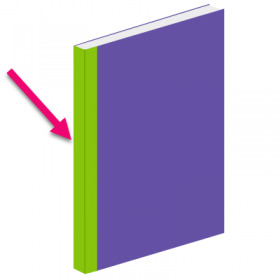
The spine is indicated in grey on the illustrations to the right. This is located in the middle of the canvas. Hard cover and perfect bound books have two guidelines to block off the flat spine area; these cover types may include spine text in this area if the book exceeds 72 pages. Saddle-stitch books have a single guideline, where the cover will fold over in the middle of the page.
If your project is being designed in yearbook-specific software provided by Studio Source, then your cover dimensions and margins are preset. If you are using your own choice of software, consult the page dimensions article for full details on how to set up your cover and interior pages.
The Dos & Don’ts of Cover Design
✔ Do place feature art within the safe area, away from the spine. Extend a complementary background color/texture from edge-to-edge to ensure a clean finish on your printed cover.
✖ Don’t crowd feature art near the edges of the page and near/over the spine. Your printed cover may have uneven thin border edges or clipped content at the page edges.
✔ Do completely cover the entire canvas with a background color/texture. While the outer edge of the page may be folded over the back or trimmed off, having full background coverage ensures clean edge-to-edge printing.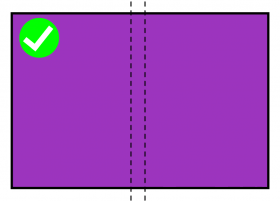
✖ Don’t leave an uncovered area around the perimeter of your cover. The uncovered area may creep onto the visible portion of your cover.
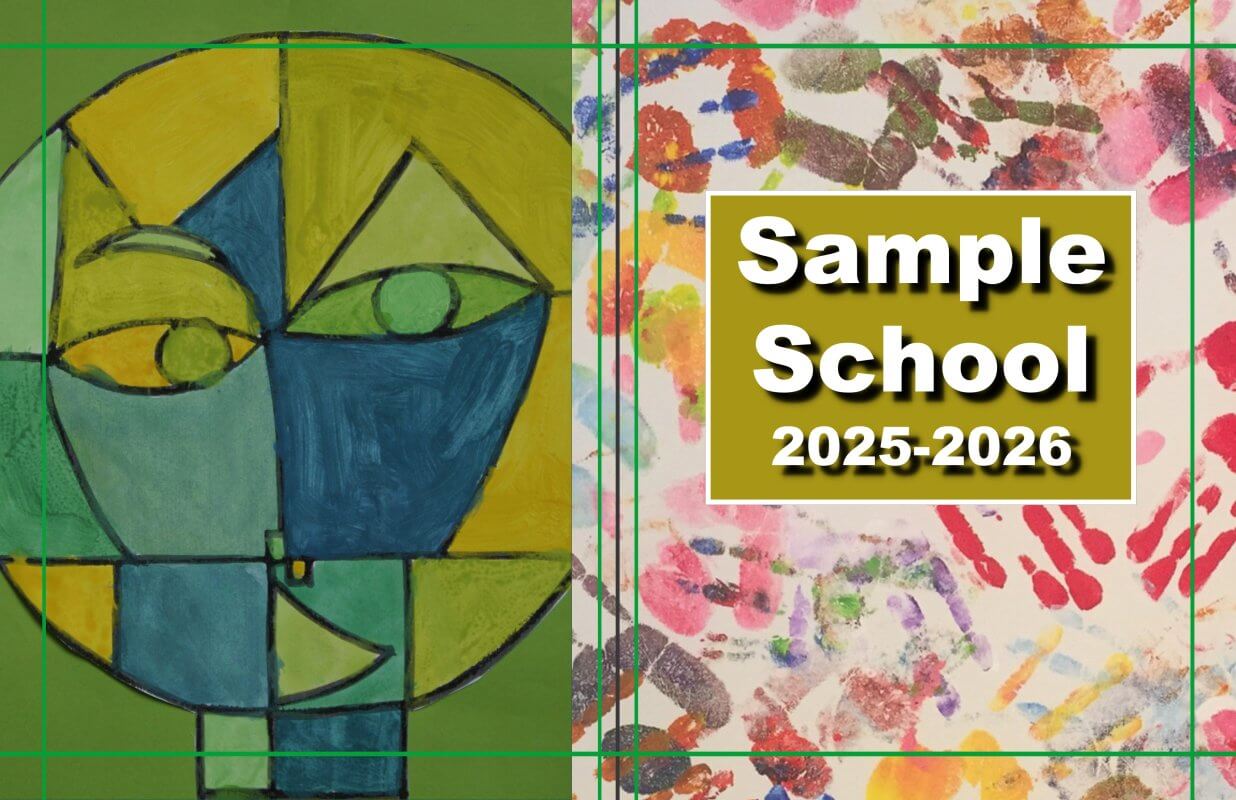
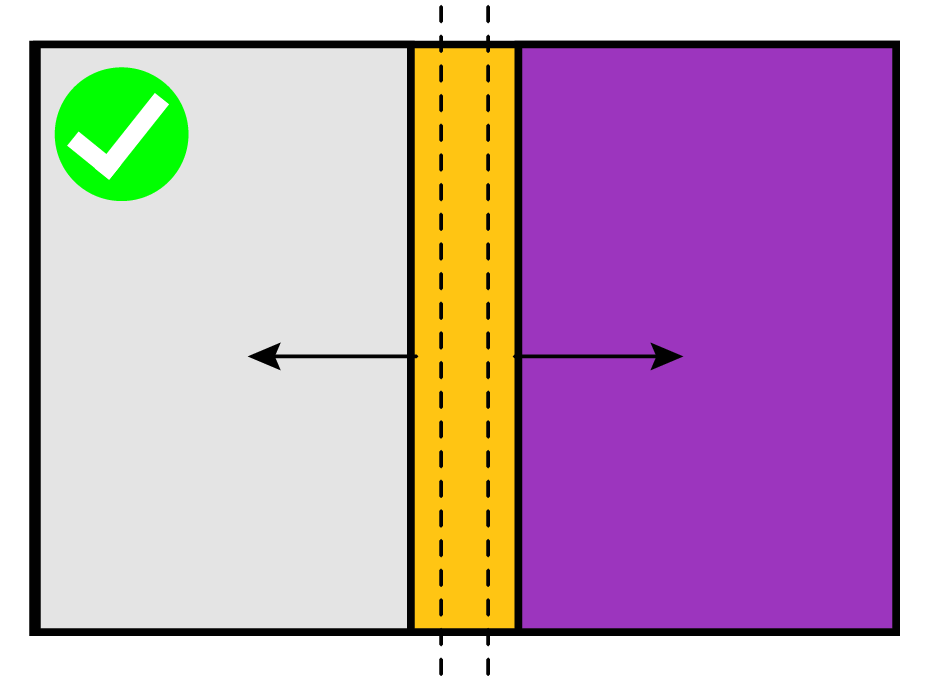
✔ Do use separate backgrounds on the front and back covers so long as they do not meet in the middle of the spine with a visible line. Overlap one of the background images over the spine to ensure a smooth transition.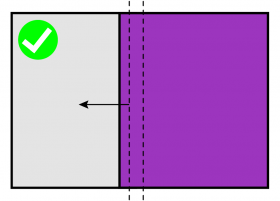
✖ Don’t use separate backgrounds on the front and back cover that join in the middle of the spine. Paper may shift so the line may end up skewed over to one side of the spine or even spill onto the front or back cover.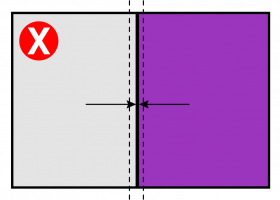
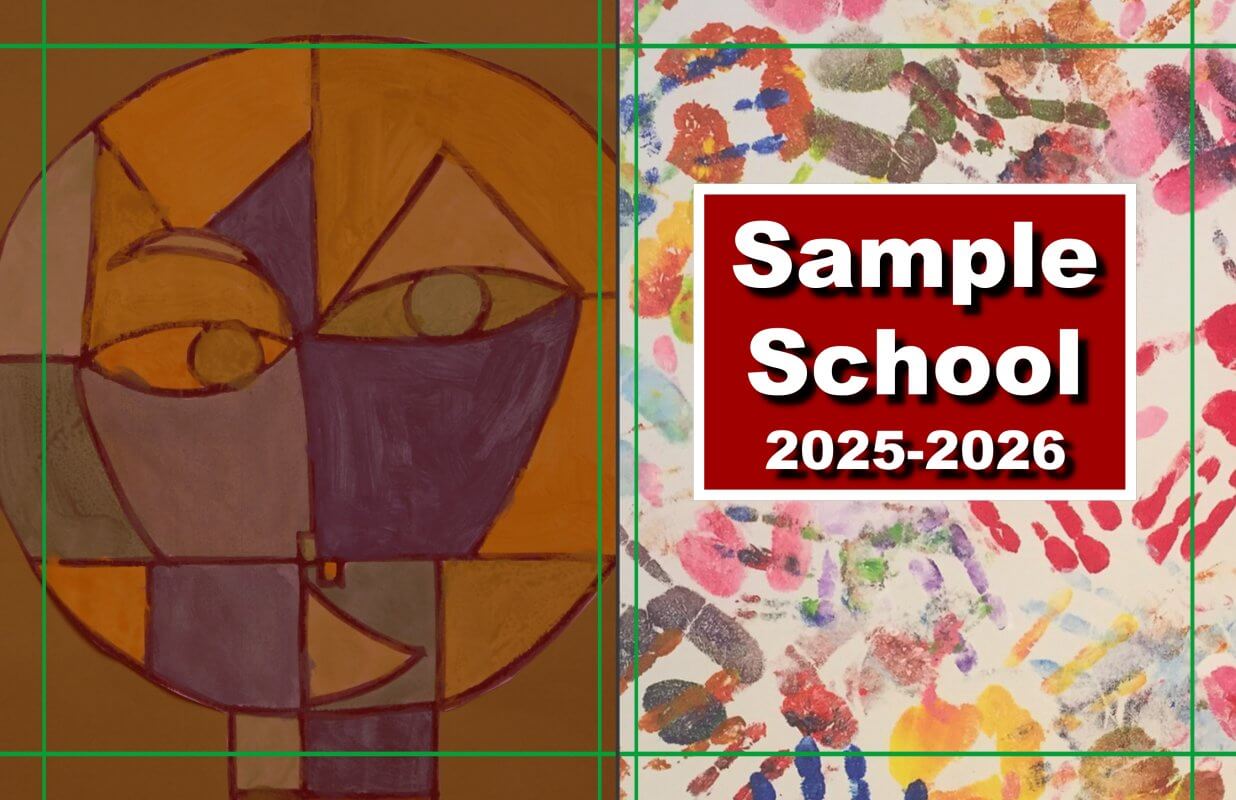
✔ Do use a “butterfly” effect to join two single backgrounds into a unified background. Flip one of the backgrounds to create a perfectly unified flow over the spine area.
✖ Don’t leave small gaps or misalign two matching backgrounds. The gap line and mismatch will show visibly on the spine.
✔ Do overlap the front or back background generously over the spine area. This will ensure a smooth transition over the spine area.
✖ Don’t place backgrounds or feature images right on the spine guideline(s) or stop mid-point in the spine. Your printed book’s spine fold(s) may not perfectly align to this guideline, with content spilling on or over the spine area should the paper stretch or shift during manufacturing.
✔ Do use a shape or background image to create a book-binding tape effect over the spine. This shape should overlap both front and back covers generously, smoothing the transition between the cover designs on each side.

✖ Do not color-block to the spine guidelines. Because paper may shift slightly during manufacturing, the color bar may move slightly and bleed over to the front or back cover area.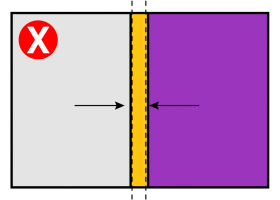
Spine Text Rules
Spine text may be added to Hard Cover and Perfect Bound Soft Cover books over 72 pages. Saddle-stitch books do not have a spine, but a fold. Books under 72 pages are too thin to accommodate spine text easily.
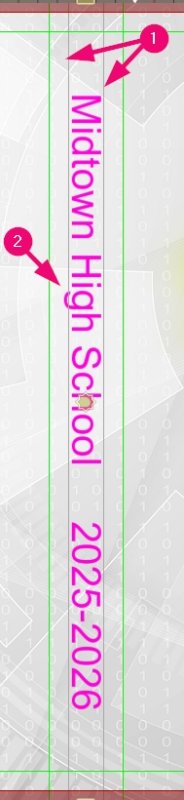
1 -Text may only be 70% or less of the width of the spine.
2 – Be careful to account for low-lying and high-flying letters.

3 – Perfectly center the text on the spine using the top and bottom of the longest letters to guide placement.

4 – For ease of placement, use ALL CAPS.
5 – English language books orient the spine facing the back cover.
IMPORTANT: Keep all featured images and text well within the safe margins. Paper can shift during printing by up to 1/8 inch, so text and images too close to the green safe margins may be trimmed off or appear awkwardly after printing.

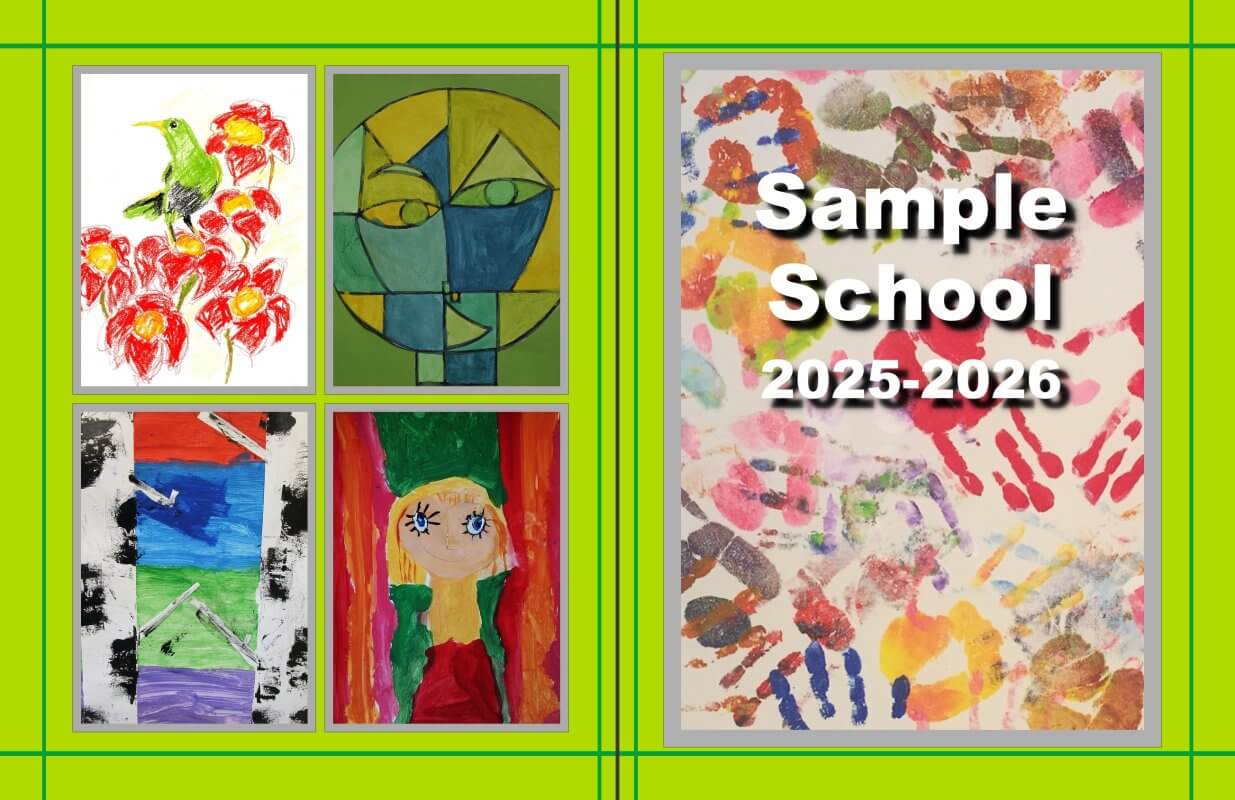
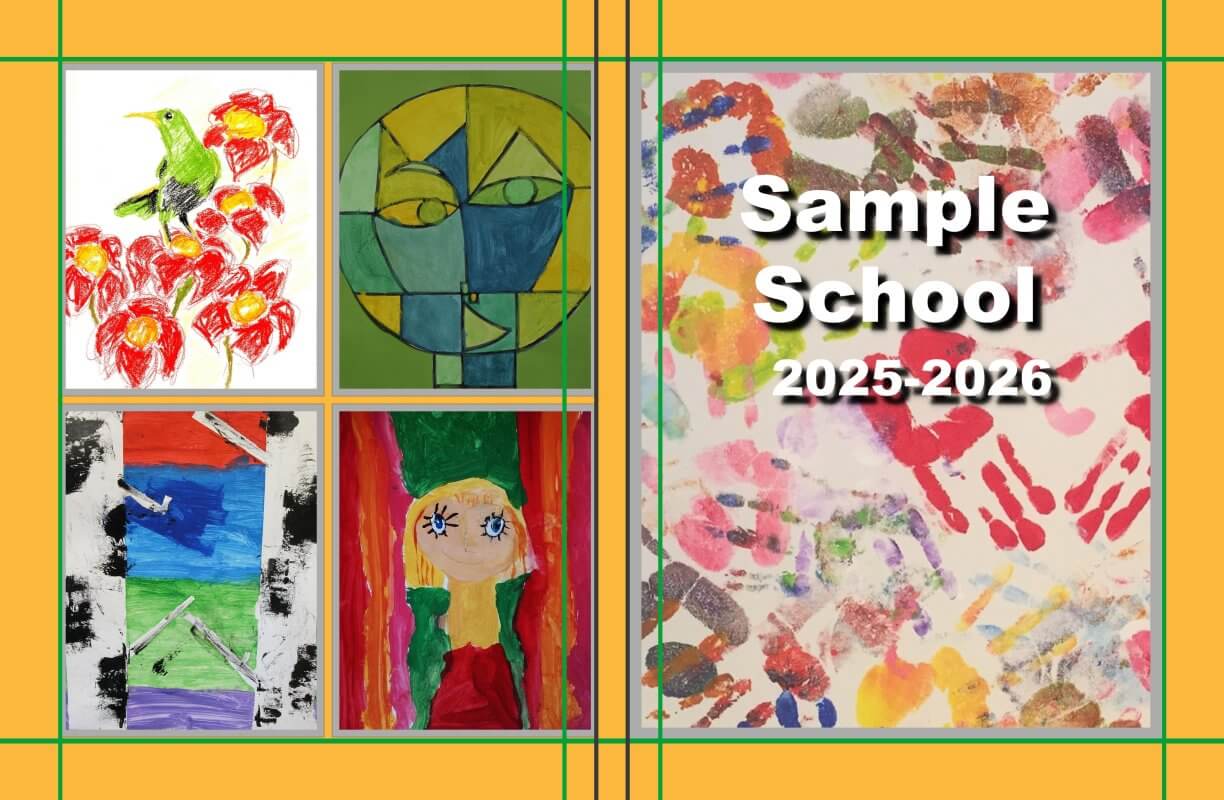
Student Cover Art
If you plan to feature student art on your cover, consult the Student Art Contest article for detailed information on formatting and placement.
Elements of Design
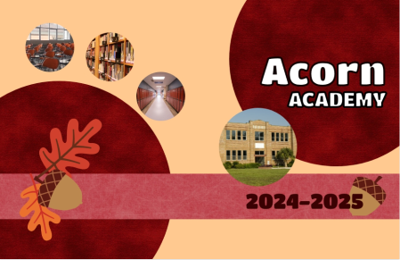
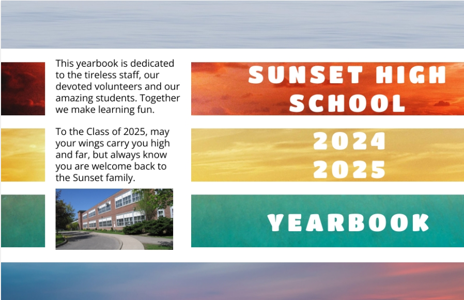
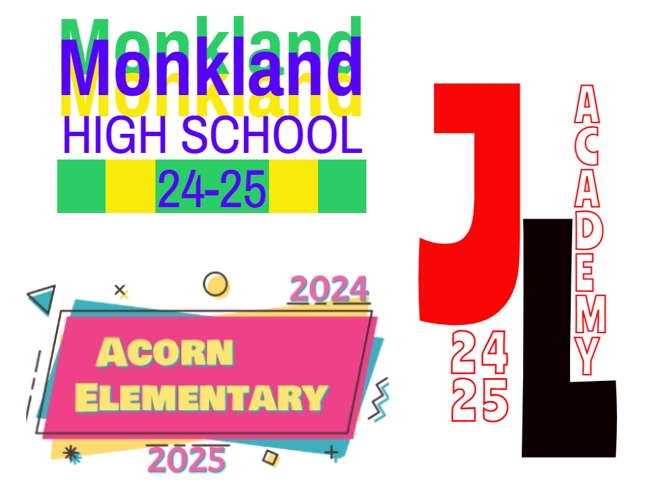
Yearbook covers should always feature:
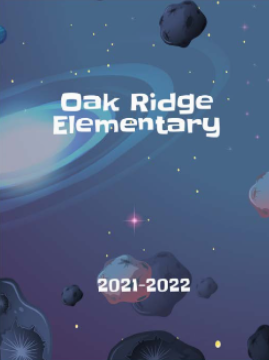
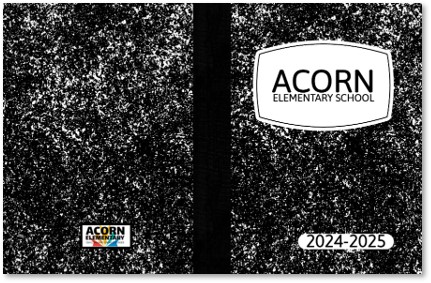
• The school name
• The school year (eg. 2024-2025, 24-25, 2025)
Yearbook covers often include:
• A school logo or mascot
• A thematic slogan, school motto or quote
• A feature photo, such as the school building, a graduating class photo and/or student art.
Cover Theme
A yearbook does not need to have a special theme. However, many schools will generate interest in the yearbook by running a “Choose the Theme” contest.
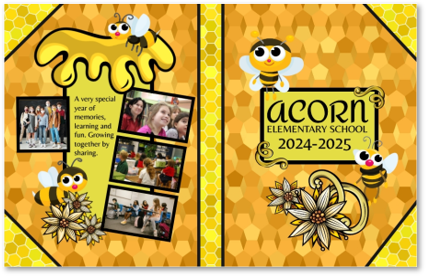
• A theme may be centered around a design motif (e.g. beehive, Netflix parody, outer space). Your cover will announce this motif boldly.
• A theme may be an idea or slogan (e.g. A Journey in Time, Stitching Our Story, Constellations). This slogan should be featured on your cover as the book title.
Color Styling
Color is an excellent way to create a thematic and stylistic unity throughout your book. Your cover can set the palette for the rest of the book.
• Choose a limited palette (2-5 colors), perhaps inspired by your school colors.
• Starting with the cover, assign particular colors to different elements in your book: backgrounds, banners, page titles, subtitles, paragraph text, etc.
• Solid dark colors and colors that appear as neon on your screen may not print well. Solid dark covers may print streaky and won’t wear well. Your screen’s luminosity amplifies contrast and brightness, so neon colors may appear dull when printed.
Backgrounds & Shapes
Backgrounds and shapes may used as simple but dynamic design elements on your cover. Try color blocking – using bold, contrasting textures and shapes to create a modern, structured look.
• Textured or patterned backgrounds or shapes may be used as decorative blocks of color over a plain background.
• Horizontal or vertical color block banners are particularly useful for creating groups (photos + text) or highlighting titles.
Text & Typography
Make a statement with text. Your school name, year and other text elements can become word art on your cover. Text can be the featured graphic image on your cover, avoiding the need to find that one perfect photo to summarize the year.
• Integrate text into your design with color, styling, clip art and shapes.
• Use text effects like bold, outline, and shadows, or create multiple layered copies of text.
• Generate separate text frames for large letters to play with scale and placement.
• Change inter-line and inter-character spacing.
• Generate separate text frames for large letters to play with scale and placement.
Creative Directions
While there are no limits to your choices when it comes to designing your cover, yearbook styling usually follows one of five major design directions. Any style is suitable for any grade level. Your choice of decoration will set the age-appropriate tone.
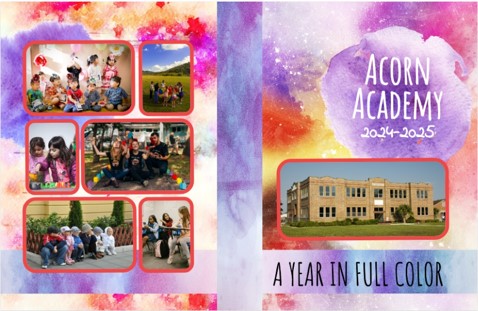
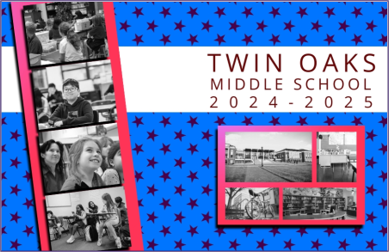
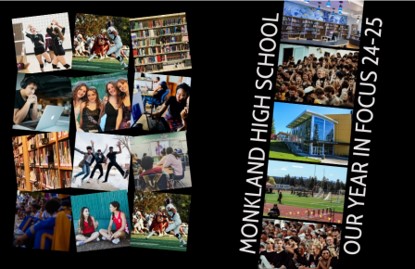
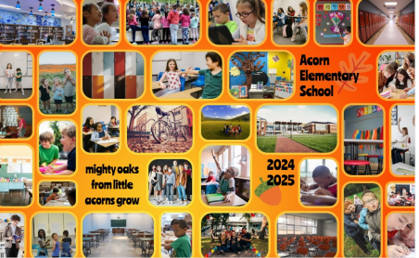
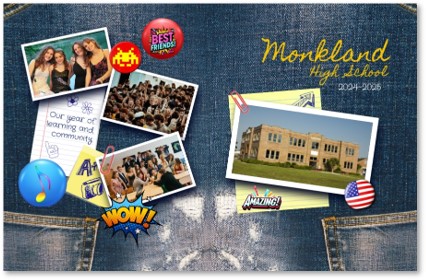
Collage Style
Collage style focuses on photos – the more the better. Decoration and text is minimal, in preference for grids or jumbles of candid images. Because there are so many photos, keeping colors and background textures simpler will enhance the design.
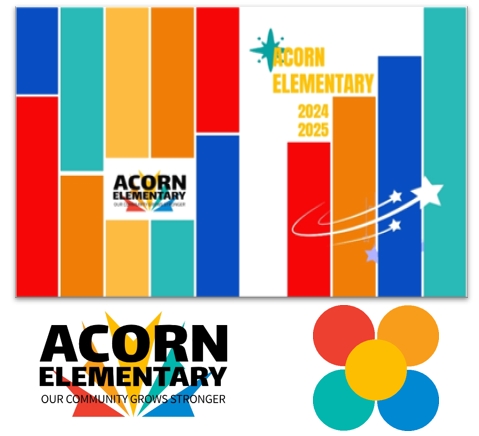
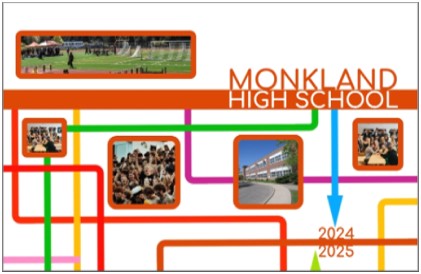
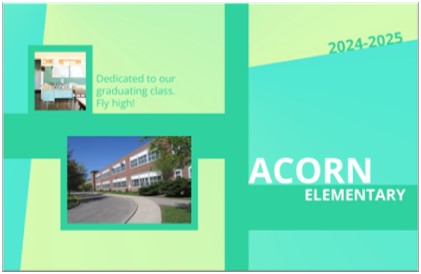
Modern Minimalism
Modern minimalism makes use of color blocking and a limited color palette. Ample use of negative space – empty areas around elements on the page– allows for titles and feature images to stand out. Headline-style titles, open fonts, and strong geometric lines are featured
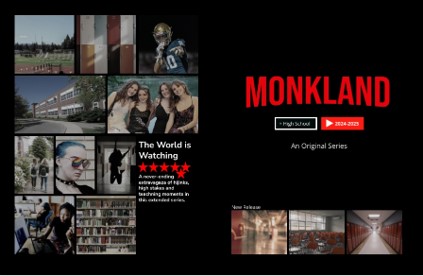
Parody / Tribute
Borrowing a style of another media source is challenging because care must be taken not to copy exact elements that are protected by copyright. While parody allows for creative freedom, you still need to make sure the tribute is clear without using the original characters, logos or specific designs.
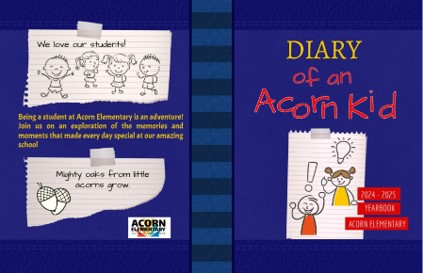
Scrapbook
Scrapbook style has a casual feel, layering photos, handwritten fonts, doodles, and decorations like stickers, tape and notepaper. It gives the impression of a personal, DIY project with a playful, less structured design.
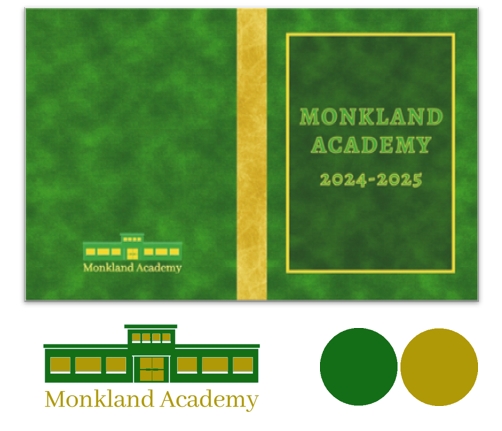
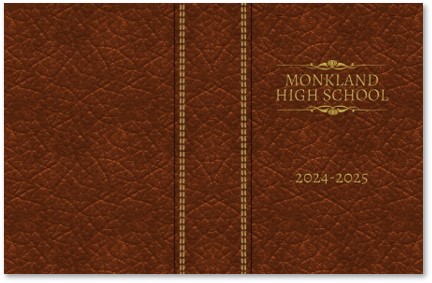
Traditional
Traditional style mimics a pre-digital yearbook. Leather, parchment and/or notebook backgrounds are combined with subtle titles. Fonts are straight-forward, not very decorative, and the color palette is very minimal.
Sourcing Content Safely
Downloading images from free websites or general internet searches is inadvisable. Free online content is often low-resolution and will print pixelated or blurry and usage rights are at best unclear. Learm more about copyright and licensing rules.
Yearbook software includes a collection of backgrounds and preformatted layout options. For additional cover background options, browse the extensive collection of images in the Studio Source Catalog. All cover backgrounds in the Catalog are copyright-cleared and appropriately formatted (6000 x 3900 pixel jpg files) to fill the entire cover background.
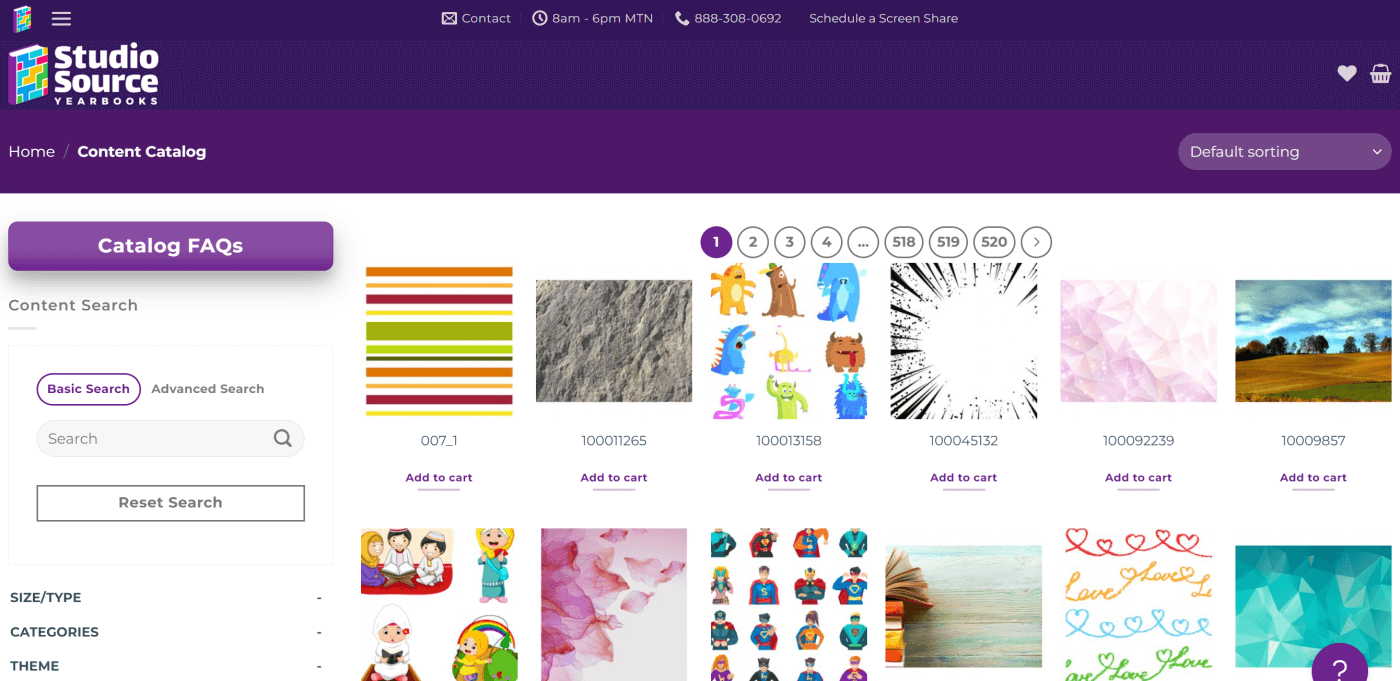
Tip: Learn how to use the Catalog in the Additional Resources & Tools article.