Proofing on the Studio Source Dashboard
Congratulations on submitting your yearbook! Now that you’ve completed the design phase, it’s time to proof your book. Save yourself from costly reprints by carefully reviewing all aspects of your yearbook design.
Dashboard Review
Once your proof has been uploaded by your studio, advisers with proofing privileges will receive a notification email inviting them to review the proof — usually well within two hours of submission. The proof notification email contains a Direct Link to the Dashboard Proof. A reminder email is sent every day until the proof is either approved or rejected by an adviser or the studio. If you don’t find these emails in your inbox, be sure to check your spam folder!
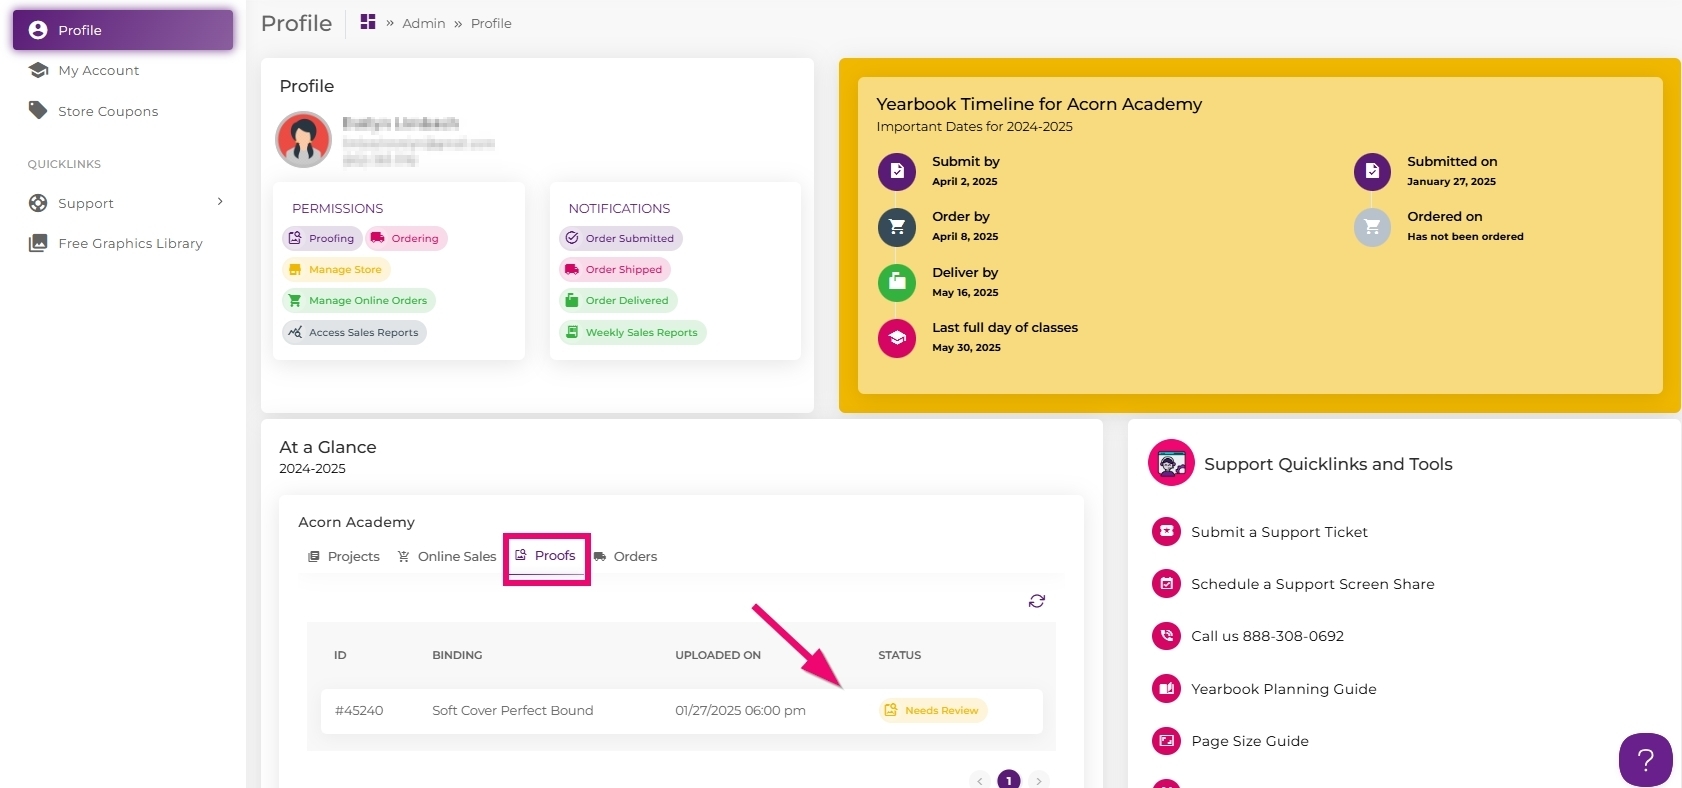
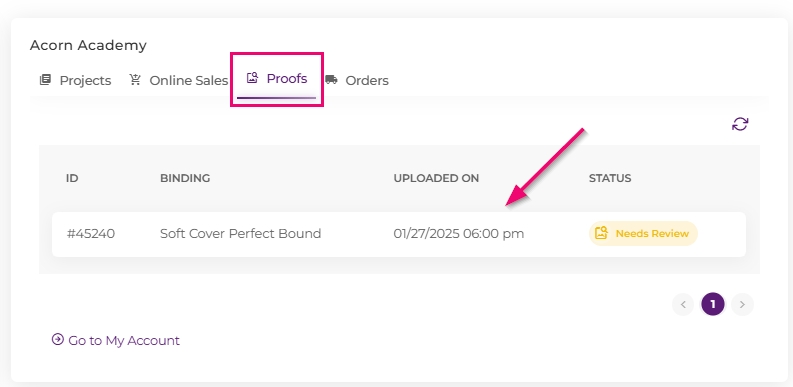
Need to get to your proof without a link? Log into your Studio Source Dashboard, scroll down to your At A Glance view to find the Proof tab. Click on the last submitted proof to access it. Note: if you have a book with two binding types (eg. a hard cover and a soft cover), you will need to access both proofs to review them separately.
The Dashboard proof page includes three different views of your yearbook: a flipbook view, downloadable pdf files, and a full cover view. Use all three views to catch important content placement issues and see all aspects of your yearbook clearly.
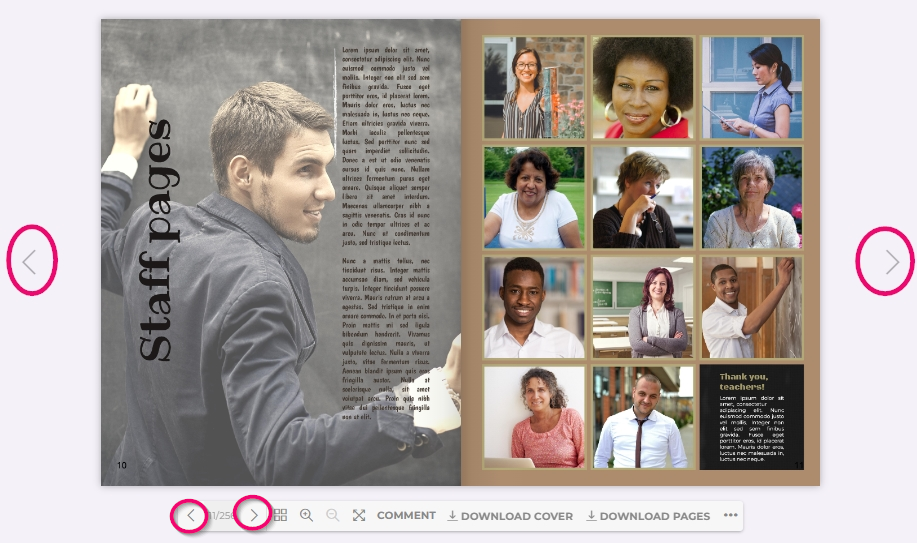
The Flipbook View
Use the flipbook to check for content that is too close to the page edges and center fold. This view represents your book as is appears after it is printed and trimmed.
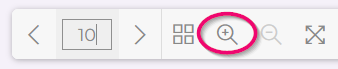
Turn the pages using the arrows at the sides or below the pages.
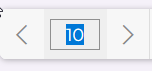
To view a specific page, enter the number
Hover over the page to zoom and use the wheel button on your mouse to zoom in/out, or use the magnifying icons under the flipbook to change the zoom.
The PDF View

Under the flip book, click both download buttons to launch the PDF versions of your cover and interior pages. These views show what your cover and pages look like before they are trimmed and bound, allowing you to check that all backgrounds, banners and any other content that is supposed to bleed out to over the edges actually covers the entire page.
The PDF files are also useful for detailed reviews, so you can check for low-resolution images, typos, and other problems with your portrait pages.
The Full Cover View
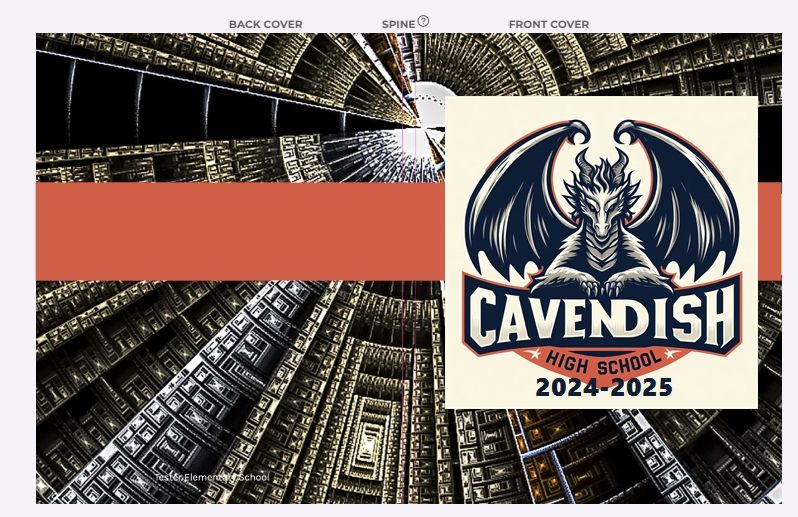
Scroll down to view the full cover. This view represent the book laying flat – the back cover is on the left side and the front cover is on the right side.
Use this view to ensure that featured content (photos, school name, year) are safely inside the page edges and at no risk of being trimmed, and also, that your spine text is well placed. (Details below…)
Your Proofing Checklist
 = high priority items to check
COVER
Your school name and current school year (eg. 2023-2024) is on the front cover. If your cover includes student art, be extra careful to check that there are no spelling mistakes!
On the Cover View, all featured images and text are ideally ½” from from the edges of the page and the spine guideline(s). They should be at minimum 1/4″ inset. For covers featuring student art, we strongly recommend generously insetting the art with the front/back cover area (like a matted painting) with a complementary background added to unify the entire cover design.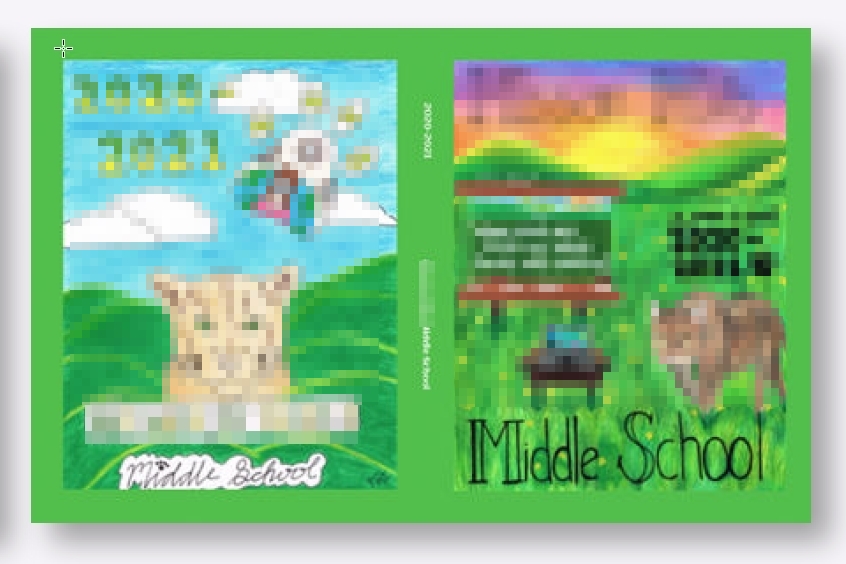
Hard cover and perfect bound books over 72 pages may have spine text. Check the Cover View for the following. Spine text must be perfectly centered, from the top of the capital letters to the bottoms of longer lower case letters. Tip: use ALLCAPS to avoid high- and low-lying letters. Spine text may not be more than 70% of the spine’s width.
Verify how your cover background looks over the spine area.
DO use a single background across the entire cover, or use a shape to overlap onto the front and back covers by at least 1/4″ to create a book-binding tape for a professional seamless effect.
DON’T have mis-alligned mirrored images, or precisely outline the spine area in a different color, or join two different backgrounds in the middle of the spine. Remember that the guidelines are approximate, and your cover image may shift slightly during printing.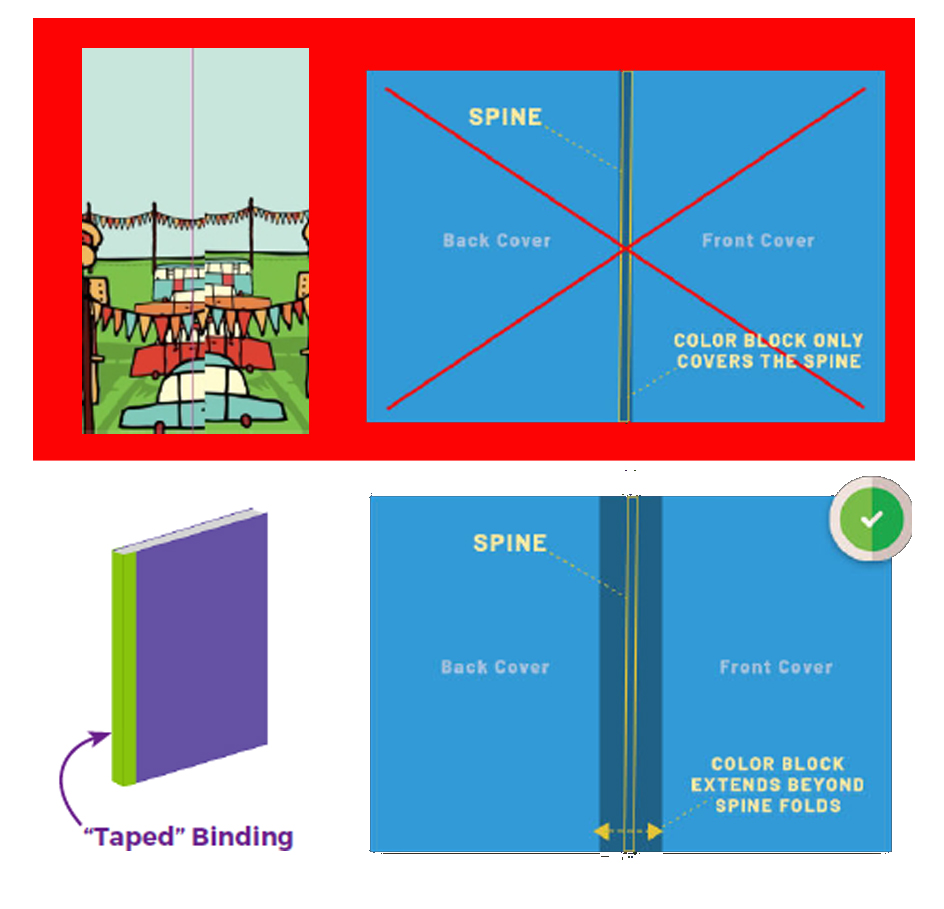
The background texture/color and banners extend to the outer edges of the page (PDF view).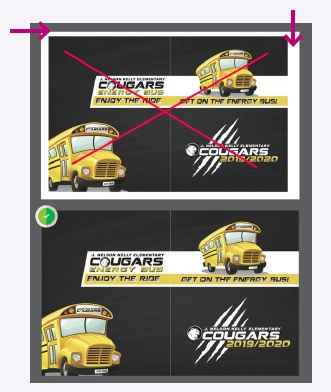

All images (photos, clip art) including the background, are high-resolution, with no visible pixelation or blurriness. Zoom in on the PDF View to review this carefully, checking for “step-ladder” edges or general fuzziness.
• Photos and clip art are cropped properly. Check for clip art and logos that are missing pixels around their edges.
INTERIOR PAGES
Page Edges
The background image/color and banners extends to the outer edges of the page (PDF View).
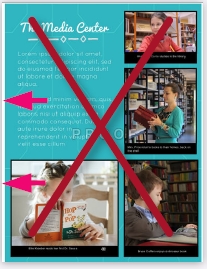
Using the Flipbook View, check that all featured content – faces/heads, clip art and text – are at least ¼” from the edge of all pages and the page gutter. Note that you can have photos extend over the page edges, but make sure to keep the tops of people’s heads and their faces within the 1/4″ margins of your page.
• Keep watch for thin or irregular borders at page edges, as these may trim up poorly (Example 1). Insetting photos and text generously from the page edges and gutter produces professional results! (Example 2)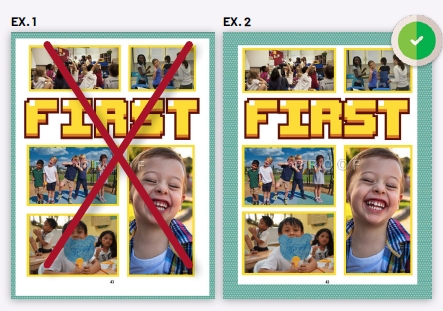
Images & Text
Background and featured images are high-resolution, with no visible pixelation or blurriness.
• All other images, including clip art and preformatted content (collages created in another tool, ads) are high-resolution, with no visible pixelation or blurriness.
• Photos, clip art and text are cropped properly. Check for clipart and logos that are missing pixels on the edge.
• All text – titles, photo captions, paragraph text – has been carefully proofread.
• All text may be easily read: use high contrast text on a clean background using a readable font. If a busy background is chosen, add a plain color shape behind your text.
• Photos and clipart do not cover text, and text is not placed over people’s faces.
All text is updated, so no placeholder text is visible. Check for “Lorem ipsum” or “Click to add text” frames.
All image frames have photos in them.
All clip art, backgrounds and images are copyright and watermark-free.
Page Numbers
Page numbers are all at least ½” from the edge of the page. (Flipbook View)
• Page numbers are consistent throughout the book – in the correct sequence, with no duplicate numbers on top of each other.
• Page numbers do not fall on top of text or faces.
Portrait Pages
Review your portrait pages carefully for the following issues:
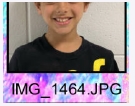
There are no duplicate portrait photos – only one photo per person in each group. Check for retake images (eg. fall and spring versions of the same person) or two copies of the same photo.
There are no duplicate names in the portrait labels. Review the portrait labels on every page to make sure everyone has a unique name.
• Student portraits are displayed in alphabetical order by last name. Portraits flown in yearbook software should display students in alphabetical order by last name.
• Portrait and labels are aligned to the grid. Portraits flown in yearbook software should conform to a perfect grid. If any images are not in the grid, the grid may have been unlocked or portraits dropped onto the page like candid images.
• Portrait pages have a similar styling and are correctly oriented in their frame.
Labels are not clipped and names do not fall under the next row of portraits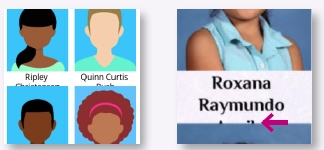
• Labels are easy to read on a plain background in a contrasting color. Dark text on a dark background will be even more difficult to read in a printed book, and labels on a busy texture background are very hard to read.

• Portrait labels do not have any typos, displaying the person’s name and not placeholder text. Check for people named “IMG285.jpg” or “Unknown/ Undefined”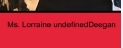
• Portrait page titles (grade, teacher name) matches the portraits on the page. eg. a page titled Mrs. Smith’s 1st Graders actually shows Mr. Carlson’s students.
• If the grid includes a featured staff image, the correct person is featured in that frame. (eg. a teacher at the front of their class, not a student)