Submitting, Proofing & Ordering Your Book to Print
Congratulations on submitting your yearbook! Now that you’ve completed the design phase, it’s time to proof your book. Save yourself from costly reprints by carefully reviewing all aspects of your yearbook design.
Step 1: Book Submission
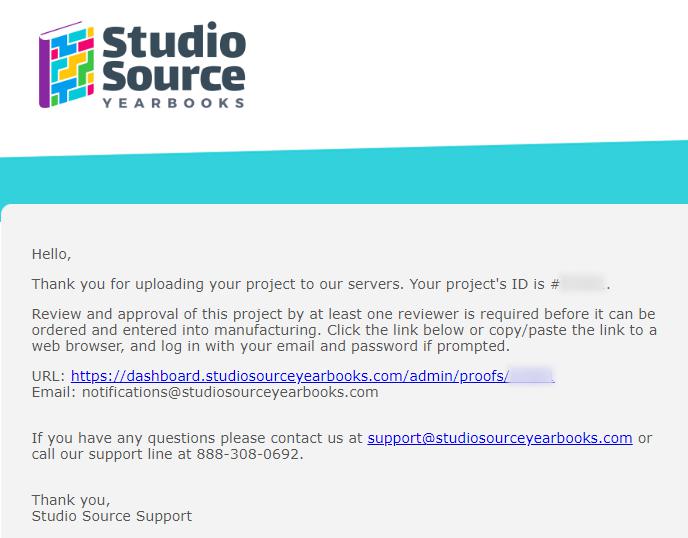
Ensure that your pages are the correct dimensions for your yearbook product, saved as a single page pdf for the cover and a multipage pdf (single pages) for the interior pages. Send these files to your studio for upload to the Dashboard. You will receive an email inviting you to review the proof if the project formatting is correct.
Step 2: Dashboard Review
Once the proof is rendered, advisers with proofing privileges will receive a notification email inviting them to review the proof — usually well within two hours of submission. The proof notification email contains a Direct Link to the Dashboard Proof. A reminder email is sent every day until the proof is either approved or rejected by an adviser or the studio. If you don’t find these emails in your inbox, be sure to check your spam folder!
To begin the Dashboard Review:
- Click the Proof Link
- Login to the Dashboard
- The Dashboard Proof will launch
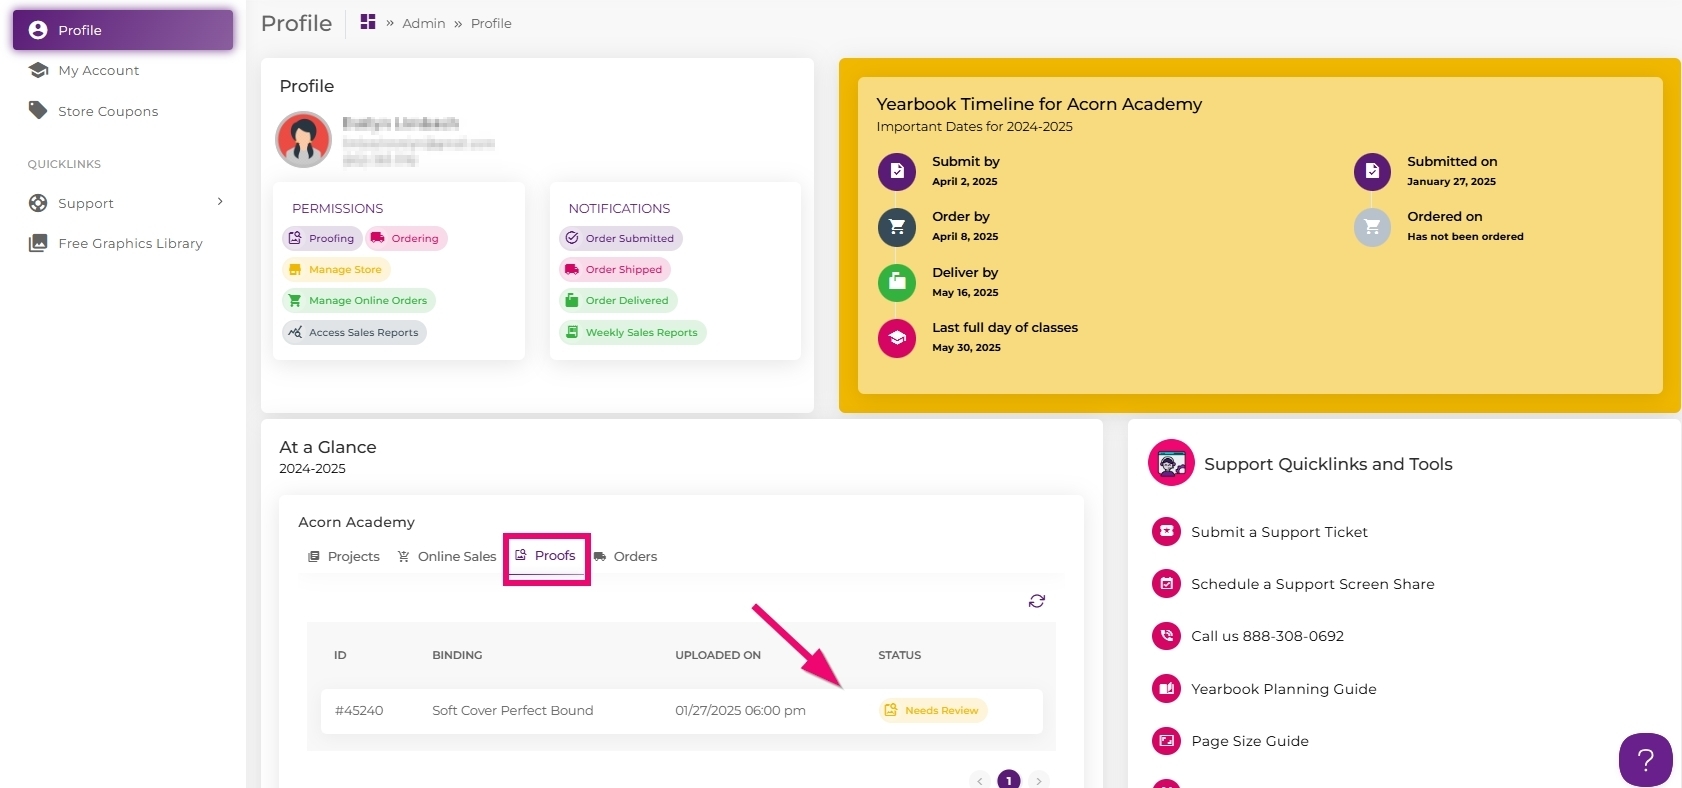
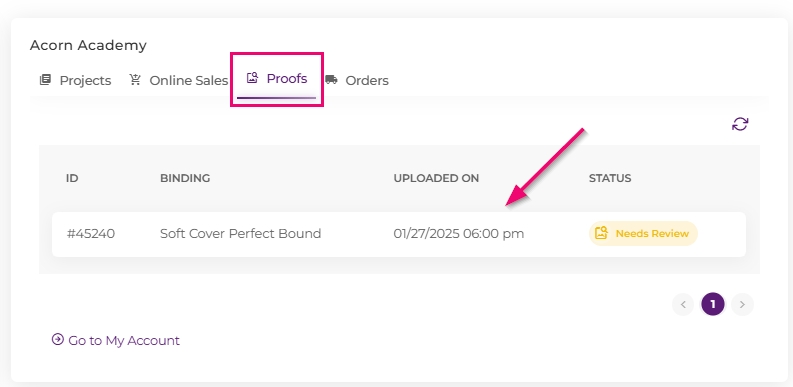
Need to get to your proof without a link? Log into your Studio Source Dashboard, scroll down to your At A Glance view to find the Proof tab. Click on the last submitted proof to access it. Note: if you have a book with two binding types (eg. a hard cover and a soft cover), you will need to access both proofs to review them separately.
Dashboard Proof
When the Dashboard proof launches, you will find a trimmed flipbook at the top of the page followed by a trimmed version of the cover spread at the bottom.
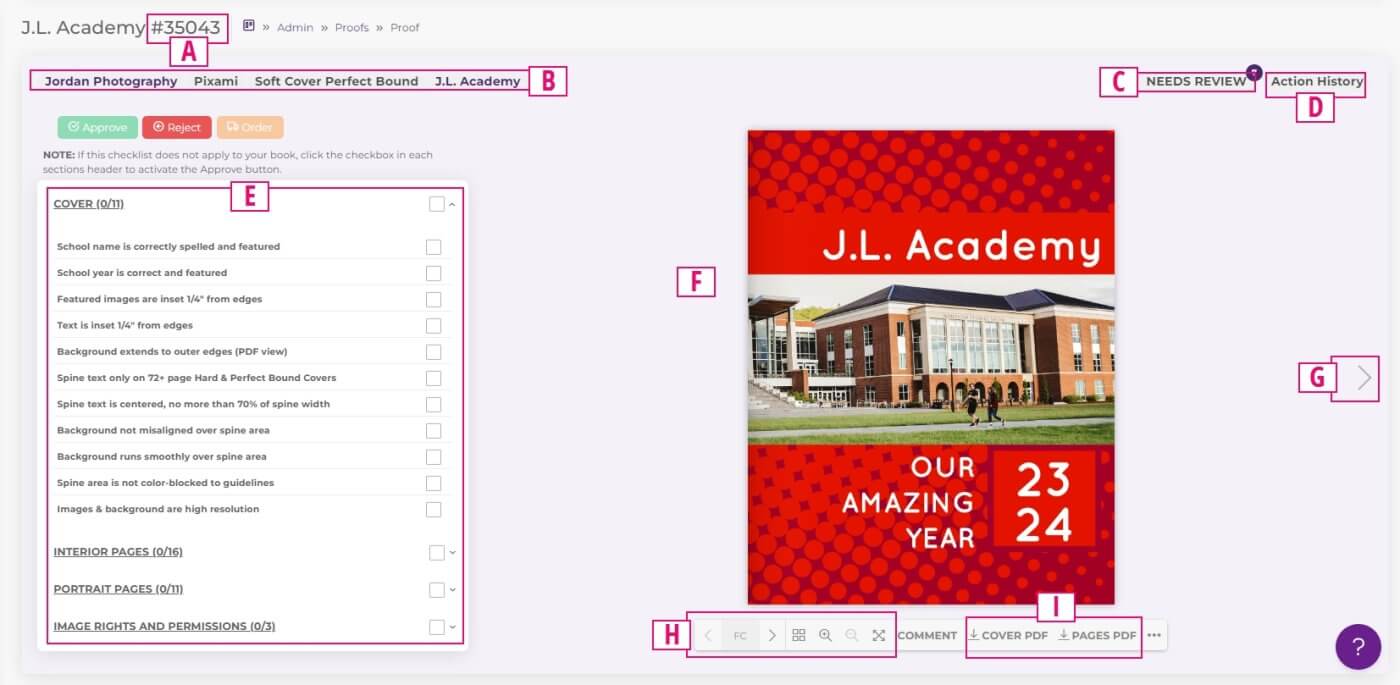
- A. Proof ID- Unique number used to identify each proof
- B. Project Info – Your studio, software, cover type and school name.
- C. Review Status – Shows who can or has reviewed the book
- D. Action History – A timeline of activity on this proof.
- E. Proofing checklist – Review then check off all items on this list. If not applicable to your book, check the item any way. All items must be checked to
- F. Trimmed Flipbook – Preview of book after it is trimmed and bound.
- G. Page Navigation – Click the arrows to move through your book.
- H. Page nagivation/view: Move through your book, zoom in/out and view full screen.
- I. Download PDFs – Click to download untrimmed views of your cover and interior pages. These are ideal for fine-detail review.
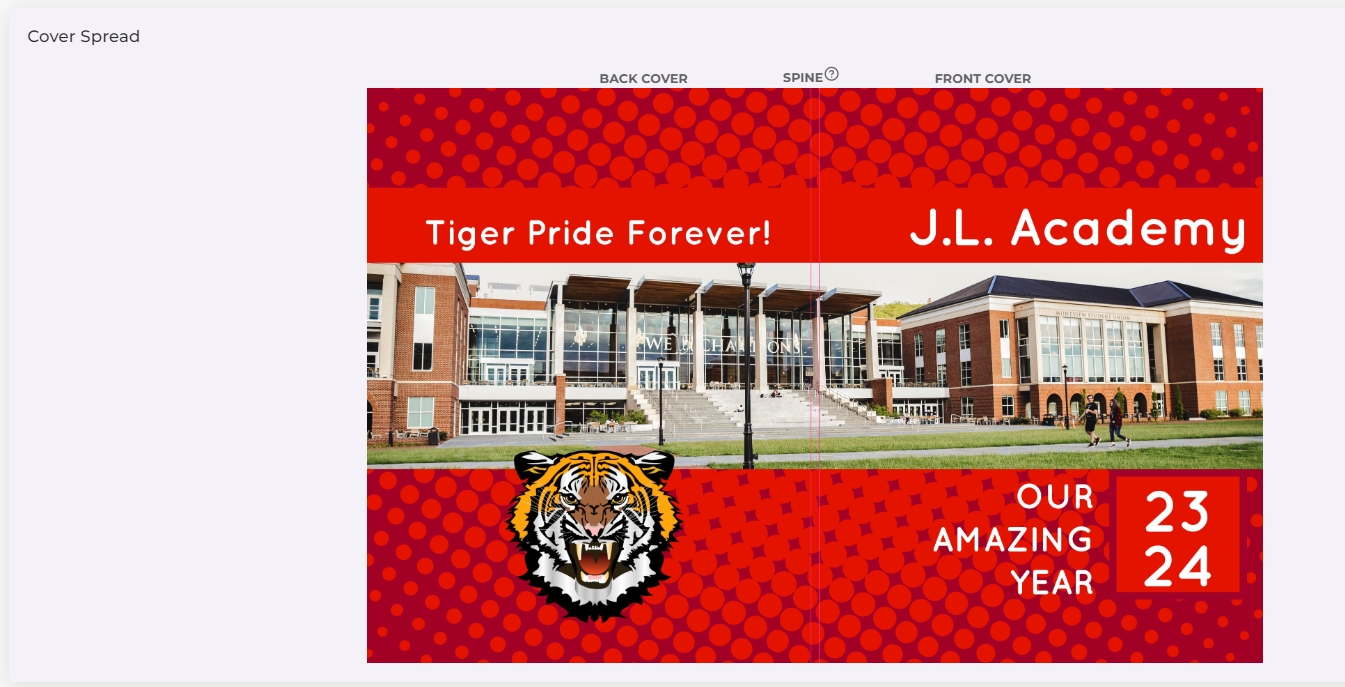
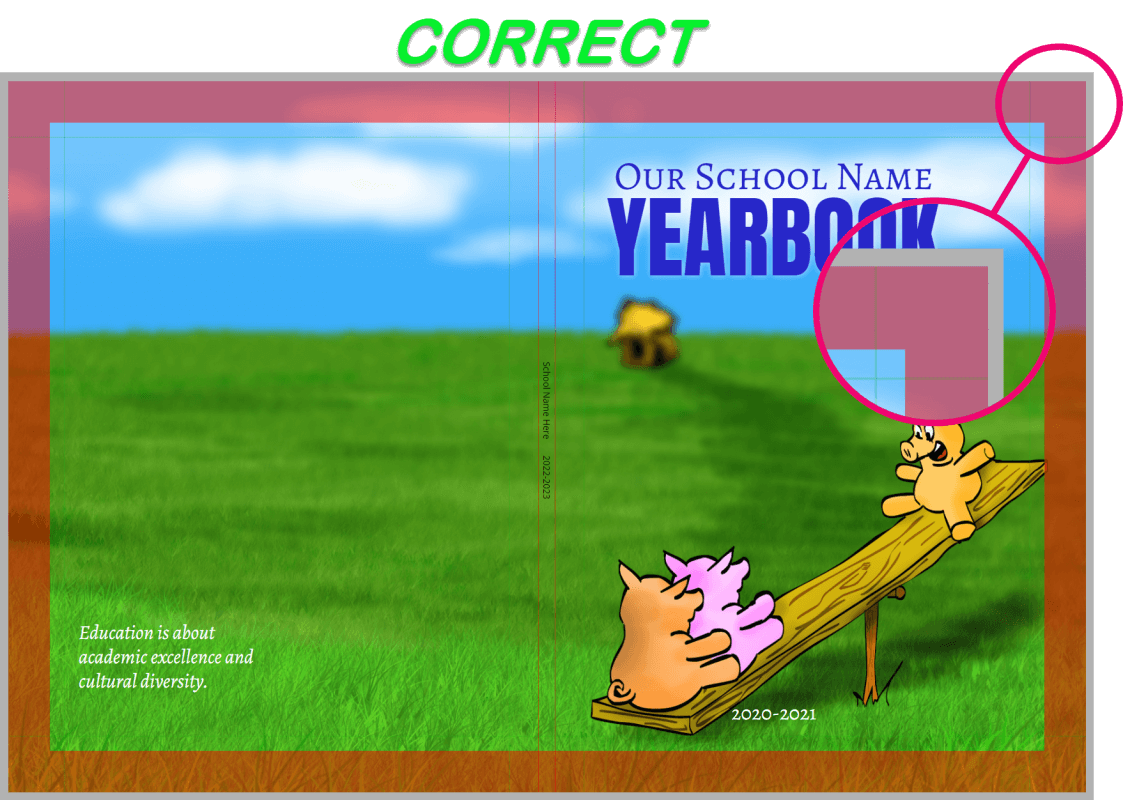
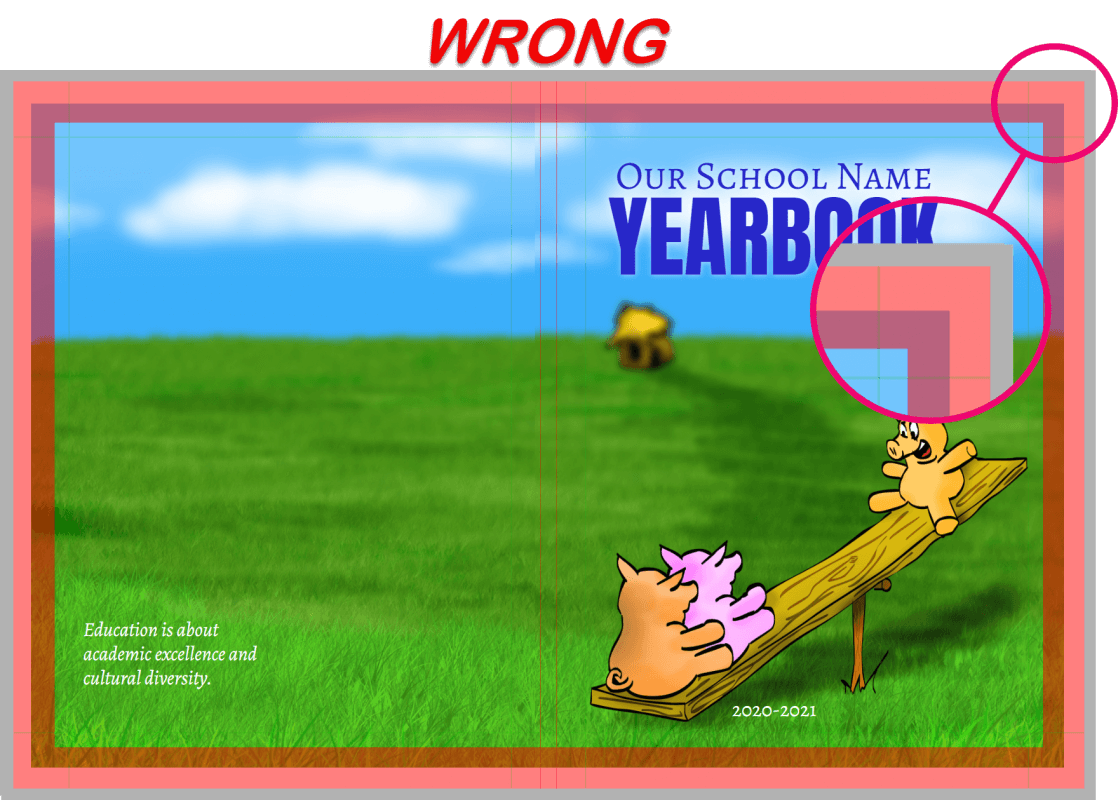
Scroll down the page to see a full spread view of your trimmed cover. Note that the spine guideline(s) appears in the middle of the page to define the back and front cover views.
Proofing with the Trimmed Flipbook
The flipbook is trimmed to provide the best representation of how your final printed and bound book. This view is ideal for finding major design/placement issues.
It is important to note this view is an approximation of how your printed book will appear. Paper may move or stretch slightly (up to 1/8th of an inch) during printing. It is important to review the flipbook to make sure that no important content is too close to the page edges, as it may be trimmed more than shown on any side of the page.
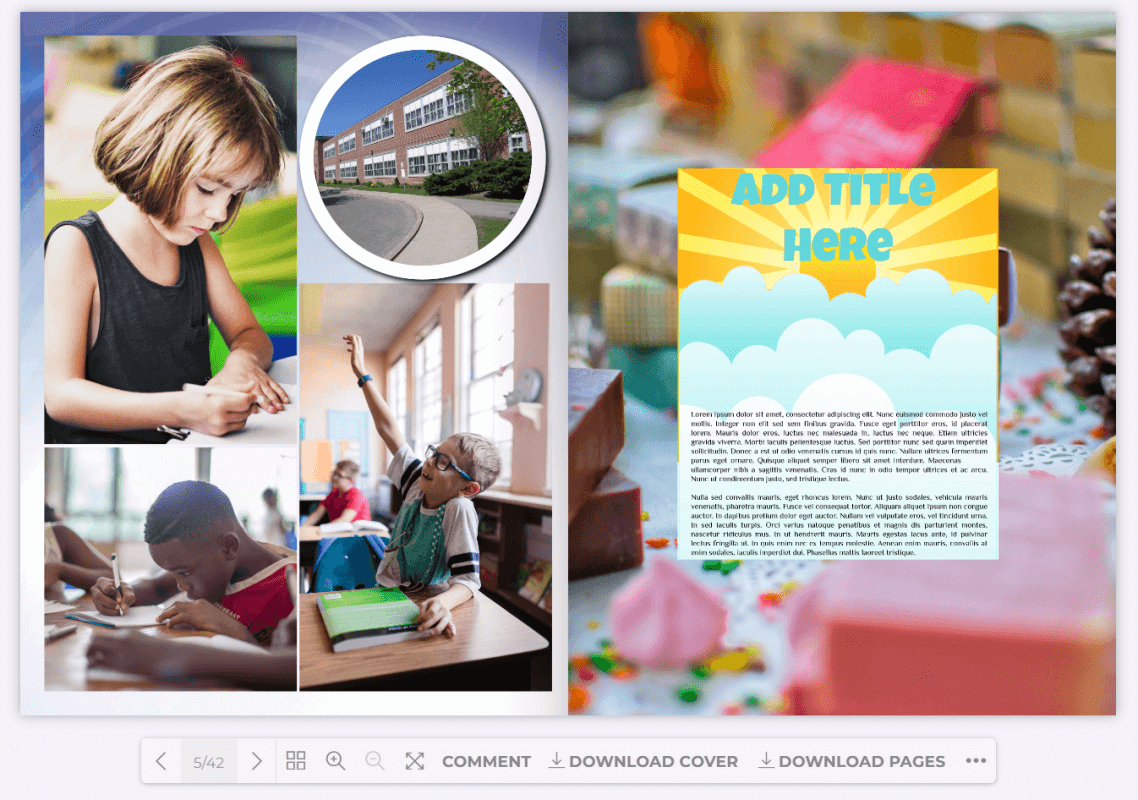
Placement errors to look for in the Flipbook:
- Images and text too close to the trim edge of the page. All important content should be at least a pencil’s width from the page edge
- People’s faces trimmed out of photos on the page edge or inside their image frame
- Check clipart to ensure it is fully visible, unclipped by its frame
Proofing the Trimmed Cover Spread
The cover of your yearbook is the most visible part of the book. Always double check the overall look of the cover.
Errors to look for on the Cover Spread:
- Text and images too close to the spine margin(s)
- If the book’s spine is wide enough to accommodate text, it must be centered within the spine guidelines and no more than 70% of the spine’s width
Proofing with the Downloable PDF Files
Click on the download buttons under your flipbook to access the untrimmed PDF cover and interior page files. This is a critical step in reviewing your proof thoroughly.
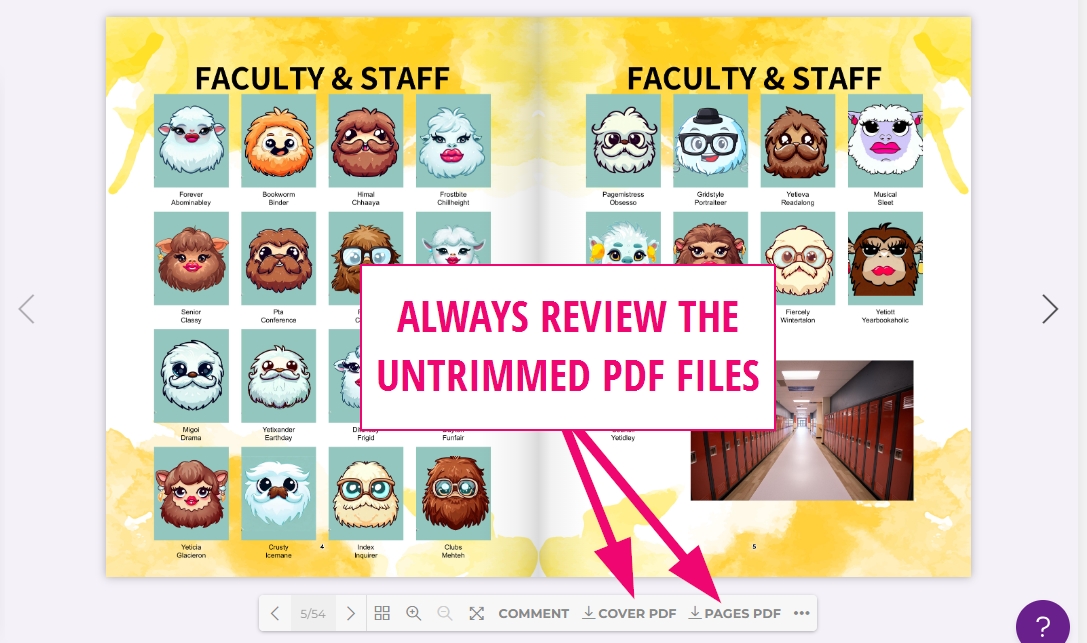
The PDFs show a full untrimmed page. They can be downloaded or printed on your local printer to pass to other proofreaders. The PDFs display your pages in a large, clear format, so this is the best opportunity to check for:
- Typos
- Low res images (make sure you zoom in to check for resolution quality)
- Issues with portrait labels
- Text legibility issues
- Backgrounds/banner elements that do not extend to the outer edge of the pages can result in white borders on the page edge due to printing tolerances
Consult the complete list of items to review on your proof in this article:
https://support.studiosourceyearbooks.com/kb/proofing-checklist-2/
Note that you cannot approve your proof until all checklist items are ticked off.
Step 3: Rejecting, Correcting, & Resubmitting
Should you find things in your Dashboard proof that you want to change, simply reject that proof in the Dashboard. Make corrections, repackage the pdf files, and send these again to your studio for upload to the Dashboard.
Rejecting the Dashboard Proof
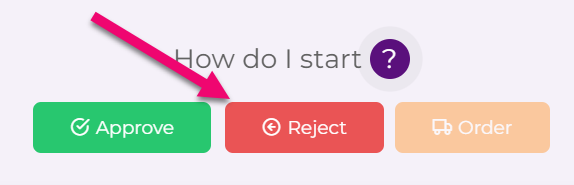
To reject the proof on the Dashboard:
- Open the existing proof in the Studio Source Dashboard
- Click the Reject button above the flipbook
Step 4: Approve the Proof
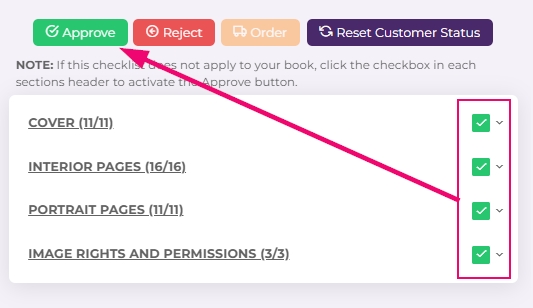
When you have completed the revision process and wish to move your entire book towards printing, click on the Approve button over the flipbook.
Step 5: Studio Source Technical Review
After a yearbook adviser or a studio has approved the Dashboard proof, most yearbooks will be reviewed by the Studio Source Team.
This review will focus on technical issues with the book:
- Trim-edge issues
- Non-full-bleed backgrounds
- Text and image placement problems
- General consistency issues
If problems are found, Studio Source will mark the proof as ‘rejected” and send a detailed email report to your studio or other designated contact person. The person who receives the email may review those notes to determine what changes to make or passed along to the design team. If changes are desired, simply follow the same process in Step 3 above to reject, correct and resubmit a new proof.
Note: Your studio may choose not to use the Studio Source Review process, in which case your book will be available for order as soon as it is marked as “Customer Approved.”
Step 6: Ordering & Production
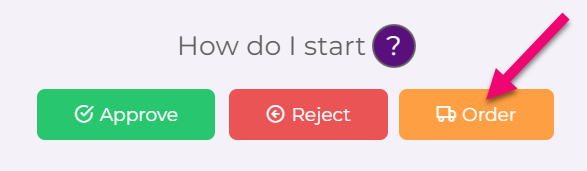
After the yearbook proof has been approved by everyone required by your studio and has passed the Studio Source technical review, the orange order button will become live and the final book order may be placed on the approved proof. For many yearbooks, the studio will place the order, so only they will see the live orange order button.
If you have ordering permissions, you will receive an email notification to let you know that your proof is available to order, linking you back to the approved proof.
If you are placing the order, be very careful to get the order quantities correct. Once your book is sent to the manufacturer, quantities may not be updated.
Books with Personalized Covers
If the order includes any personalized covers (student names and/or photos added to their individual yearbook), additional instructions on how to submit data will be sent after the order is placed.
Once the data is received, the Studio Source team will generate the customized covers to send to the designated school contact for review and approval. The book will then go to print, and ship as per the instructions provided by your studio.