Portrait Import, Management and Page Design
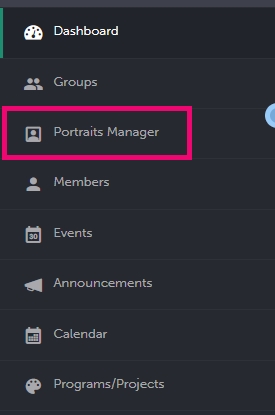
Admin users with access to the Community Console may upload portraits into the Portrait Manager.
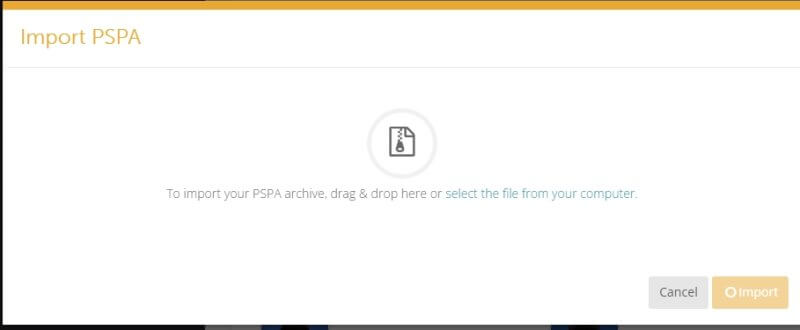
Drag the .zip format portrait package supplied by your photography company in to the window, then click Import to upload. If the package is formatted correctly, it will unpack and your portraits will appear in the Class Portraits window. If you have any problems or errors during the import process, please contact the Studio Source support team.
What is a PSPA Portrait Package?
Most photographers use a portrait package known as the PSPA (Professional School Photographers Association) format, which consists of one or more folders of portrait photos and an Index.txt data file describing who is featured in the images — their names, grade, classroom assignment, etc..
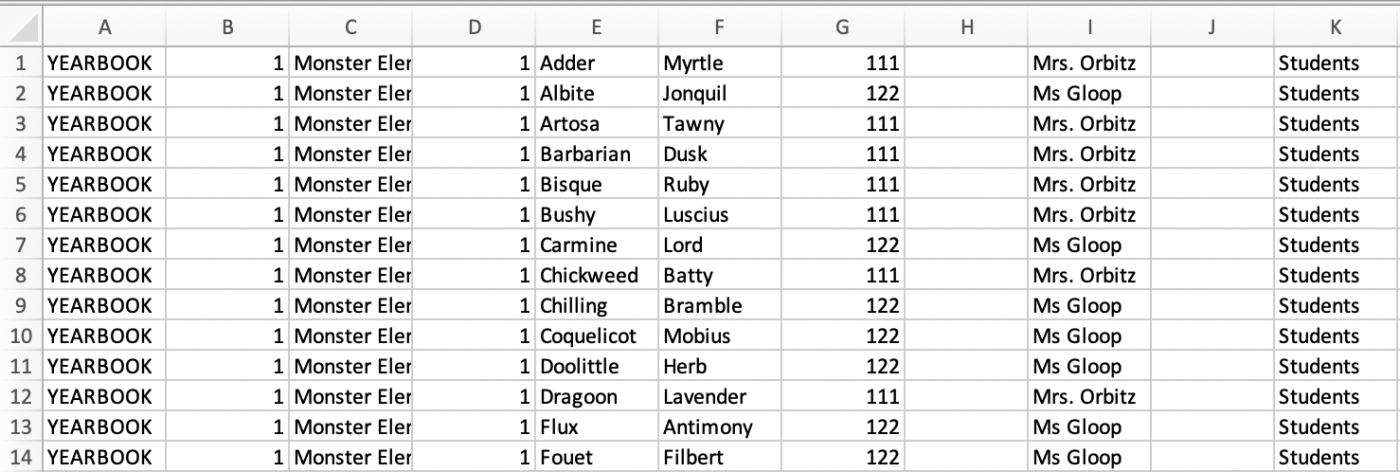
You can preview the index.txt file in a notepad-type application or open in in Excel (choose “all files” as the format to open the .txt file). Each row represents one person/image, and the columns display info in a particular order. The essential information for yearbook-building is listed below:
- A. Volume Name: School name or a default field, like “Yearbook”
- B. Image Folder: The name(s) of the folder(s) containing your images
- C. Image File Name (including file extension): File names given to the portrait photos, usually a .jpg
- D. Grade: Assigned to students and possibly teachers
- E. Last Name: Family name of the person in the portrait
- F. First Name: Given name of the person in the portrait
- G. Homeroom: A number corresponding to the homeroom
and/or - H. Teacher Name: Can be first and last or last name only
The PSPA format recommends images to be sized at 640 wide x 800 tall pixels, which allows for photos to be sized to approximately 2″ x 2.5″ on your pages at good quality. If your portraits are 320×400 pixels (very small) or very large (eg. 2400×3000 pixels or more), we recommend going back to your photography studio to request a new export. Very small images will show resolution warning and quality issues, and very large images may slow cause slowness when managing your portraits or working on your pages.
Portrait Upload FAQs
Unfortunately, these are not easily fixed within any of our software offerings, but it is very easy to fix in your index.txt file prior to importing it.
To fix ALL CAPS in the index.txt file:
- Open the Index.txt file in Excel
- Identify the First and Last name columns (in this case E and F)
- Click on an Empty Cell in row 1
- Use the PROPER() formula to change text to Proper case
- Start typing =Proper
- Select Proper in the Function Menu
- Select E1 & type ) (the formula should appear as =Proper(E1)

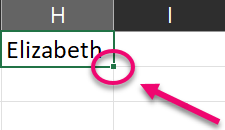
- Click the Handle in the lower right corner of H1 and Drag to the right to select I1, then Drag all the way down to the last record in your database
- Release the mouse, excel will replicate the =PROPER() formula for each of the selected cells
- Click and Drag on the headers for columns H and I to select both entire columns
- Right click and select Copy
- Click and Drag on the headers for columns E and F to select both entire columns
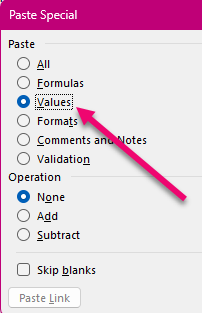
- Right click & select Paste Special
- Click Values ONLY
- Delete columns H & I
- Go to File > Save As… and save your file in .txt format in the same folder as your original index.txt file
Note: Your file must be named index.txt, so you will have to save over the original txt file.
Stoodio will only import a PSPA .index.txt file. If you’ve received a .csv file format, simply rename it to a .txt and it may import without issue. Other formats may require you to import them into Excel or another spreadsheet application, then resave them to a .txt format. Contact Studio Source support for additional information.
If you have a excel database of file data and a folder of images, you can create a faux PSPA Databse pretty easily by following these steps:
- Create a new folder called “Images” in main folder
- Cut/Paste all portraits into new Images folder
- Insert 2 columns as first two columns, add “vol1” and “Images” as field data for all records in these two columns
- Cut/Paste Image Name column to make it column 3
- Cut/Paste Grade column to make it column 4
- Cut/Paste Last names into column 5
- Cut/Paste First names into column 6
- Cut/Paste Homeroom into column 7 (if there is one – otherwise skip this).
- Cut/Paste Period into column 8 (if there is one – otherwise skip this)
- Cut/Paste Teacher into column 9 (if there is one – otherwise skip this).
- Cut/Paste Track into column 10 (if there is one – otherwise skip this).
- Delete all remaining columns after Track…should have 10 columns total
- Review each column and check for missing data. It is generally easier to make changes to your data at this point than to do so later in the software. If you do not have information for those individuals, just add NA.
- Delete Header Row
- Save .txt file with name “index”
Occasionally a photographer will provide a portrait database package that is not PSPA format, but it will contain all the information needed to create portrait pages. The other information is simply not required.
To fix this issue:
- Open the data file in a spreadsheet software
- Delete the extra columns, keeping only the essential info (file name, first & last name, grade, homeroom, teacher, salutation, job title)
- Resave the datafile as a TXT format, using Save As… under a new file name to avoid overwriting the original file (eg. INDEXrevised.txt)
- Import this new index file into Pixami
If there are problems with importing the portrait images to accompany your database, check the Index file in a spreadsheet software or notepad application.
- Compare the actual file names of the portraits listed in the index file versus the actual portrait names
- The File Names in the data table MUST exactly match the actual names of the portrait files
- Check the index file for missing zeros starting the file name, typos or extra spaces, and ensure that the file name includes the JPG extension
Note: You may be able to manually correct the file names, but if you are not able to, ask your photographer for a new PSPA format table, explaining in detail what is wrong with the package you received.
If there are just a few missing photos, check to make sure the images were actually included in the portrait package. Ask your photographer for these missing images – they may be added to the portrait manager record directly without need to import all photos again.
Tip: If you feel that you still need help with these resolutions, please reach out to Studio Source Yearbooks Support for further assistance.
Managing & Flowing Portraits
After you’ve uploaded your portraits from the PSPA, you may want to further organize or modify the images and info associated to them. After your portrait set is in good shape, you are ready to flow the portraits onto your yearbook pages in the Print edition of your yearbook. Below please find a webinar to guide you though these steps.
Tip: When you make changes to your portraits in the manager, the layout of existing portrait pages will not update automatically. It is important to review the portrait pages in the page editor to make sure everything looks the way you want. Reflow if any of the following has been done:
- Changing or correcting the first or last name associated with a portrait
- Adding a portrait or portraits to a class folder
- Removing a portrait or portraits from a class folder
- Moving a portrait or portraits from one class to another


